
Repeating a Program Section (Loop)
This How-To describes Loops and how to use them
Examples are valid for:
CB3 Software Version: 3.4.1.59
Note that older or newer software versions may behave differently.
Understanding loops
A loop is a sequence of commands that are repeated until something occurs to stop the loop (such as the program being stopped). For instance, the default mode for a program with Universal Robots is that a program loops forever (this can be changed by selecting “Robot Program” and deselecting the “Program Loops Forever”, seen in Figure 1).
Using the program in Figure 1 if the checkbox is deselected, as seen, the program will stop after Waypoint 5, if the checkbox is selected then the program will continue to run until stopped by some external force (such as an operator tapping the Stop Button).
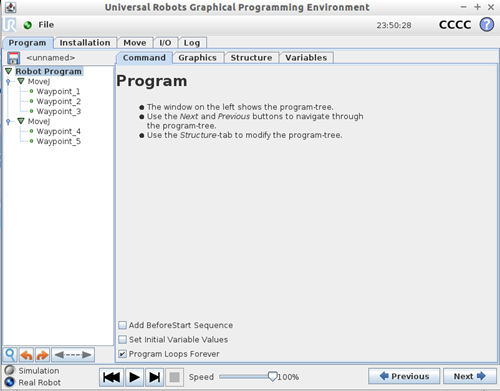
Figure 1 - Program and Program Loops Forever Selection
The Loop command has 3 types of logic that can be used to determine how it will act (seen in Figure 2).
The 3 options are: 1) Loop always, 2) Loop X times, and 3) Loop as long as the following expression is true.
Using “Loop always” any commands underneath the loop command will be repeated continuously, such as the “Program Loops Forever” which continually repeats everything under the “Robot Program”.
The next, “Loop X times”, will repeat any commands in the loop command the number of times that’s entered; an example would be placing a 3 into the number of times will result in the loop repeating 3 times and then exiting to go onto the next commands in the program.
Finally, the “Loop as long as the following expression is true”, can utilize some type of expression as the trigger to end the loop cycle. For example, if the expression was “digital_in[0]=True” then the program would continually loop as long as it is true, when/if the signal turns false then the loop would be exited.
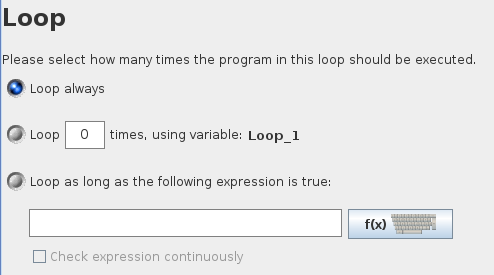
Figure 2 - Loop Command Logic
Using Loops in a program
To use a loop in a program you can either start with one (if you know for a section of your program you want it to loop) or you can modify existing code by adding a loop and moving the commands into (under) the loop.
Below, in Figure 3, you can see an existing program:
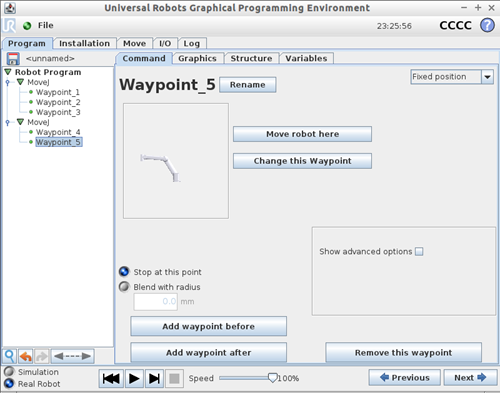
Figure 3 - Screenshot of Existing Program
Next, choose the spot where the loop is going to go (Figure 4) and select the logic that’s going to be used (as discussed above). Then move the commands that you want into the loop structure, as seen in Figure 5.
![]()
Figure 4 - Program with Empty Loop Command
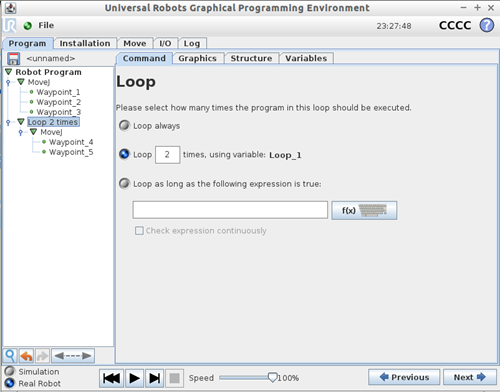
Figure 5 - Program with Chosen Commands in Loop Structure
With the above loop command in place Waypoints 4 and 5 will repeat 2 times before the loop command ends and the program loops back up to the start of the program.