Ethernet IP guide
This is an Ethernet IP guide to help you when using this with Universal Robots
NOTE: All files are avalable for download at the bottom of this page.
Examples are valid for:
CB3 Software version: 3.2.18654
e-Series Software version: All versions
Note that newer software versions may behave differently.
These examples can be used on CB3/CB3.1 from software 3.2 and e-Series.
Specifications
Here is an overview of some important information to get started.
PLC (used in example)
- Allen-Bradley Compact Logix L16ER
- Studio 5000 Logix Designer
Note: - UR only supports Ethernet/IP Class 1 implicit or "I/O" messaging, not Ethernet/IP Class 3 explicit or "client/server" messaging.
- Remember to change/select the correct CPU
- Studio 5000 Logix Designer
Robot
- UR3, UR5, & UR 10 running Polyscope v. 3.2
Sample Programs:
The files listed are available for download at the bottom of this page and are used in the example (ACD project files are compatible with Logix Designer v.24):
- UR.ACD
- ur-eip-demo.urp
Conveyor Tracking example:
- EIP_conveyor_example.ACD
- UR-EIP-conveyor-tracking.urp
EDS file:
- UniversalRobot.eds
User-defined Data Types:
- UR_DataTypes.L5X
Note: The L5X file contains user-defined data types and can be used to import the message format into Rockwell Studio 5000 Logix Designer
I/O Message Format:
- eip-iomessage.pdf
Note: When using output registers, it is important to set the mask accordingly.
Script
Script Functions for synchronizing a program with a PLC:
- read_input_boolean_register(address)
- read_input_float_register(address)
- read_input_integer_register(address)
- read_output_boolean_register(address)
- read_output_float_register(address)
- read_output_integer_register(address)
- write_output_boolean_register(address, value)
- write_output_float_register(address, value)
- write_output_integer_register(address, value)
Notes
The lower range (bool[0:64], int[0:23], float[0:23]) of the gp input and output registers is reserved for FieldBus/PLC interface usage. The upper range (bool[64:127], int[23:47], float[23:47]) can be used by external RTDE clients (i.e URCAPS).
Trouble Shooting
- It is important to consider and set an RPI value that corresponds with the requirements of the installation. The valid range of RPI is 2ms - 3200ms where a smaller value means more frequent data synchronization but also requires more resources from the PLC, Robot and Network.
- If you experience connection issues between a scanner and the robot make sure that you have configured the scanner for unicast connection (point-to-point) and that you have sufficient network bandwidth between the scanner, the Robot and other devices to avoid colliding packets etc.
Setup
This guide gives step-by-step instruction on how to start using Ethernet/IP with Universal Robots or watch the video
Video: How to connect your UR robot to an Allen Bradley PLC
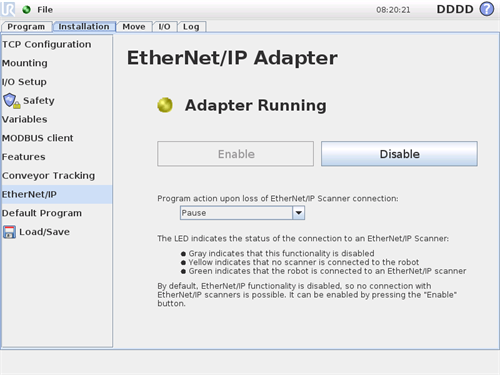
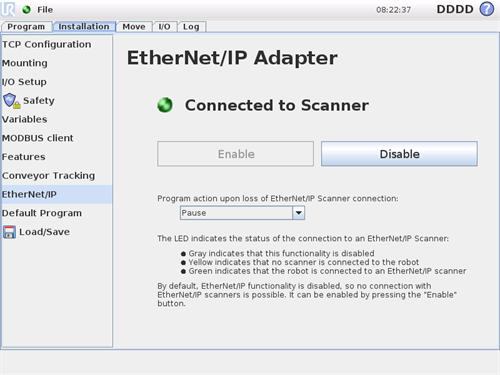
1. ROBOT: Enable Ethernet/IP in the Installation tab. Remember to save the installation afterwards for the changes to take effect the next time the installation is loaded.
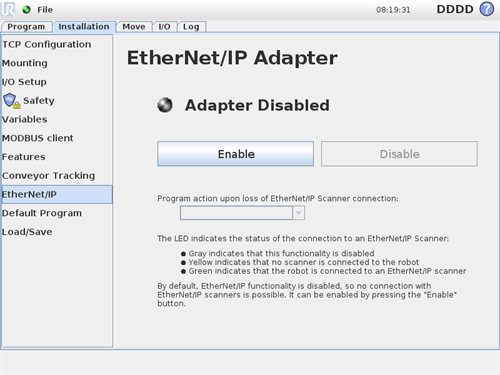
2. ROBOT: The yellow LED indicates Ethernet/IP is running on the robot but no PLC/scanner is connected to the robot
3. PLC: Open UR.ACD project in Studio 5000 Logix Designer. If your version of Logix Designer is incompatible with the project file (i.e. older than v.24), you can create a new project and import the user-defined data types from the UR_DataTypes.L5X file.
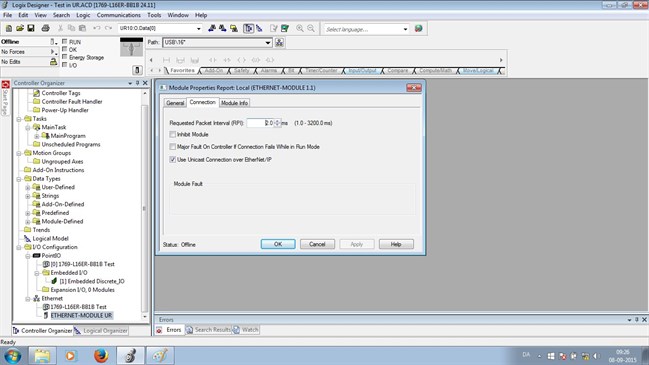
4. PLC: Navigate to I/O Configuration -> Ethernet -> Ethernet-Module UR
5. PLC: Set IP Address of Robot and Press "Apply"
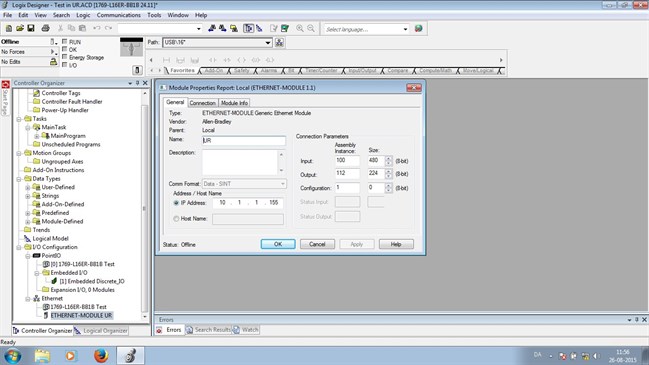
6. PLC: Navigate to "Connection" Tab and ensure that the RPI matches your requirements and that the check box next to "Use Unicast Connection over Ethernet/IP" is checked.
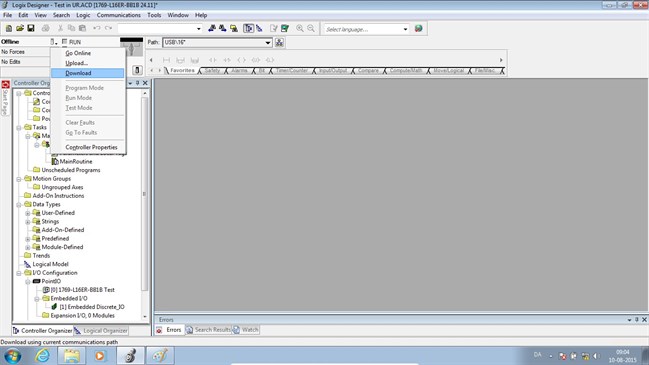
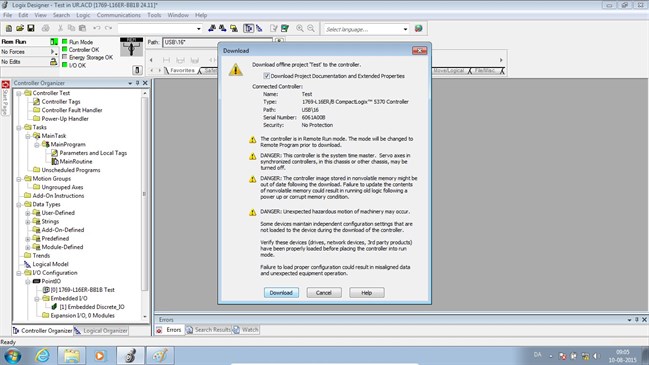
7. PLC: Download the program to the PLC
8. PLC: Confirm that "I/O OK" is solid green
9. ROBOT: Confirm that LED in Installation tab is also green
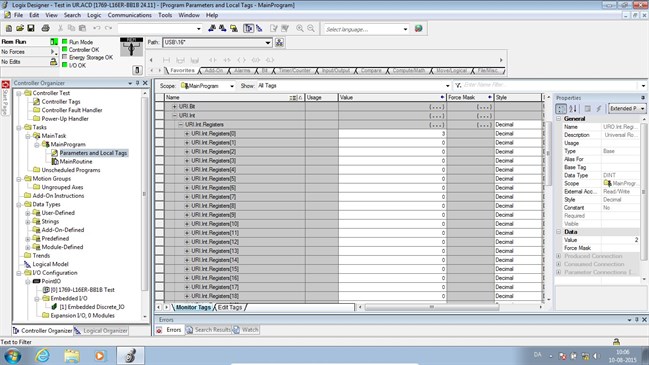
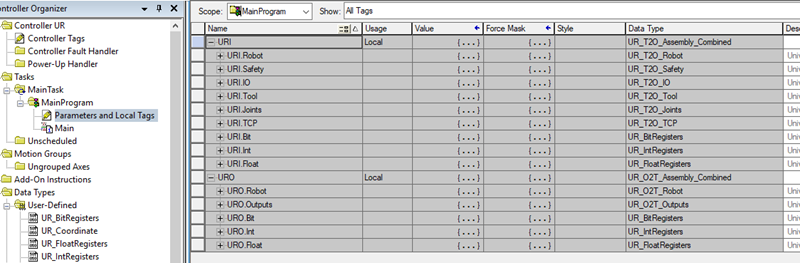
10. PLC: Navigate to Tasks -> Main Task -> Main Program -> Parameters and Local Tags
10.1. IF You did not use the demo, but will implement communication to your own code, you need to enable communication between the robot and the AB PLC. First set up URI and URO in your local or global variables, using the provided User Define Data Types:
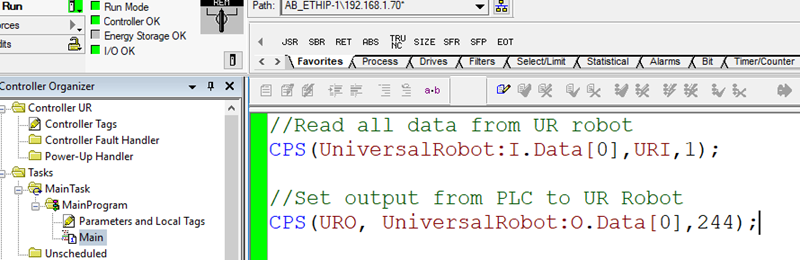
10.2. Then setup CPS between the robot and the PLC
Ladder:

ST:
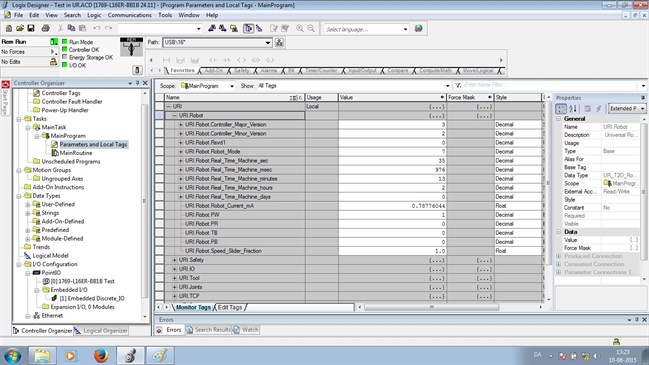
11. PLC: Navigate to URI -> URI.Robot inspect values sent from the robot
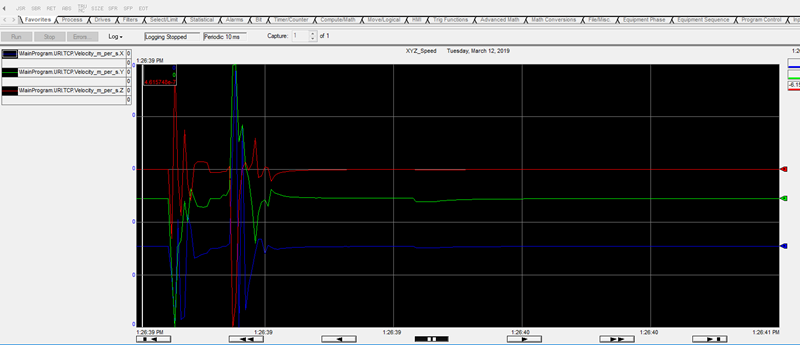
11.1. Example to test - Trend Velocity of XYZ
Demo
This demo is provided to show a basic example of how to communicate between the PLC and Robot. The demo allows the user to set two numbers in PLC output registers. The robot retrieves the numbers, calculate their sum and stores the result in a PLC input register.
1. ROBOT: Open ur-eip-demo.urp
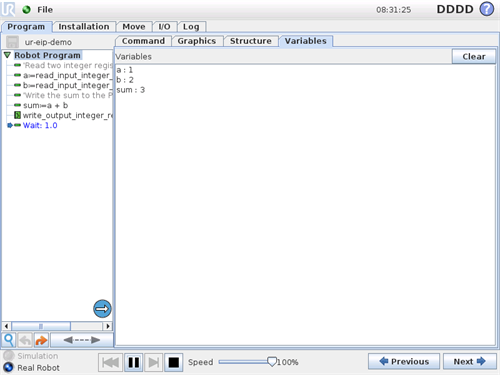
2. ROBOT: Run program
3. ROBOT: Navigate to variables tab
4. PLC: Set integer registers URO.Int.Registers[0] and URO.Int.Registers[1] to some values
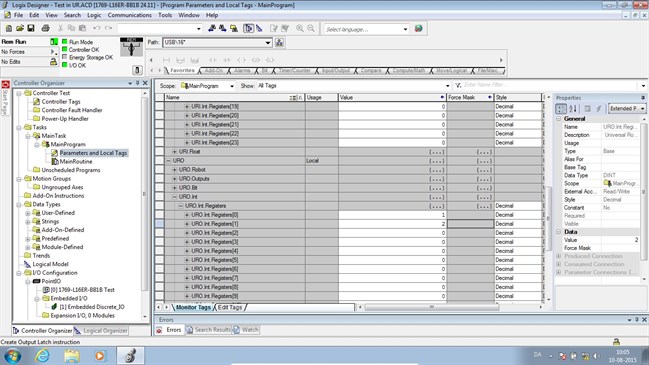
5. ROBOT: Go to the Variables tab and confirm that the numbers are received
6. PLC: Validate that the URI.Int.Registers[0] contains the sum