Direction

Description

The Direction command moves the robot in a linear motion along a single axis of a selected frame until a stop condition stops it. Use this command when you need continuous motion in one direction and do not need an exact target point. When you run the node, the robot moves from its current position along the axis you define and stops when any one of your stop conditions is met. You can define multiple stop conditions to control adaptive motion.


To access Direction command

  1. Go to the main program screen. For basic command nodes, see Command Nodes.

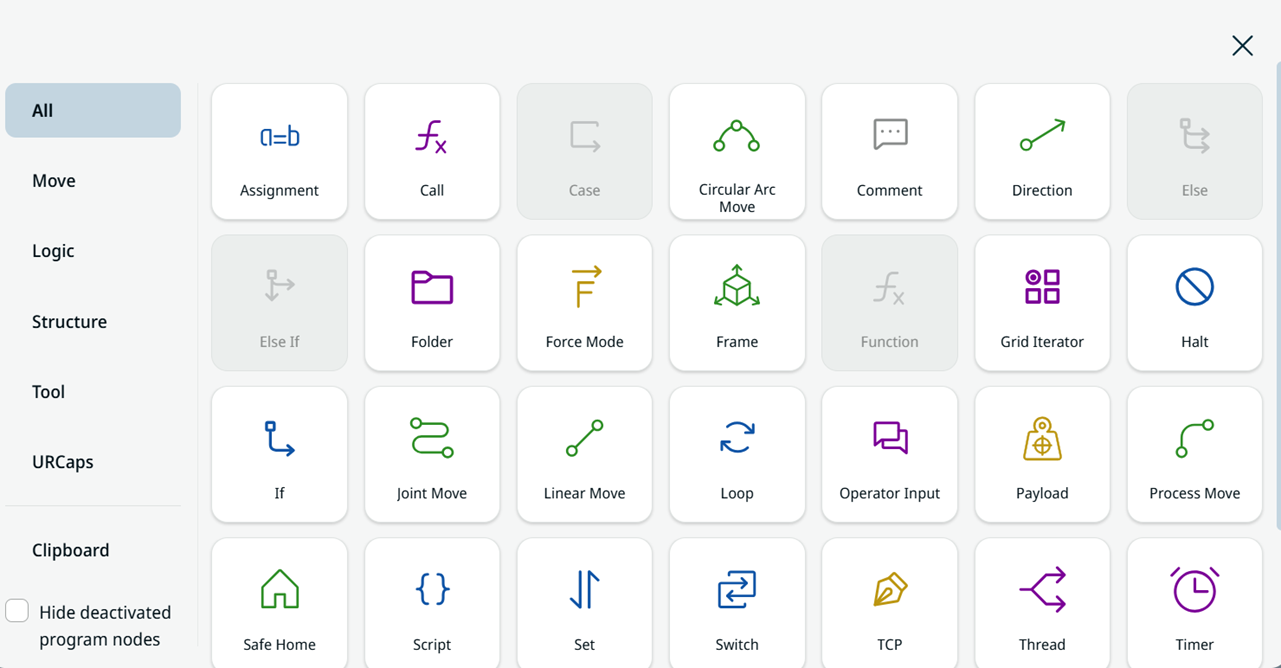
  2. Tap the Direction icon in the Commands toolbox.

    Direction icon in the Commands toolbox


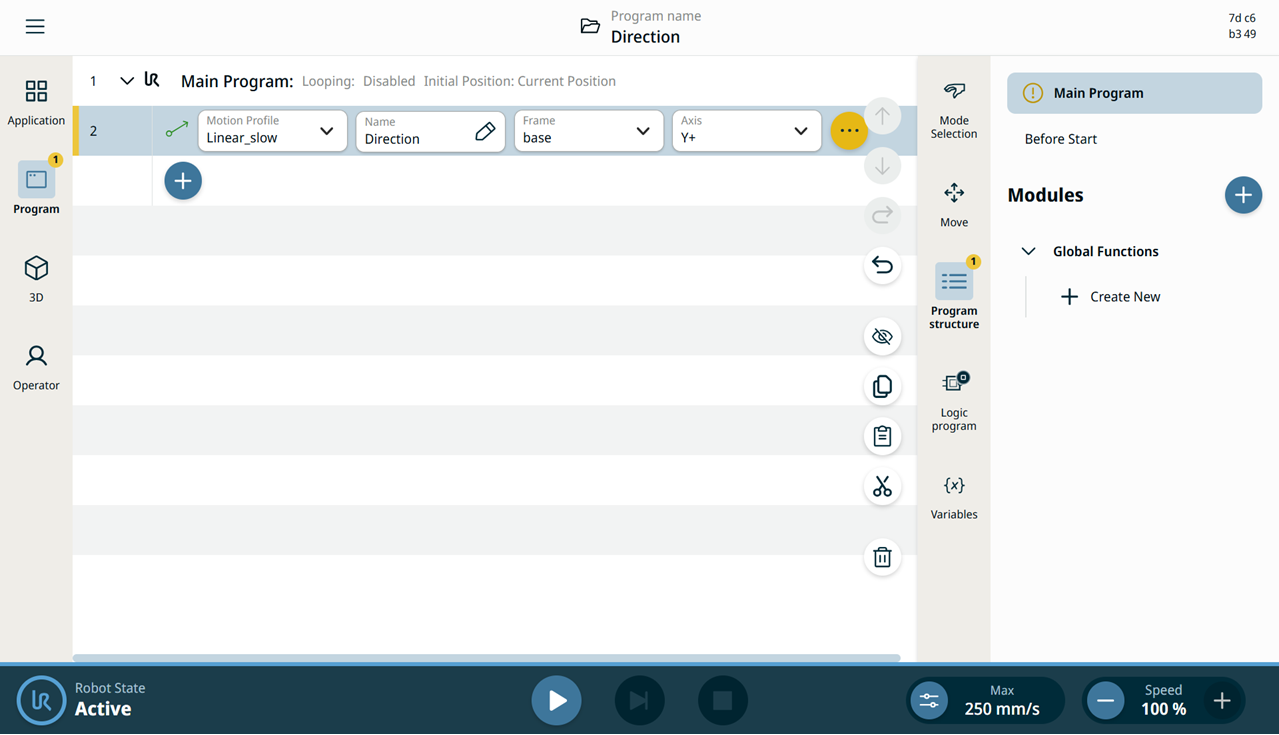
  1. A node with four editable fields and a kebab icon is inserted into the program tree. The four fields are:

    • Motion Profile. See Motion Profiles.
    • Name. A reference name for the node, which you enter on the Value tab.

    • Frame. The reference coordinate system.

    • Axis. The direction of motion.

    Direction node with Motion Profile, Name, Frame, Axis, and the kebab icon

  2. Tap the Name field, enter the name, and tap Confirm.

 
  1. Tap the Frame field. Four choices appear:

    • world

    • base

    • flange

    • tcp

  2. Select your preferred frame choice.

  3. Tap the Axis field. The six axes appear.

  4. Tap your chosen axis.


Motion Profile labels on Move Nodes

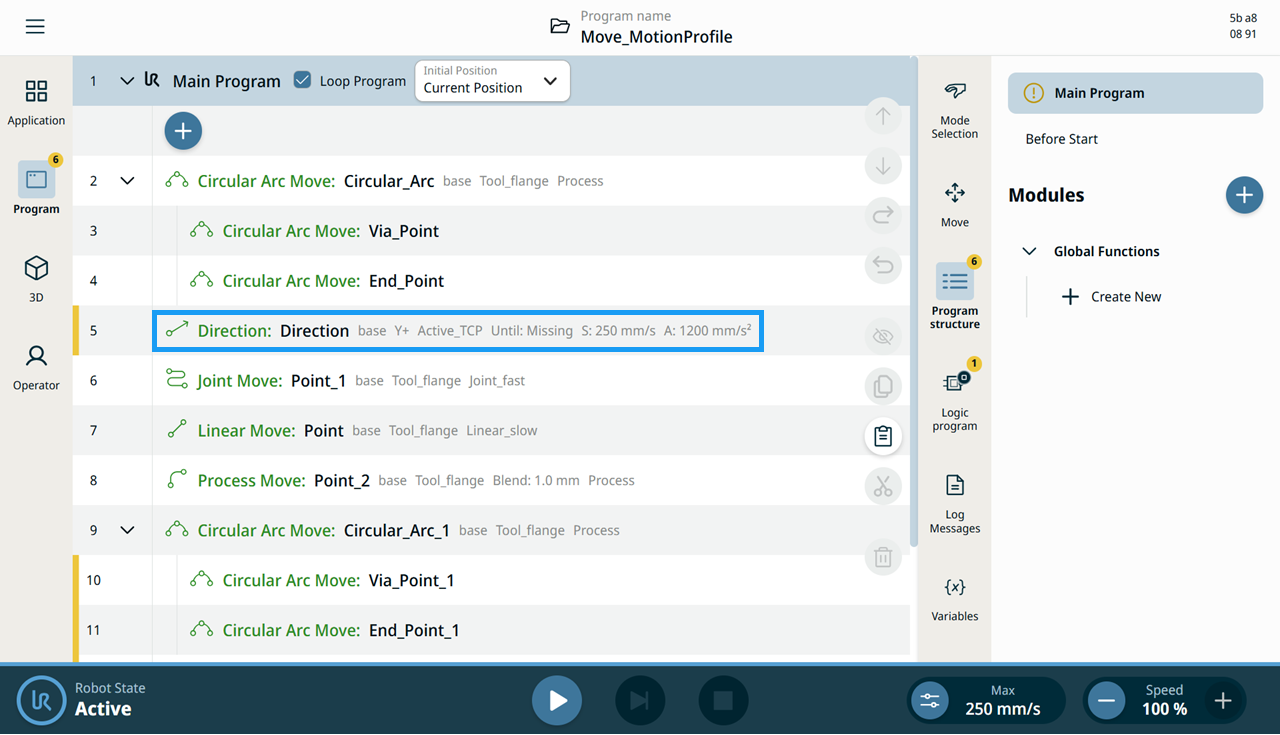
All Move-related command nodes in the program tree display the Motion Profile associated with each node. This feature enables users to see the selected Motion Profile on a Move node. This feature is implemented on the following command nodes:

Move nodes with Custom motion profile will display the values for the speed and acceleration instead of Motion profile.


Direction node in the program tree showing Motion Profile values


To use the More options

Tap the kebab icon.

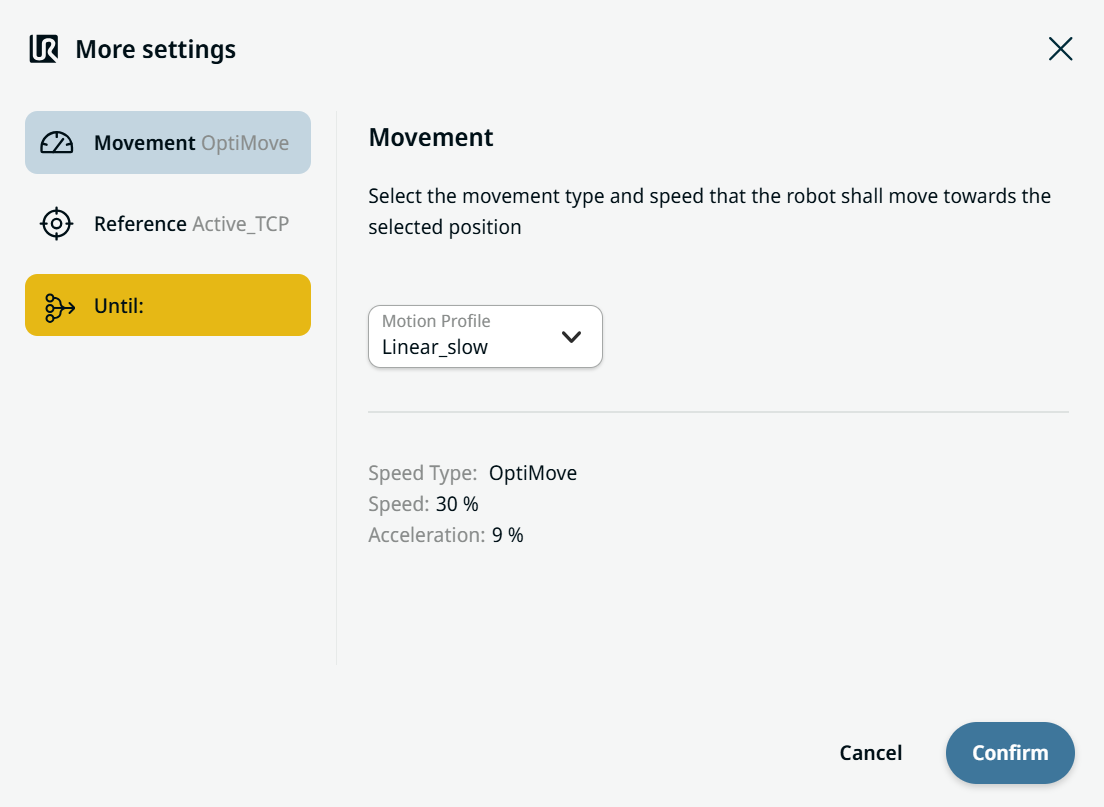
A new screen appears containing three advanced settings:

  • Movement

  • Reference

  • Until

More settings screen with Movement, Reference, and Until


To use Movement setting
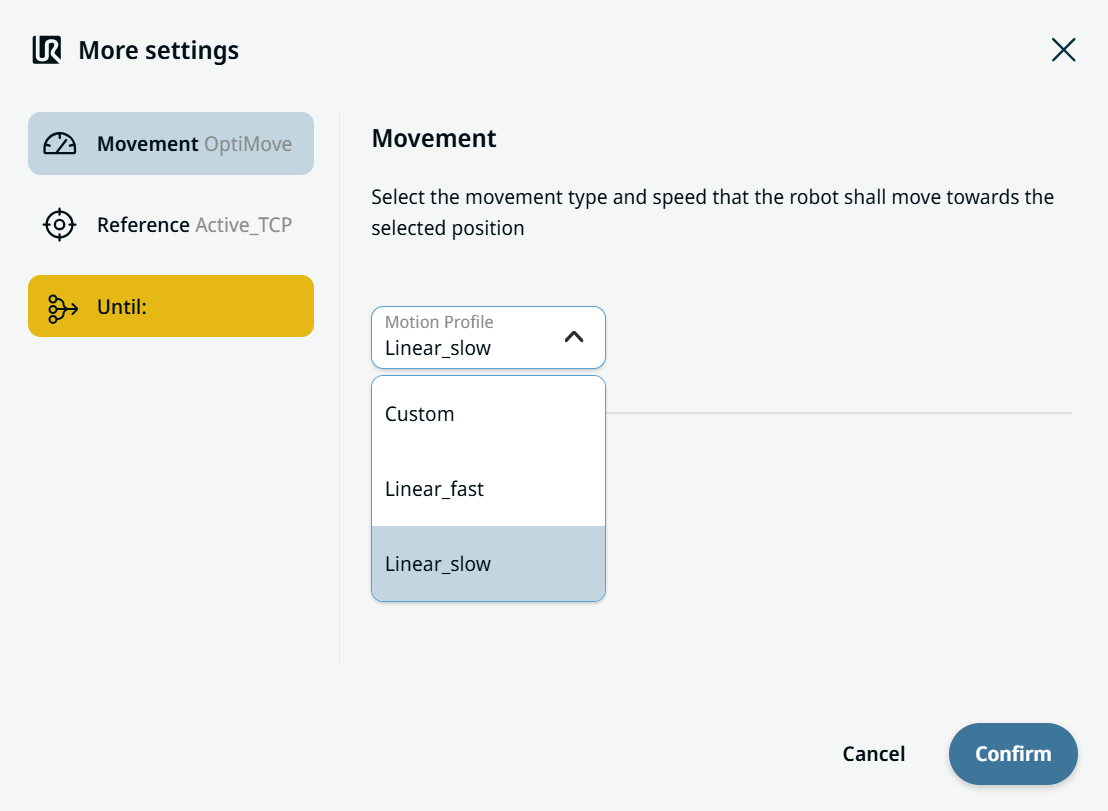
  1. On the left side, tap Movement. OptiMove is the default setting.

     
    Movement Motion Profile list
  2. Tap the Motion Profile field and select Custom, Linear_fast, or Linear_slow.

  3. When you select Linear_fast or Linear_slow, Speed Type is automatically set to OptiMove.

  4. When you select Custom, three more fields are inserted:

    • Speed Type

    • Speed

    • Acceleration

  5. Tap the Speed Type field and select OptiMove or Classic.

  6. Tap the Speed tab, enter the data, then tap Confirm. For value, variable, and expression entry, see Value-Variable-Expression Tabs.

  7. Tap the Acceleration tab, enter the data, then tap Confirm. For value, variable, and expression entry, see Value-Variable-Expression Tabs.


To use Reference setting

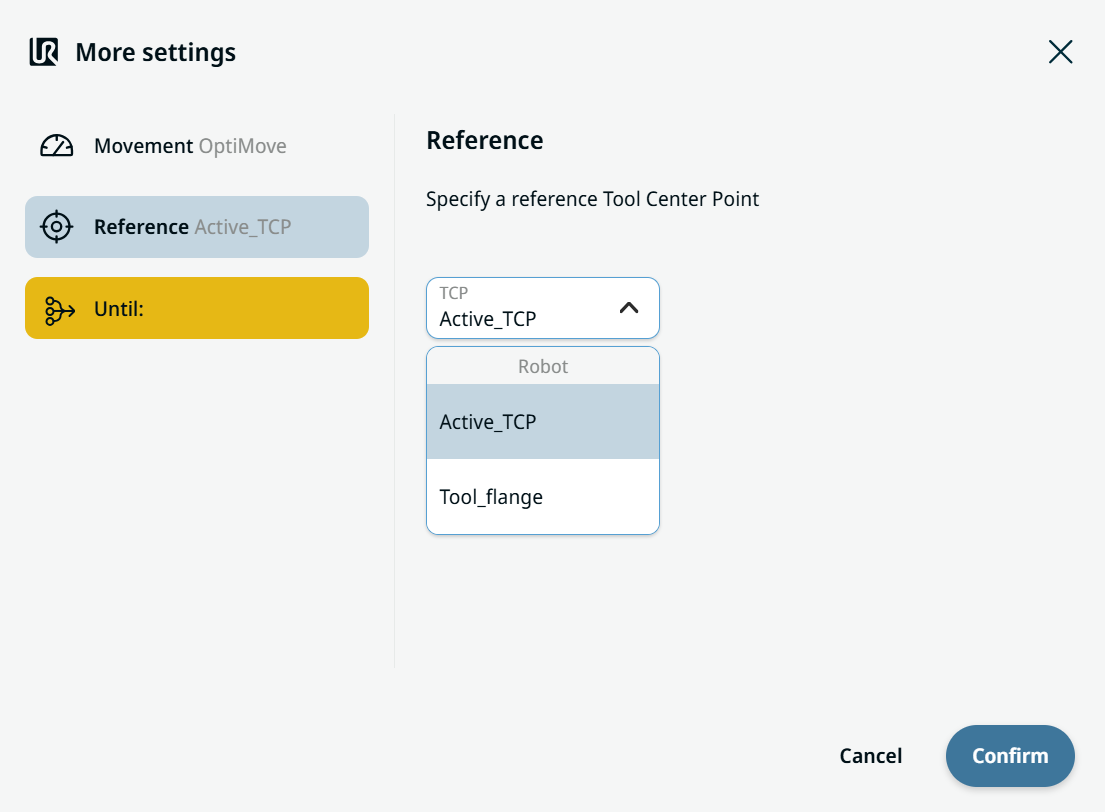
Use this setting to specify a reference Tool Center Point.

Reference TCP list


  1. In the TCP field, select Active_TCP or Tool_flange.

  2. Tap Confirm.


To use Until setting

The Until setting defines the stop conditions.

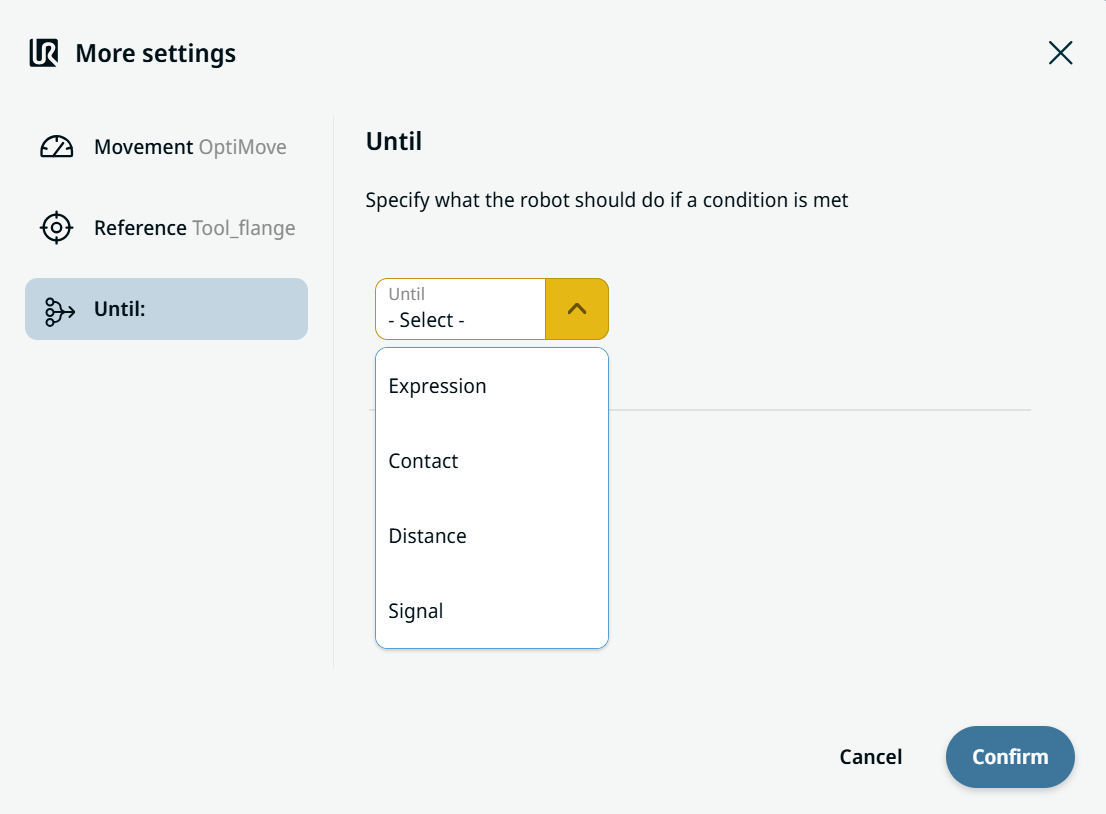
  1. On the left side, tap Until. An Until field appears, giving you four conditions to add:

    • Expression

    • Contact

    • Distance

    • Signal

      Until conditions list


To access Expression

Expression stops the motion when a logical or Boolean expression is met.

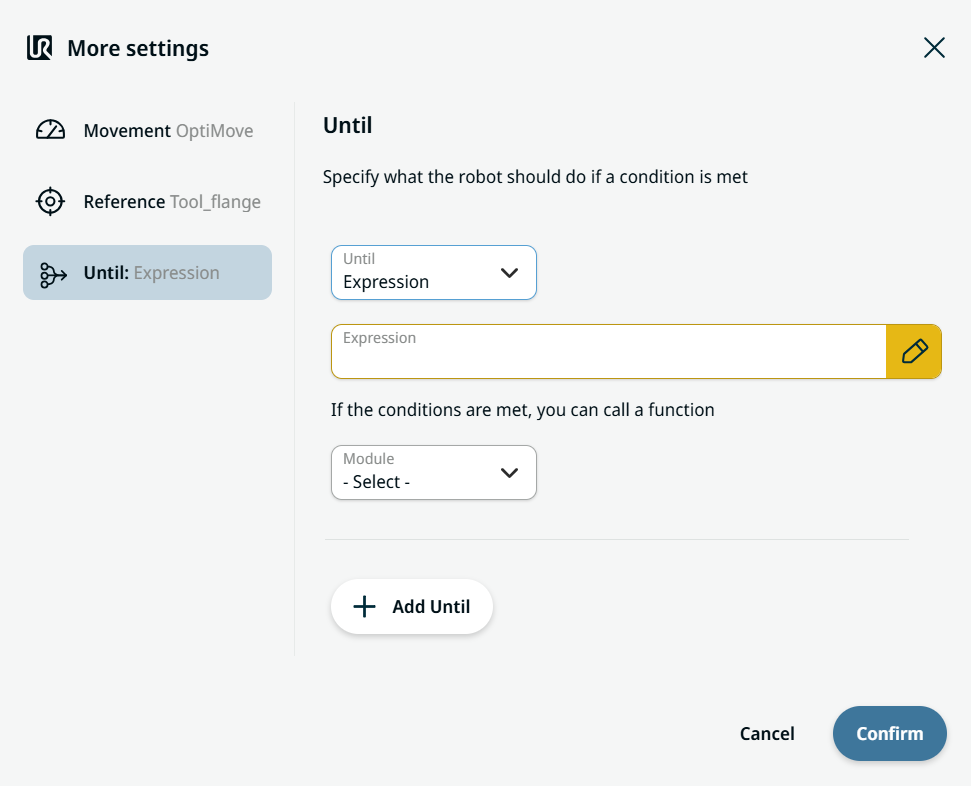
  1. Tap Expression. Three functions are added:

    • Expression field

    • Module Select drop-down menu

    • Add Until button

      Until Expression setting

    Expression sets the expression to check against, and you can optionally call a function when the condition is met.

  2. Tap the Expression field, enter the value, then tap Confirm.

  3. Tap the Module field. Global Functions displays the Function field.

  4. Select either Global Functions or Module.

  5. Tap the Add Until button to add further conditions, then tap Confirm.

    You can delete an Until condition by tapping the trash can. You cannot delete the last condition.


To access Contact

Contact stops the motion on physical contact.

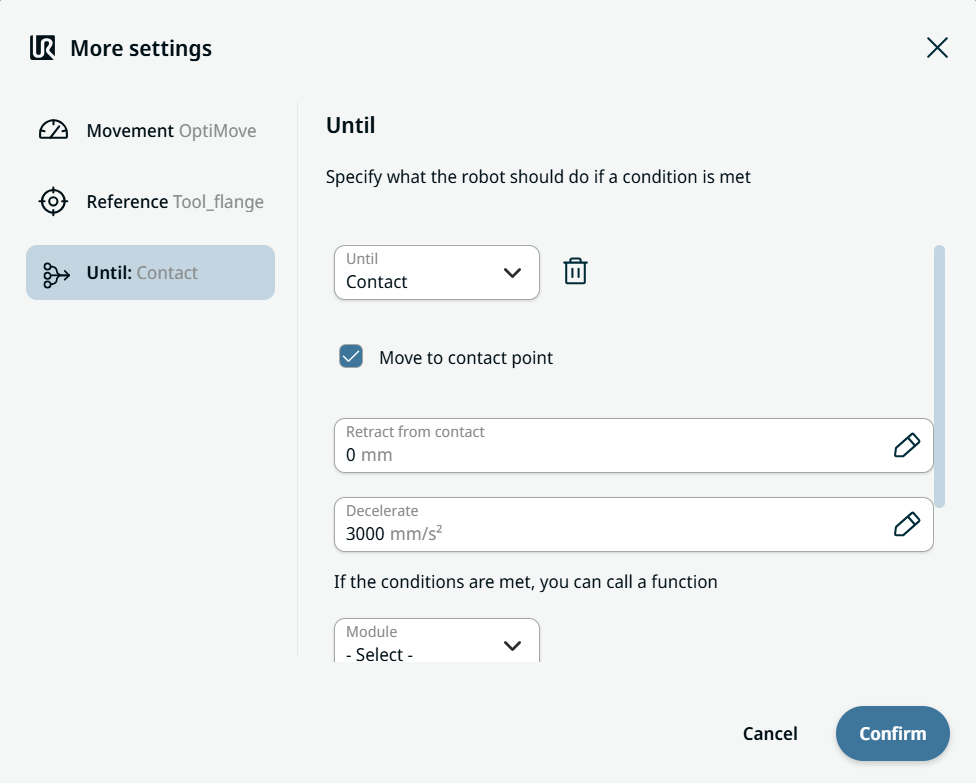
  1. Tap Contact. Five functions are added:

    • Checkbox for Move to contact point

    • Retract from contact field

    • Decelerate field

    • Module Select field

    • Until field

    Until Contact checks for tool contact.

    Until Contact setting
  2. Select the Move to contact point checkbox.

  3. Tap the Retract from contact field, enter the data, then tap Confirm. For value, variable, and expression entry, see Value-Variable-Expression Tabs.

  4. Enter the data in each tab and tap Confirm. For value, variable, and expression entry, see Value-Variable-Expression Tabs.

    When you uncheck the Move to contact point checkbox, the Retract from contact field becomes inactive.

 
  1. Tap the Decelerate field, enter the data, then tap Confirm. For value, variable, and expression entry, see Value-Variable-Expression Tabs.

  2. Tap the Module field. Global Functions displays the Function field.

  3. In the Until field, you can add further conditions.


To access Distance

Distance stops the motion after traveling a set distance.

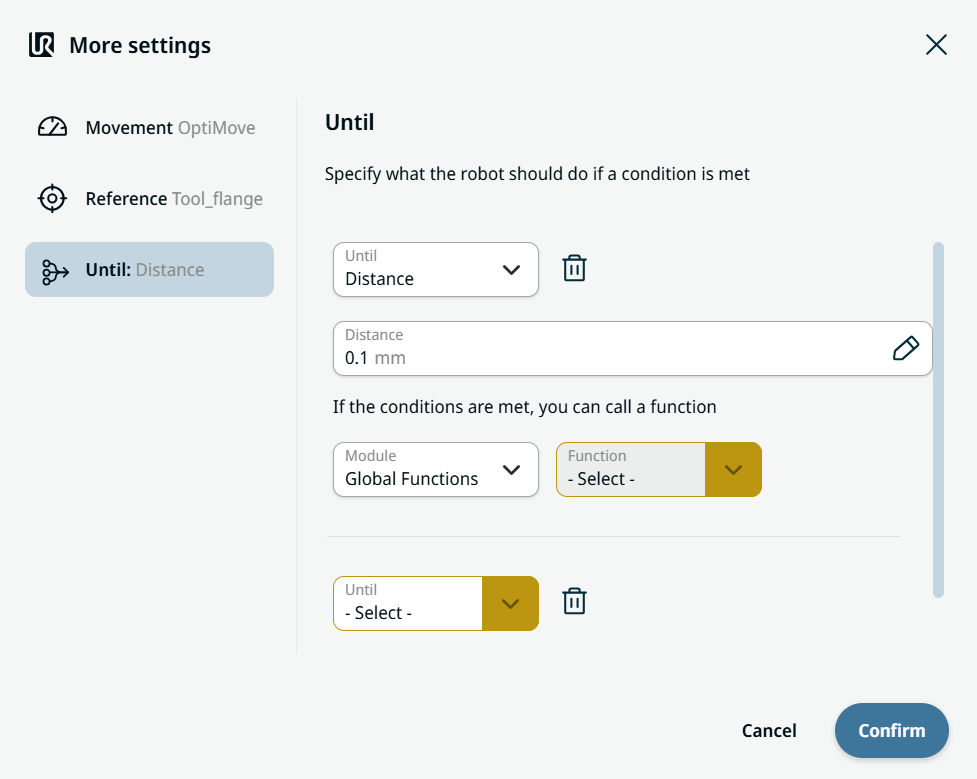
  1. Tap Distance. Four functions are added:

    • Distance field

    • Module field

    • Function Select field

    • Until field

    Until Distance setting
  2. Tap the Distance field, enter the data, then tap Confirm. For value, variable, and expression entry, see Value-Variable-Expression Tabs.

  3. Tap the Module field. Global Functions displays the Function field.

  4. In the Until field, you can add further conditions.


To access Signal

Signal stops the motion when a specific digital input signal becomes active or inactive. Use it with sensors, buttons, or other external devices to stop motion when the environment changes.

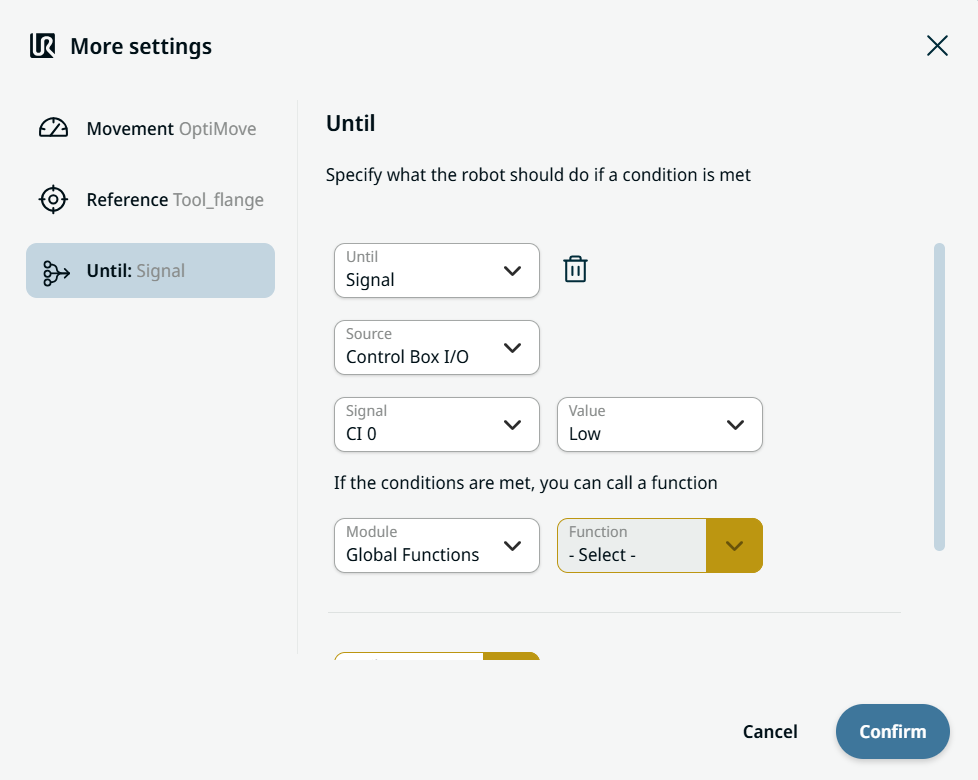
  1. Tap Signal. Four functions are added:

    • Source field

    • Module field

    • Function Select field

    • Until field

    Until Signal setting
  1. In the Source field, select Control Box I/O or Tool I/O.

  2. Select the Signal of the I/O and the Value.

  3. Tap the Module field. Global Functions displays the Function field.

  4. In the Until field, you can add further conditions.