Replacing the Teach Pendant: Standard TP
| Removing & Replacing |
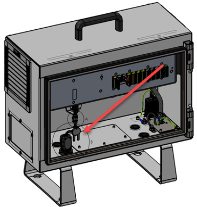
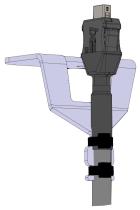
This section describes how to remove and replace a Standard Teach Pendant. For information on how to replace a Standard Teach Pendant with a 3PE Teach Pendant, see Replacing the Teach Pendant: 3PE TP. When the Teach Pendant is replaced, test the E-stop button function. 更换示教盒可能导致系统在启动时报告故障。
|
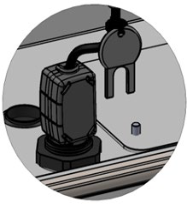
| To remove |
|
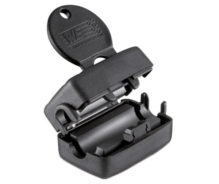
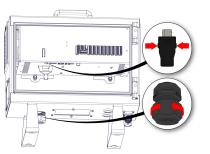
| To replace |
|