ジョイント移動
| 説明 |
The Joint Move is a move command node that supports Motion Profiles. The command creates a movement from point A to point B that is optimal for the robot. この移動は、A から B への直線とは限りませんが、ジョイントの開始位置とジョイントの終了位置には最適です。 「ジョイント移動」を使用すると、ロボットアームのジョイント空間で計算された動きをします。 ジョイントは同時に移動を完了するように制御されています。 この移動タイプでは、ツールがたどるための曲線のパスを描きます。
|
|
To access Joint Move command |
|
|
|
|

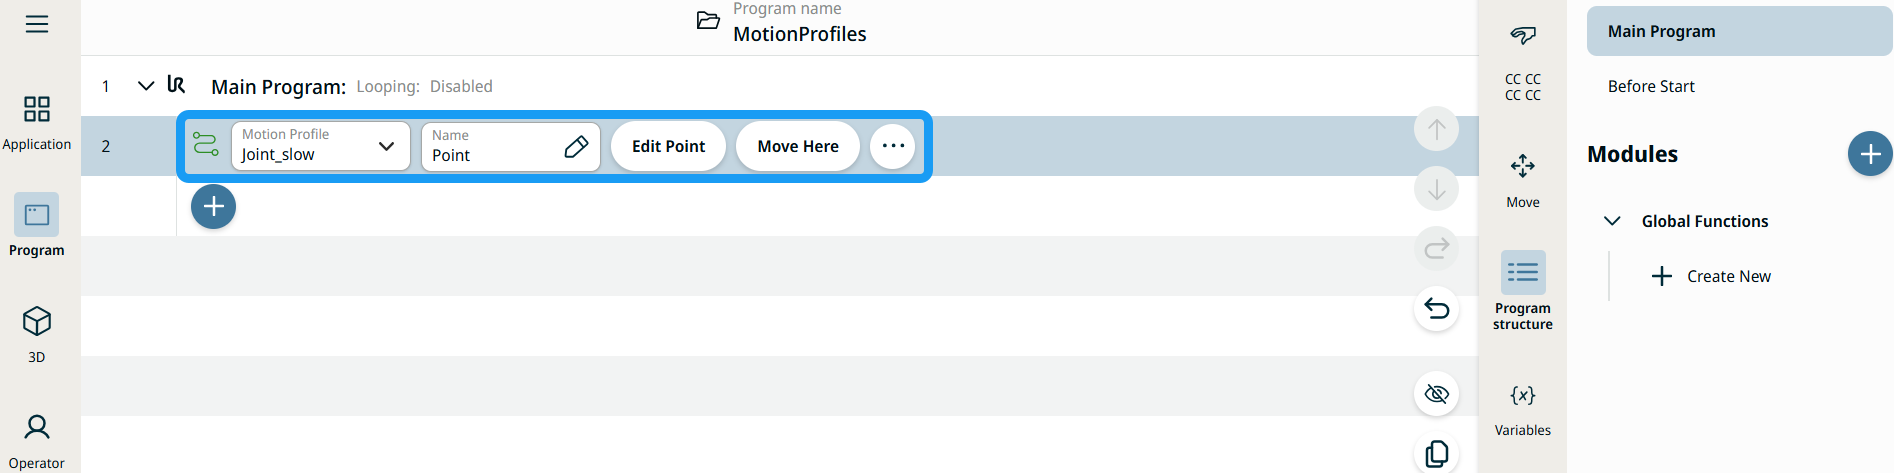
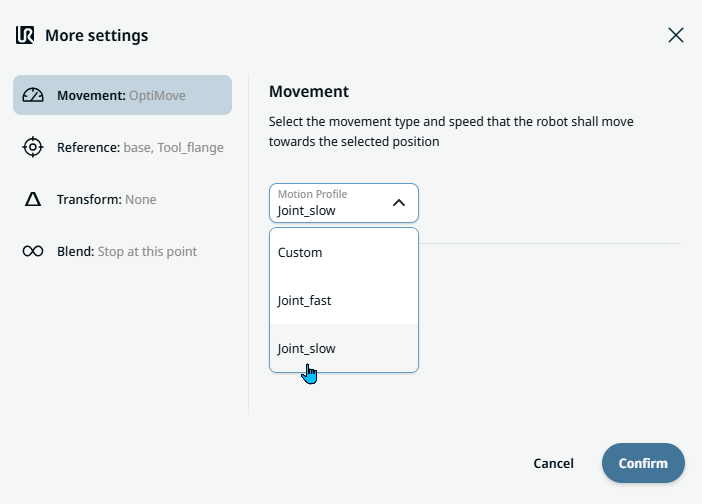
| 移動ノードのモーションプロファイルラベル |
プログラムツリー内のすべての移動関連コマンドノードには、各ノードに関連付けられた移動プロファイルが表示されます。 この機能により、移動ノードで選択されている移動プロファイルを確認できます。 この機能は以下のコマンドノードに実装されています: カスタムモーションプロファイルを使用する移動ノードでは、モーションプロファイルの代わりに速度と加速度の値が表示されます。 |
|
|
|
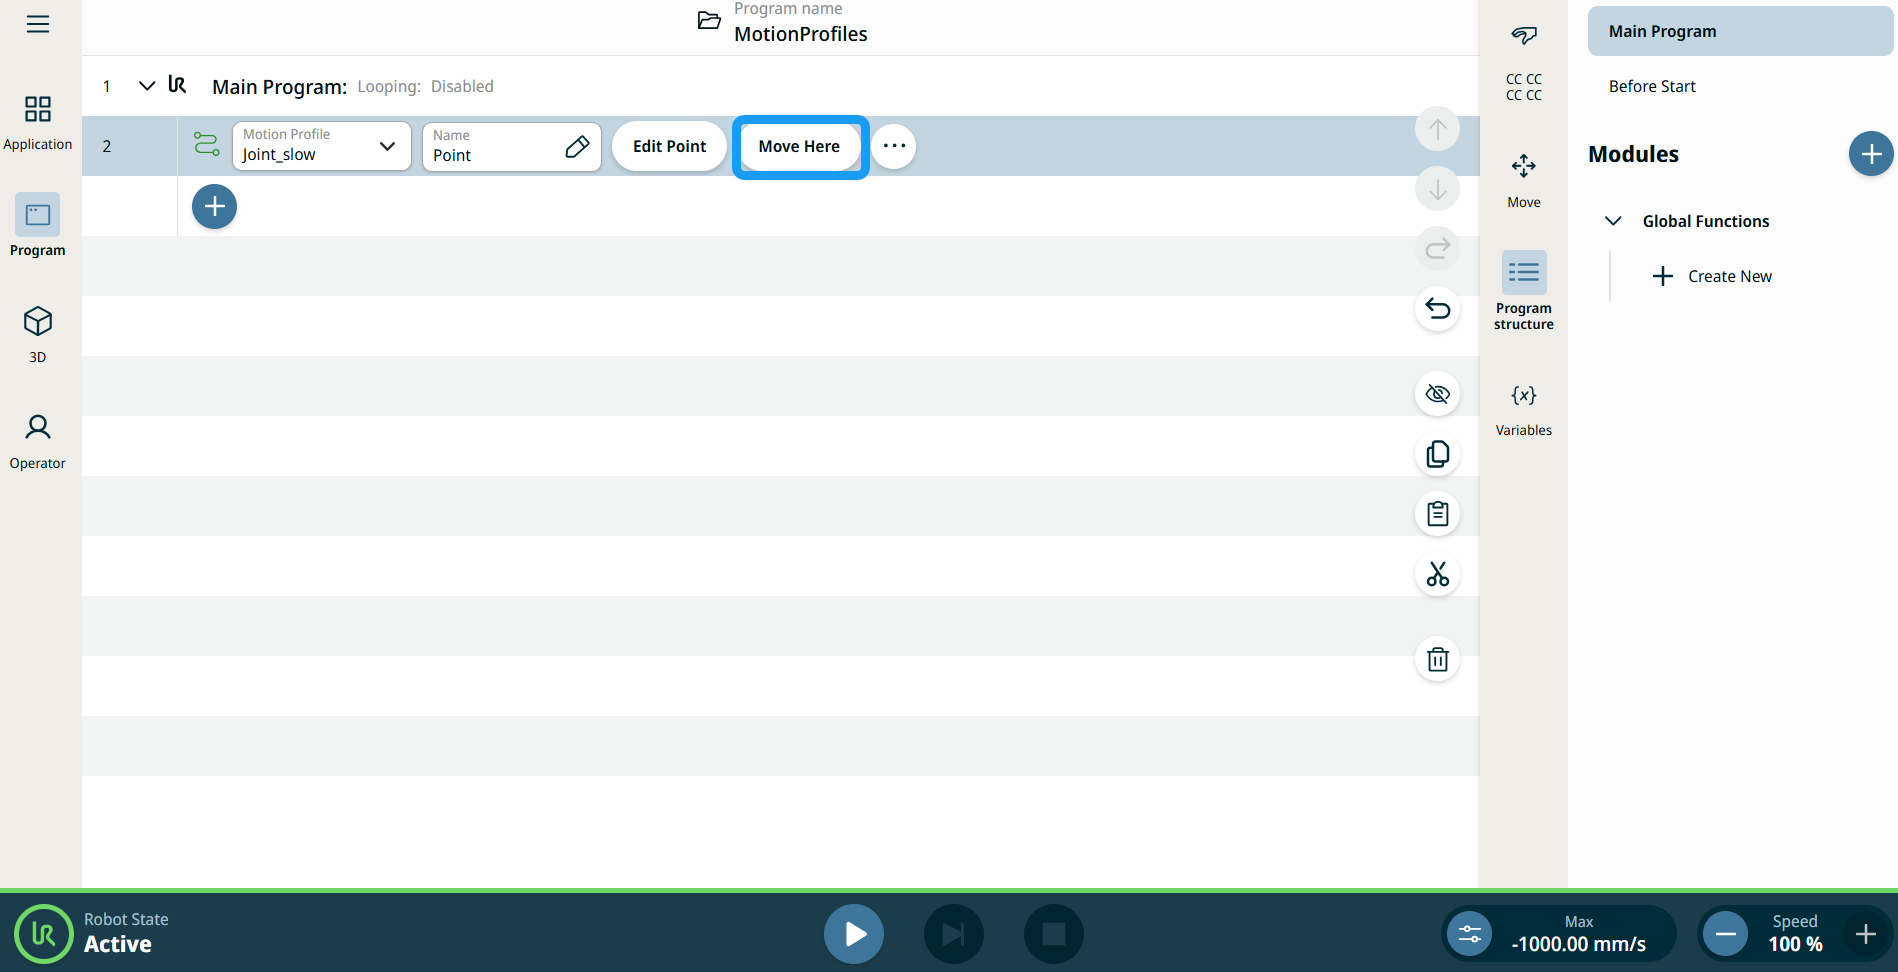
| [ここに移動] ボタンの使用 |
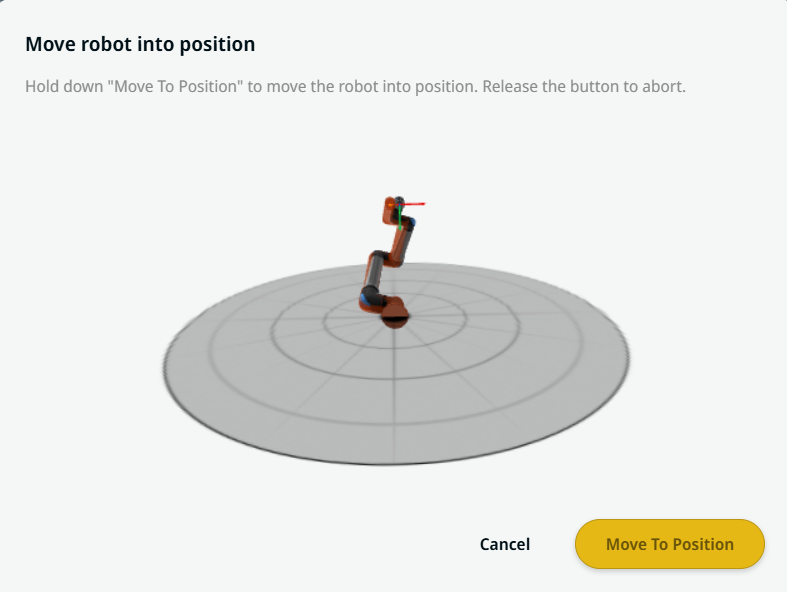
ここに移動 ボタンは、直線移動 および ジョイント移動 コマンドに表示されます。 この機能により、プログラムツリーから直接ウェイポイントの位置へ移動できます。 [ここに移動] ボタンを押すと、「ロボットを位置まで移動」ダイアログが開きます。 このボタンはウェイポイントが教示されている場合に表示され、ロボットの状態が 標準 モードまたは 減少 モードのときのみ有効になります。
|
| Movement setting |
|
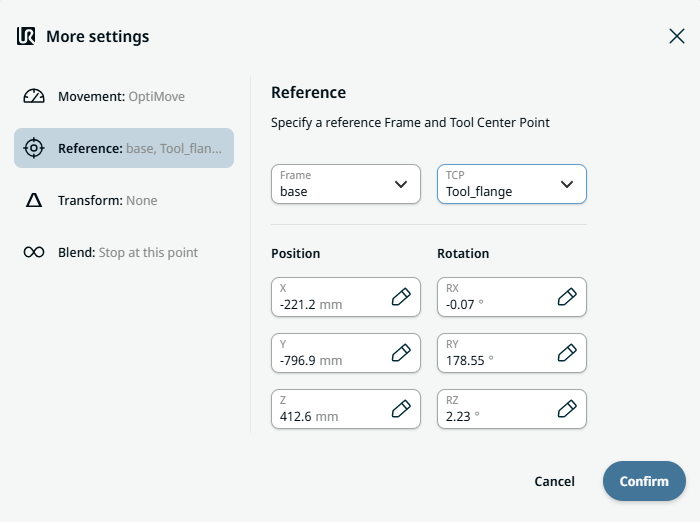
| Reference setting |
|
| Transform setting |
|
|
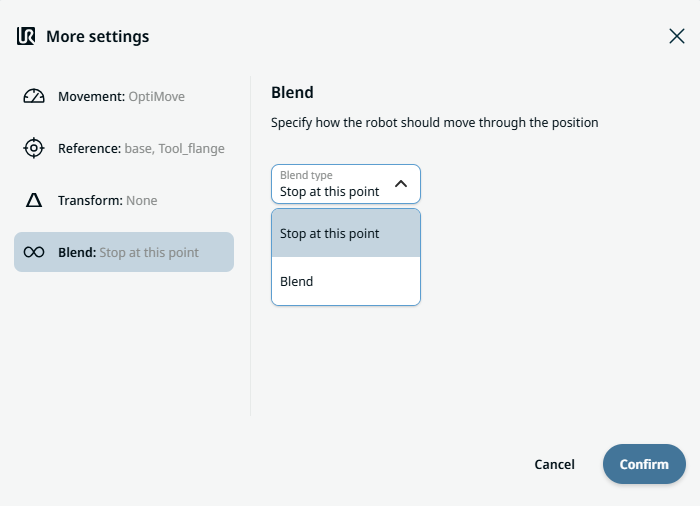
Blend setting |
|