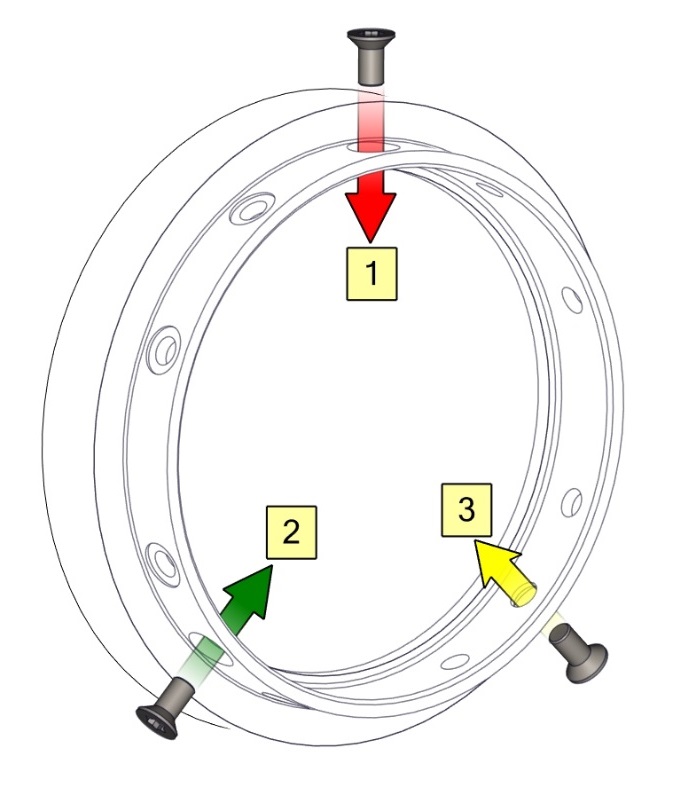
Assemble Screw Connection Joint
| Screw assembly |
The assembly procedure is done in reverse of the disassembly. However, a few things must be noted before assembly is begun. • Remove old Loctite residue in the screw holes with a roll tap or forming tap (size 2 M4; the rest M3) for threads before assembling the joint to get the correct torque on the new screws.
• Always use new precoated screws when possible. If you must assemble with old screws, carefully clean the screws and add Loctite 243 to the screws before assembly. • Always replace the flexible flat black ring with a new one to maintain the IP classification. • Replace the wear rings if extensive wear or damage is shown. |
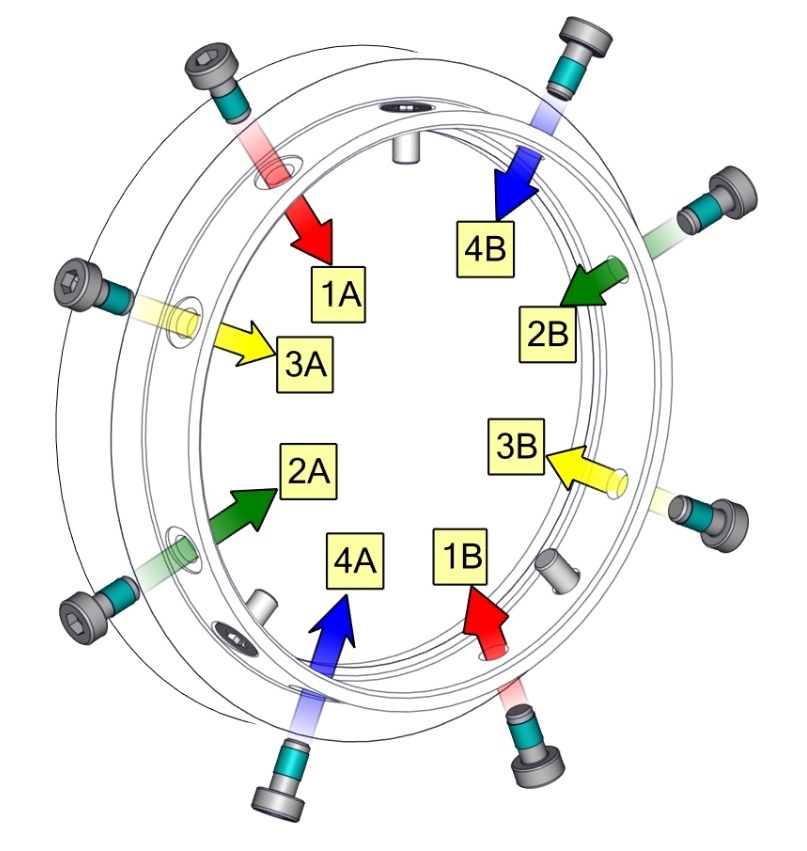
When mounting the blue lids, please refer to the table below for the correct screw size.
|