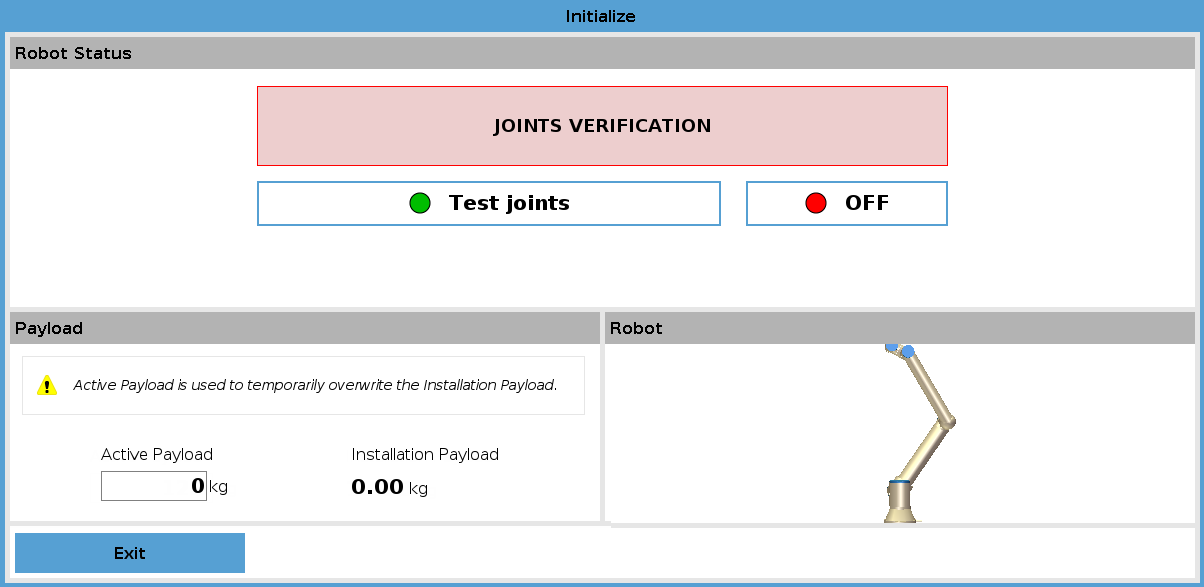
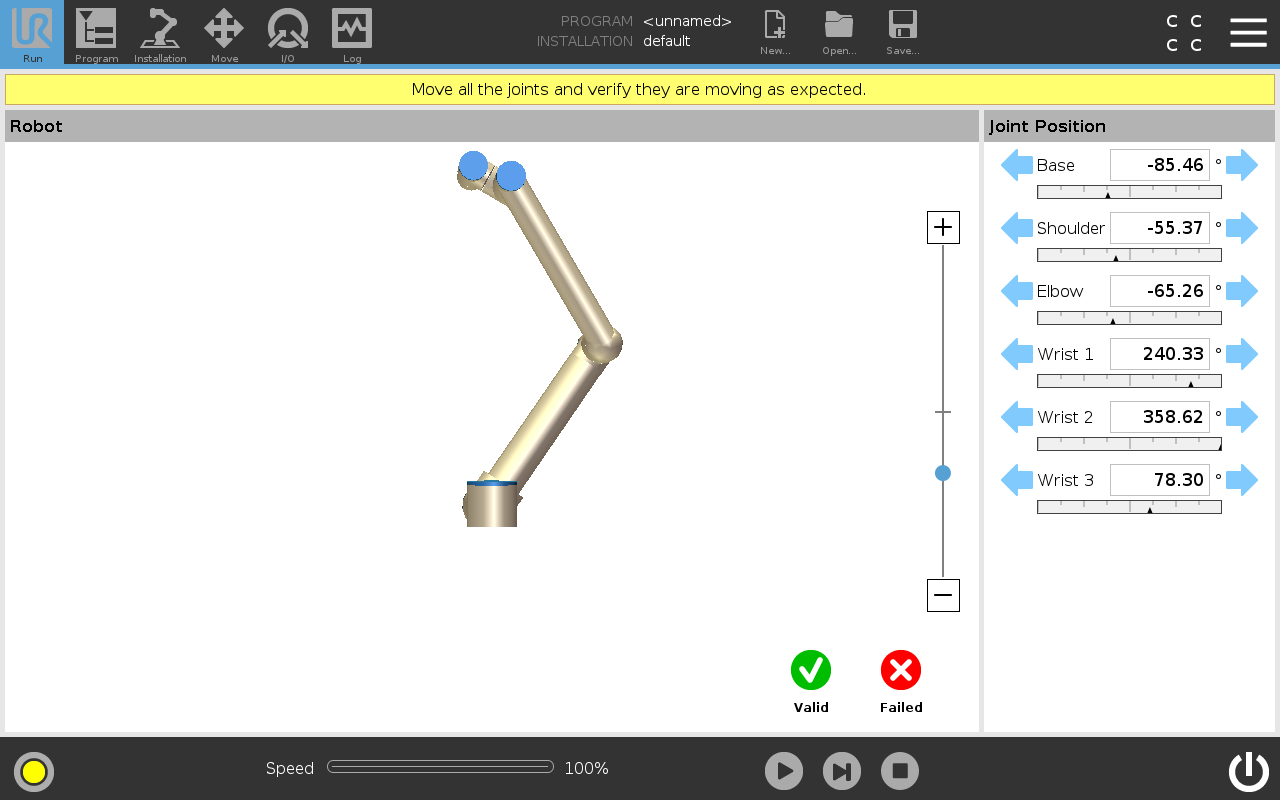
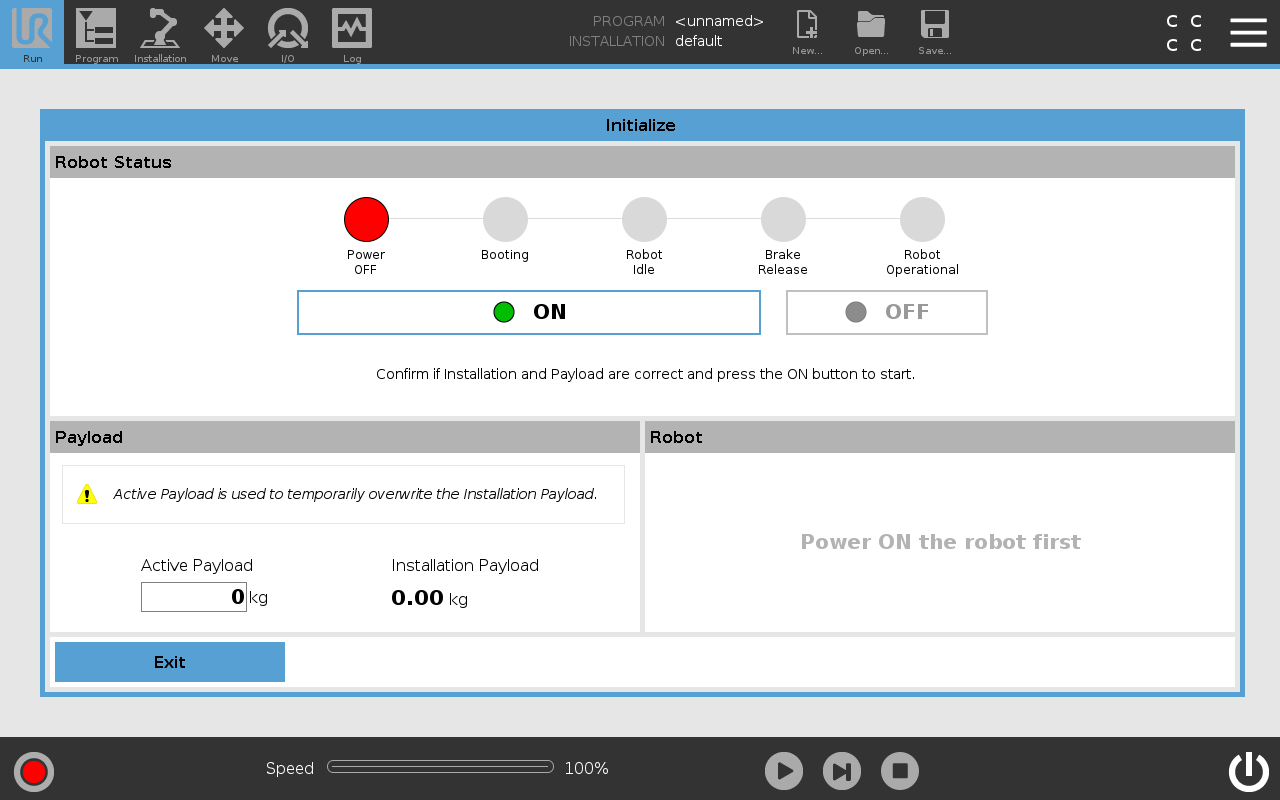
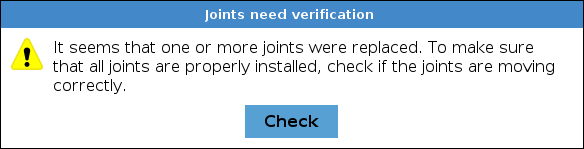
Joint Verification

Verification steps

When a joint is replaced, it needs to be verified by the controller to be assigned the correct ID. The screen below appear automatically when the robot arm is powered on for the first time. Follow the steps.

  1. Go to Initialize screen and press On.

  1. A pop-up appears saying that joints need verification. Confirm the pop-up message by pressing Check.

  1. Press Test joints to start joint verification.
 
  1. Move all joints with the arrows respective to each joint.
    • If joints move as expected, press Valid, and a pop-up appears. Follow the pop-up instructions.
    • If joints do not move as expected, i.e., wrong joint moves or incorrect direction), press Failed and a pop-up appears. Follow the pop-up instructions.