Pick and Place

Description

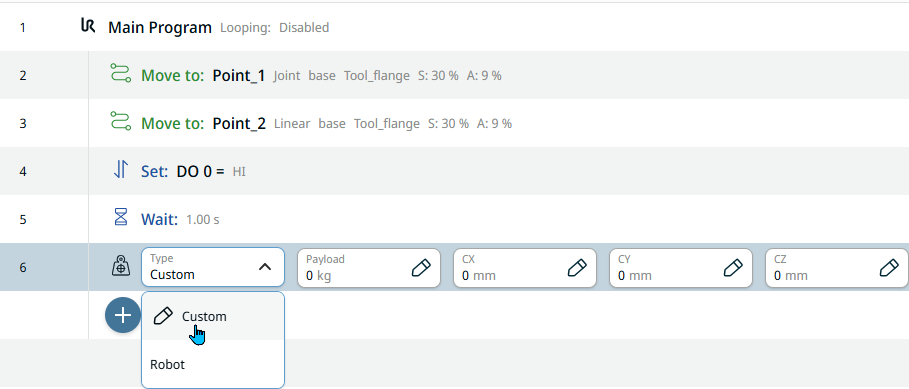
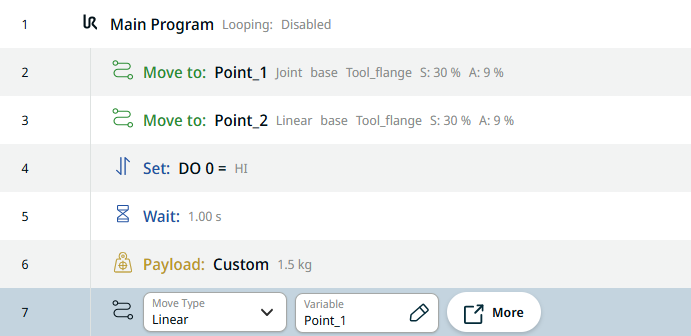
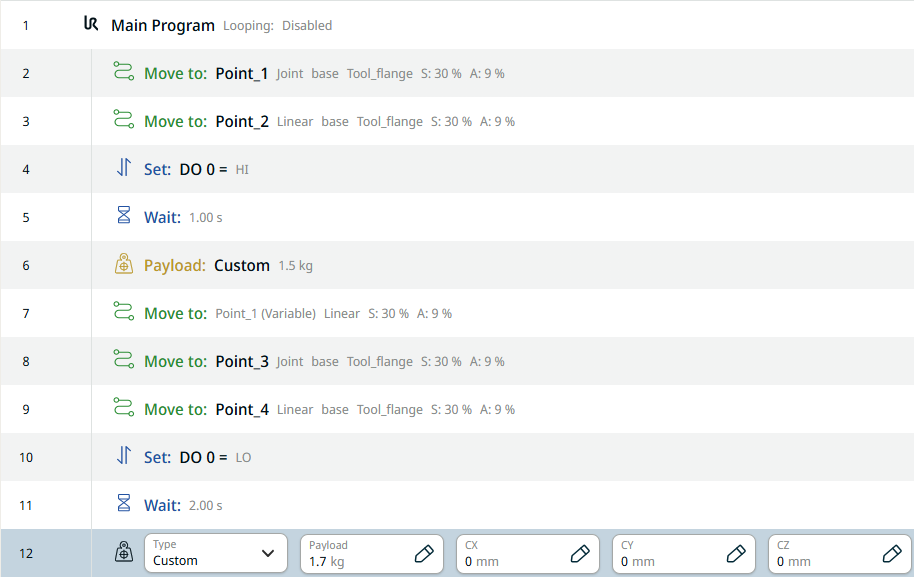
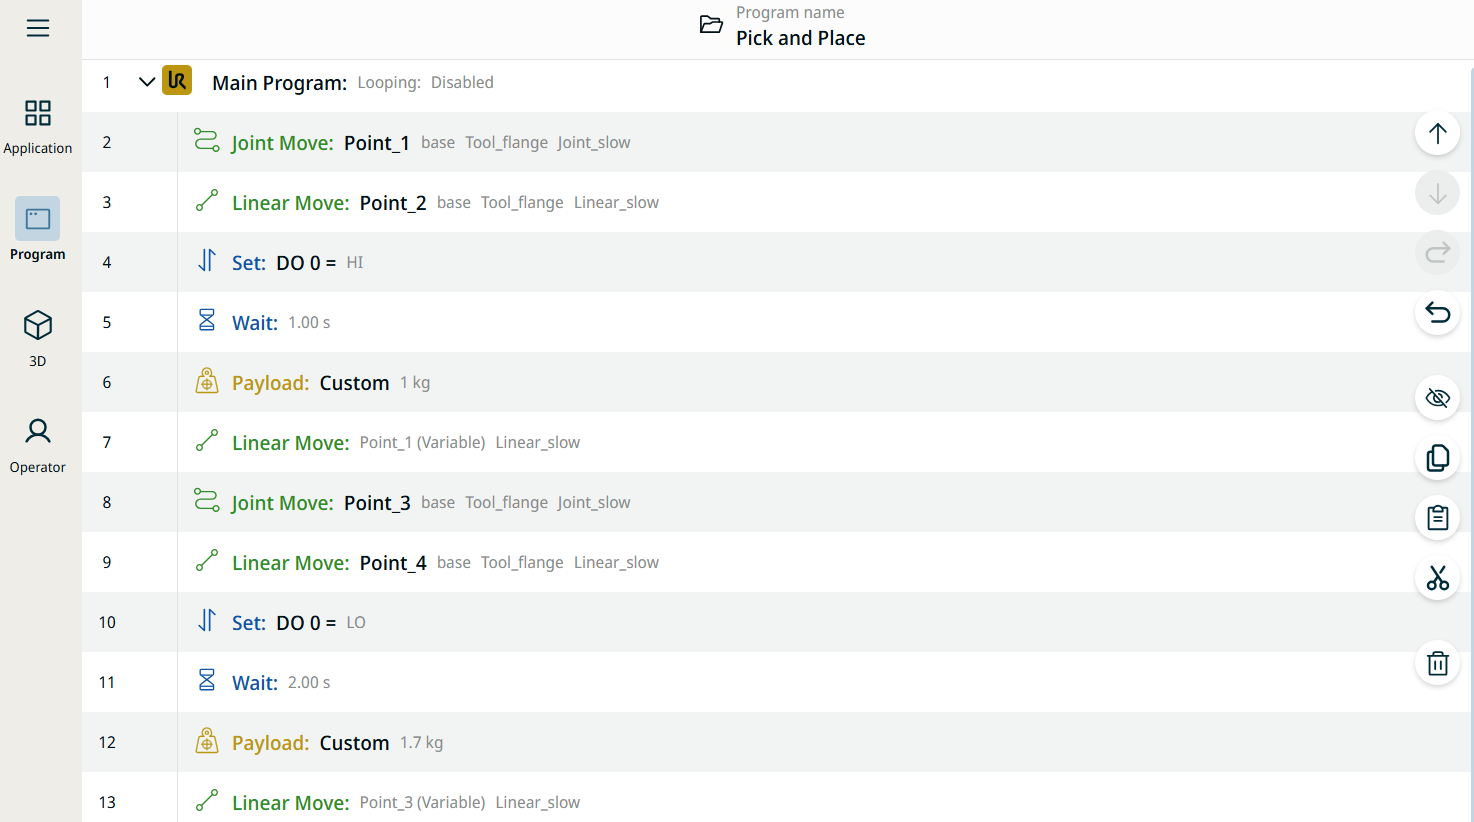
Pick and place is used when a robot picks up a piece from a tray or fixture and places it again in another tray or fixture. In a pick and place program, you create a default payload in the installation. Then you add a Set Payload when picking up an object. You update the payload after the gripper closes but before starting to move. Additionally, you use the Set Payload after the object has been released.


Creating a Pick-and-Place program

  1. In the main navigation, tap the program icon. You are directed to the main program screen.

  2. Tap the add icon to see the commands toolbox and choose the Move to icon.

  3. A command node with Move Type and Name fields, and Edit Point and More buttons is inserted into the program tree.


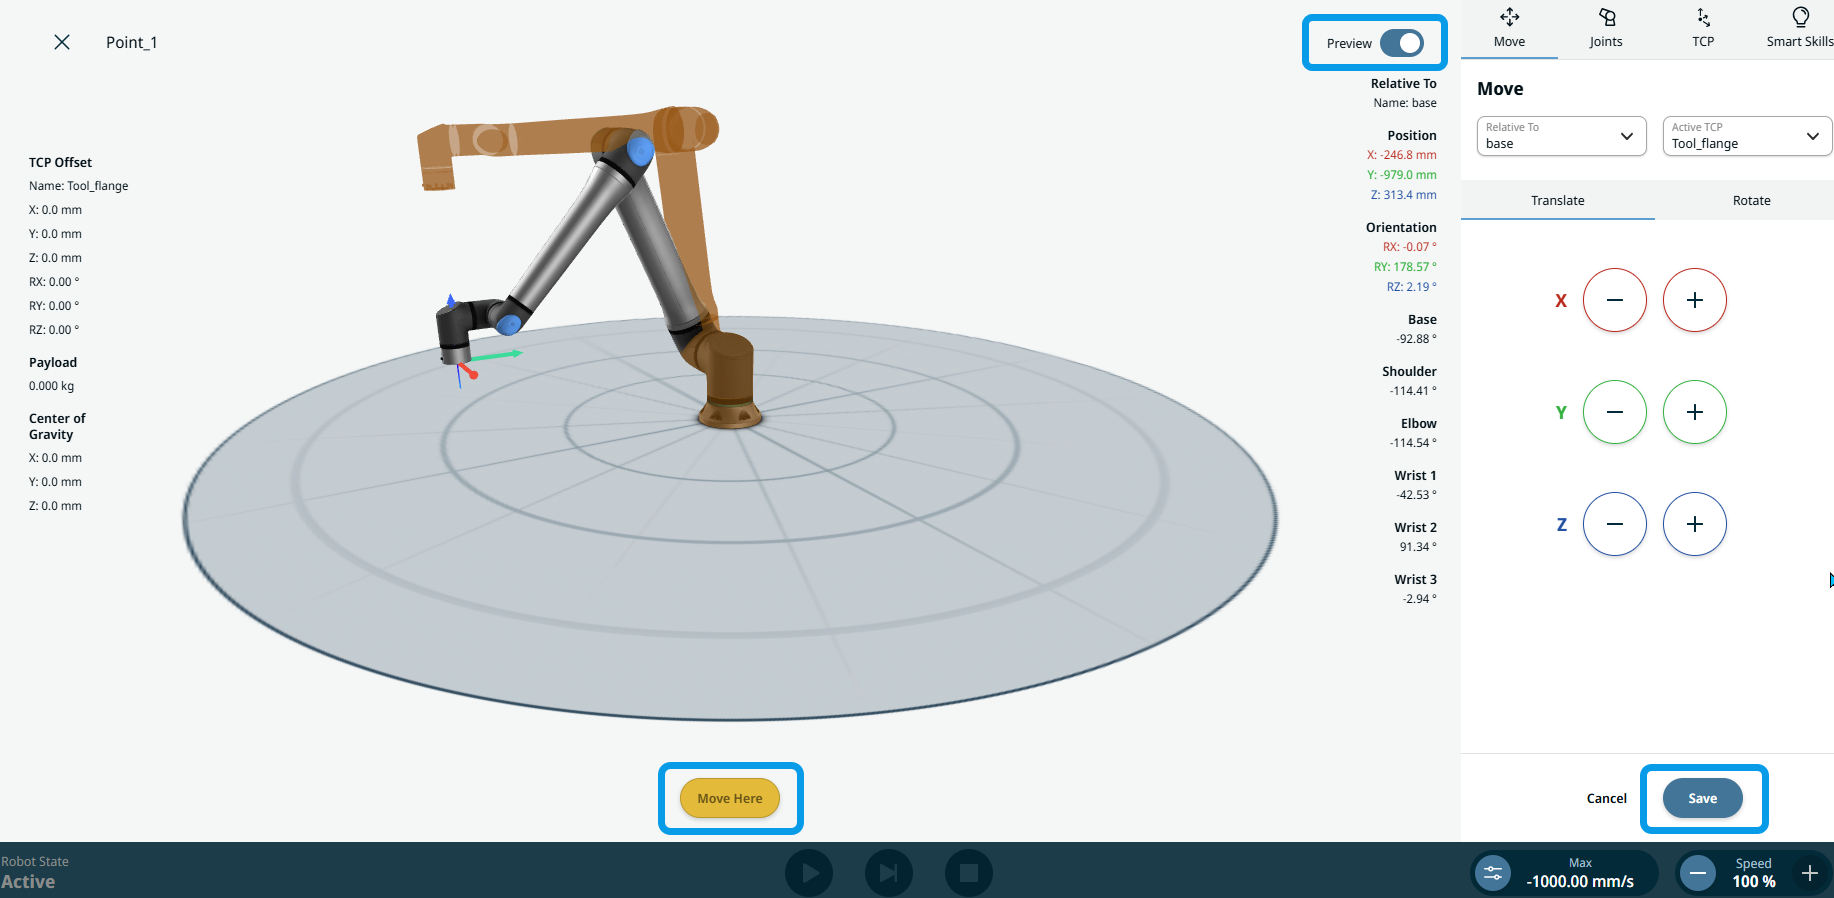
Position the robot above a tray/fixture

  1. Tap Edit Point to mark the robot’s first position above the corner of the tray or fixture. You are directed to the 3D viewer. Move the robot arm using the plus-minus button of the X, Y, Z coordinates and Save.

  2. Choose Joint move type and name it as Point_1. Then Confirm.

Robot grabs a thing from a tray/fixture

  1. Tap the add icon and insert a second Move to command to grab the piece from the tray in a linear movement.

  2. Choose Linear in the Move Type field. Tap Edit Point and move the robot arm using the plus-minus button of the X, Y, Z coordinates , and Save. Jog down using the Z axis in blue arrow.

  3. Name it as Point_2.


  1. Tap the add icon. To close the gripper, choose the Set icon.

    A command node with Source field is inserted into the program tree.

  2. Choose Tool IO in the Source field. A Signal field is inserted to the right and choose DO 0. A Value field is further inserted and choose High.

  3. Tap back the add icon and insert a Wait command.

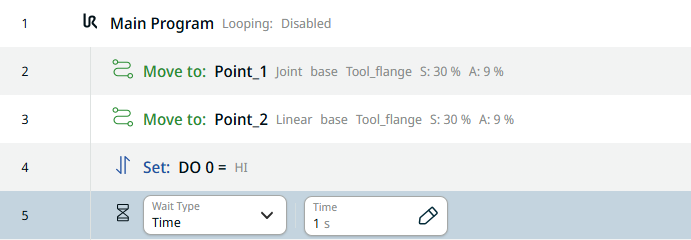
  4. Choose Time in the Wait Type field and enter 1 in the Time field. 


  1. Tap back the add icon and insert a Payload command to update while the gripper is holding the piece.


  1. Choose Custom in the Type field. Four additional fields are added. In the Payload field, enter 1.5 kg in its Value tab, and in the cz field, enter 75 in its Value tab. Then Confirm.

Robot moves to the point above a tray/fixture

  1. It is time to move up to the point above the tray again by using a variable. Tap the add icon and insert a Move to command.

  2. Use Linear in the Move Type field.

  3. Tap the Name field, and in the Variable tab, select Point_1. Then Confirm.

    By using a variable position, you only have to reteach once, and not everywhere that position is used in case adjustments are needed.

Robot reaches the end of a tray/fixture

  1. To move the robot into position, go back and tap the first Move to command in the program tree.

  2. Tap Edit Point, and you are directed to the 3D view of the robot. Press the Move Here button until the robot arm reaches the previewed position in brown color. The blue Preview button at the right top side turns to white, which indicates that you have reached the desired position. Tap Save.

  3. For the robot to reach the end of the tray, tap the last created command in the program tree.

  4. Tap the add icon and insert another Move to command in the program tree.

  5. In its command node, choose Joint in the Move Type field.

  6. Tap Edit Point and move the robot arm using the plus-minus button of the X, Y, Z coordinates and Save. Jog sideways using the X axis in red arrow.

  7. Name it as Point_3. Then Confirm.

Robot places a picked thing

  1. To get to the Place position, tap the add icon and insert another Move to command.

  2. In its command node, choose Linear in the Move Type field.

  3. Tap Edit Point, and move the robot arm using the plus-minus button of the X, Y, Z coordinates and Save. Jog down using the Z axis in blue arrow.

  4. Name it as Point_4. Then Confirm.

  5. Tap the add icon and insert a Set command to open the gripper.

  6. Select Tool IO in the Source field.

  7. Select DO 0 in the Signal field and Low in the Value field.

  8. Tap the add icon and insert a Wait command. In the Time field, enter 2 in the Value tab.

  9. Tap the add icon and insert another Payload command while the gripper is empty.

  10. Choose Custom in the Type field.

 
  1. In the Payload field, enter 1.7 in the Value tab, and Confirm.

  2. Tap the add icon and insert another Move to command in the program tree to move the robot up to a point above the tray again by using a variable.

  3. In its command node, choose Linear in the Move Type field. In the Name field, choose Point_3 in the Variable tab, and Confirm.

    This is the final structure of your program tree.

  4. Tap the 3D Viewer in the main navigation and the Play button in the footer to view your created pick-and-place program.