Linear Move
| Açıklama |
The Linear Move command node supports Motions Profiles as Joint Move, but it creates a movement that is a direct line from point A and point B. It moves the Tool Center Point (TCP) linearly between waypoints. Bu, her bir eklemin takımı düz bir çizgi yolu üzerinde tutmak için daha karmaşık bir hareket gerçekleştirdiği anlamına gelir.
|
|
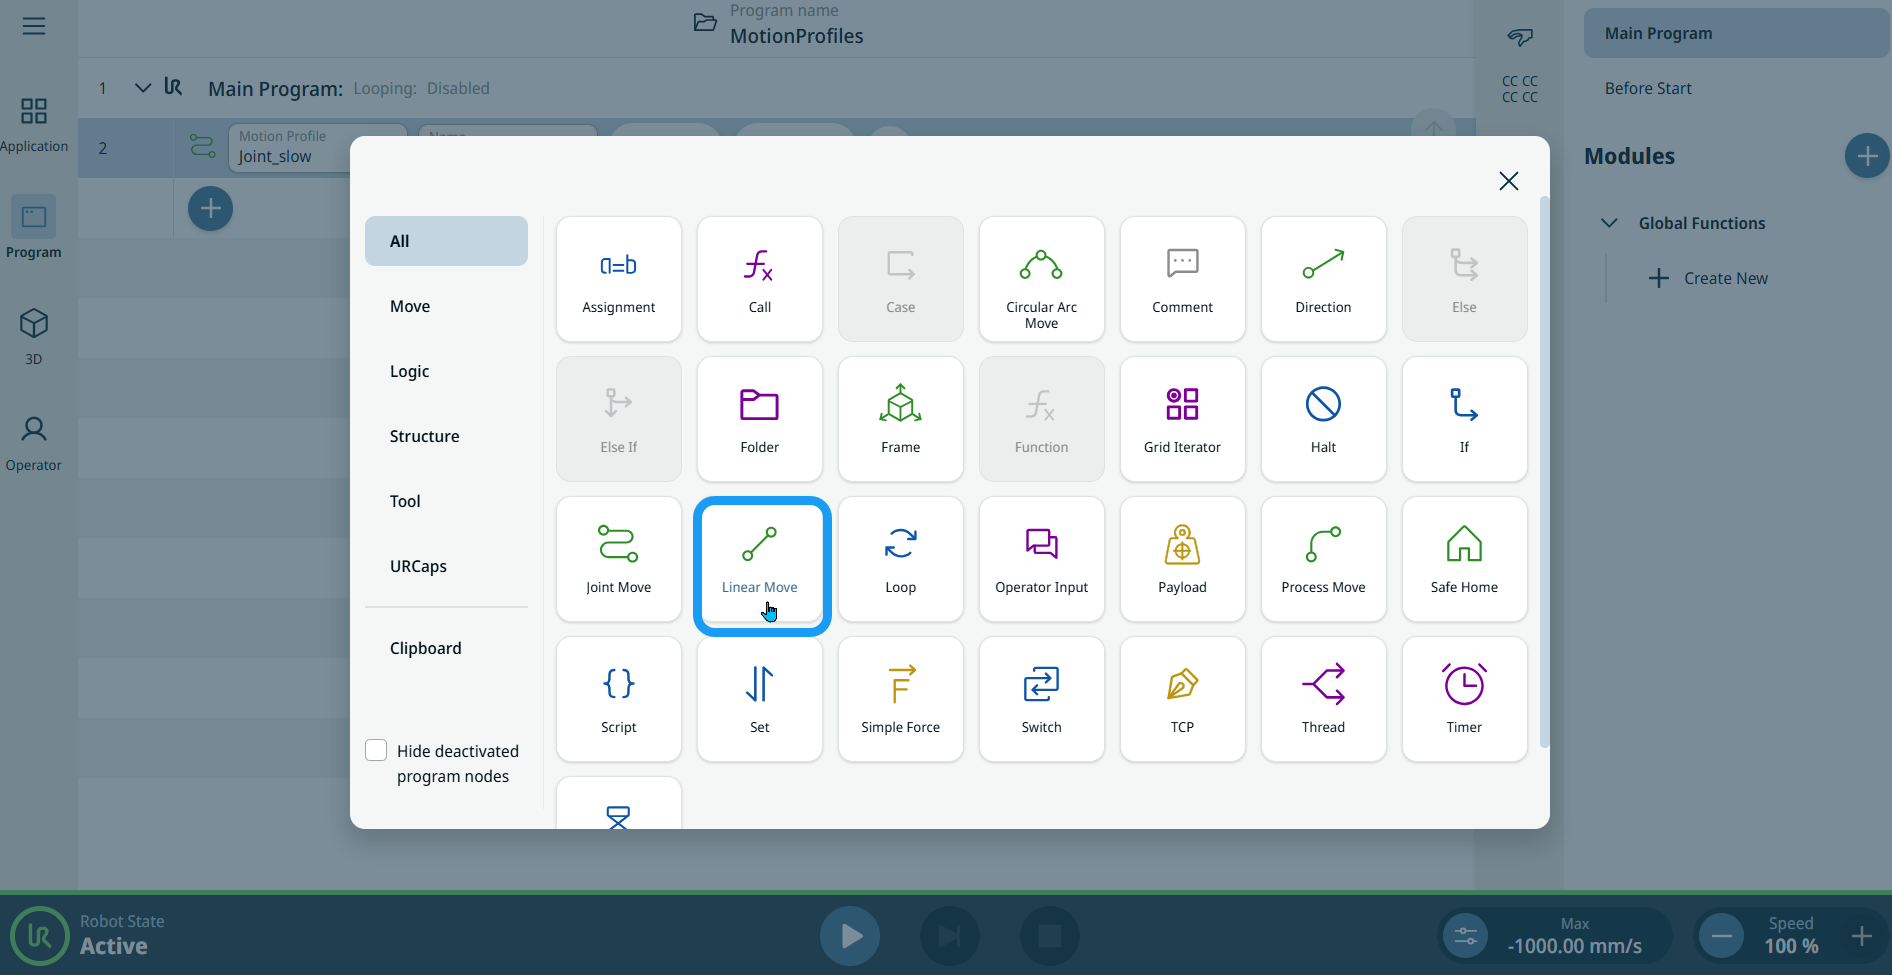
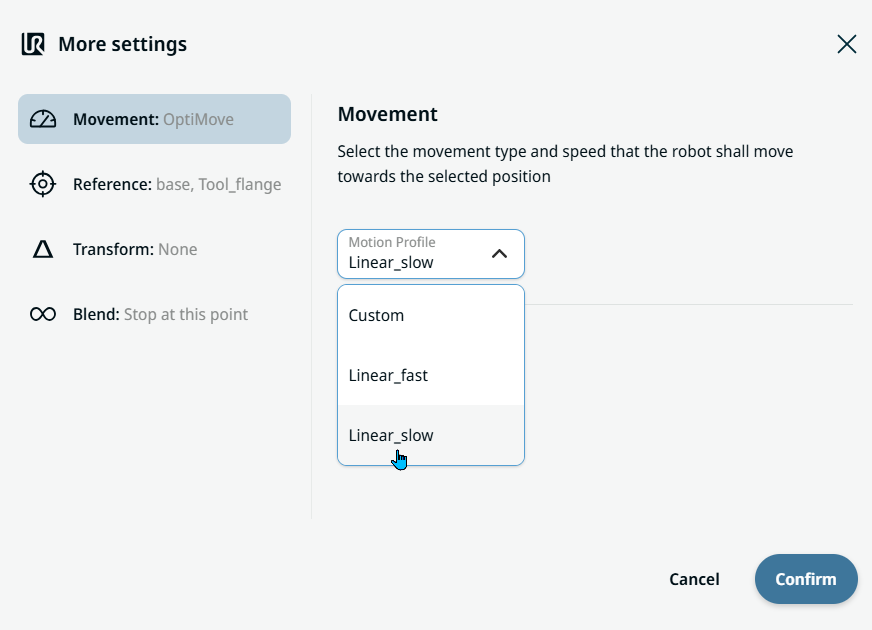
To access Linear Move command |
|
|
|
|
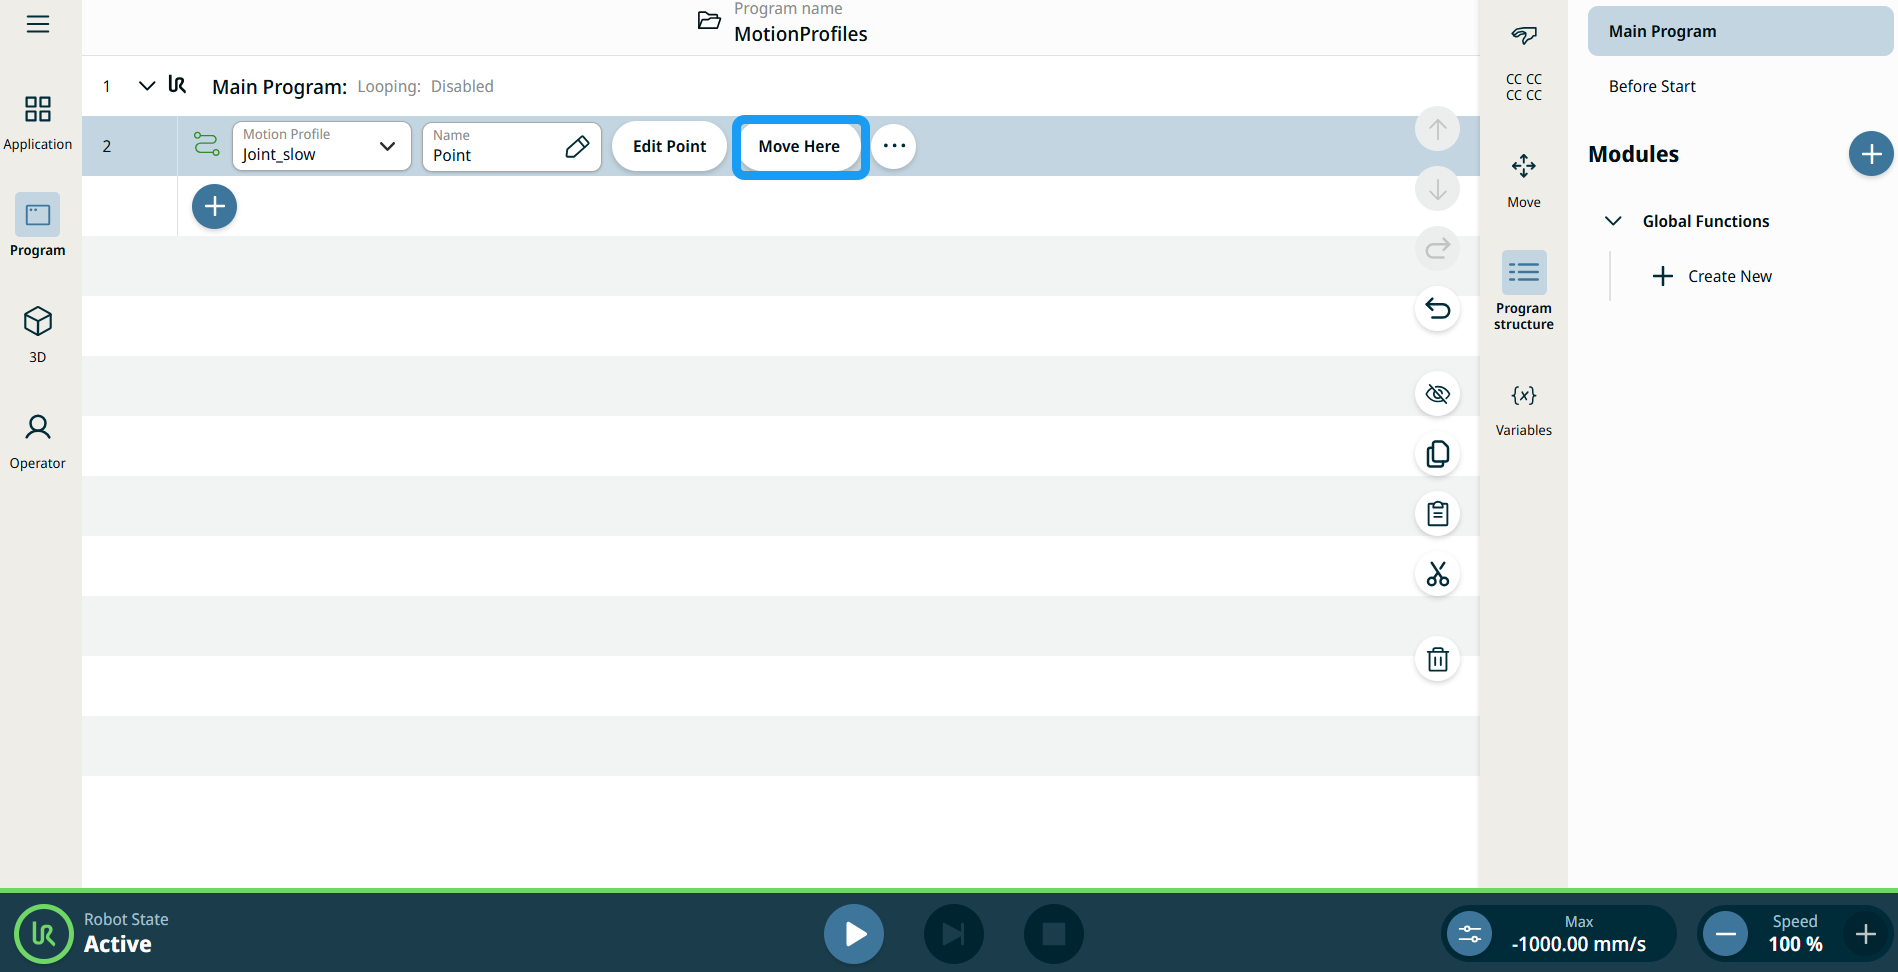
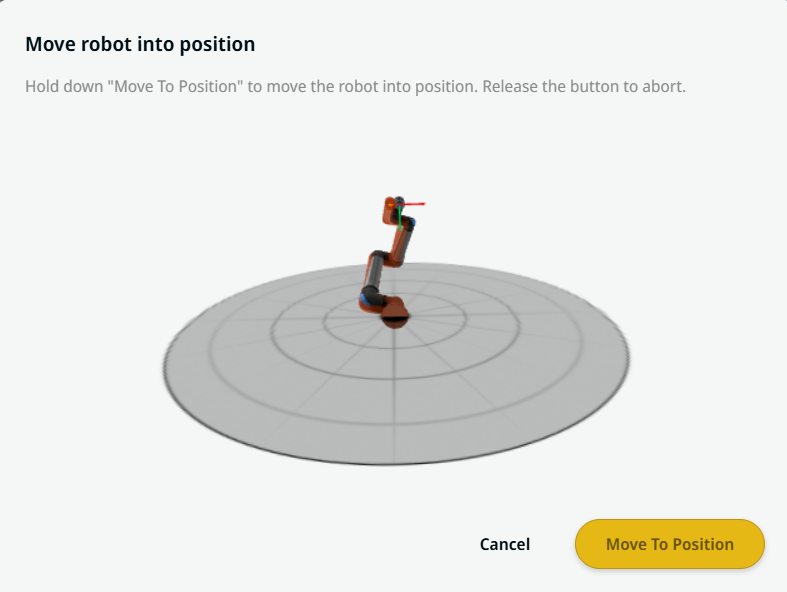
| Buraya Hareket Ettir düğmesini kullanma |
Buraya Hareket Et düğmesi, Linear Move ve Joint Move komutlarında görünür. Bu özellik, doğrudan program ağacından bir geçiş noktası pozisyonuna hareket etmenizi sağlar. Buraya Hareket Et düğmesine basmak, Robotu pozisyona hareket ettir diyaloğunu açar. Düğme, geçiş noktası öğretildiğinde görünür olur ve yalnızca robot durumu Normal veya Azaltılmış modda olduğunda etkinleşir.
|
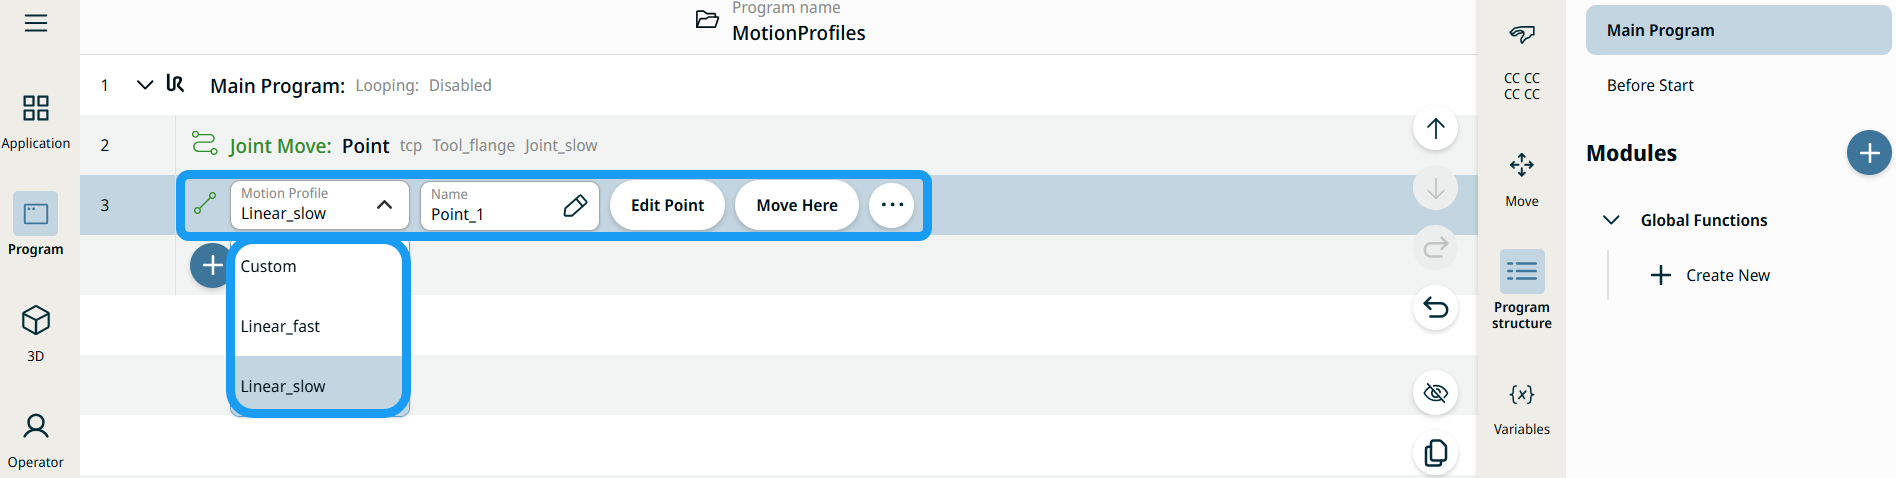
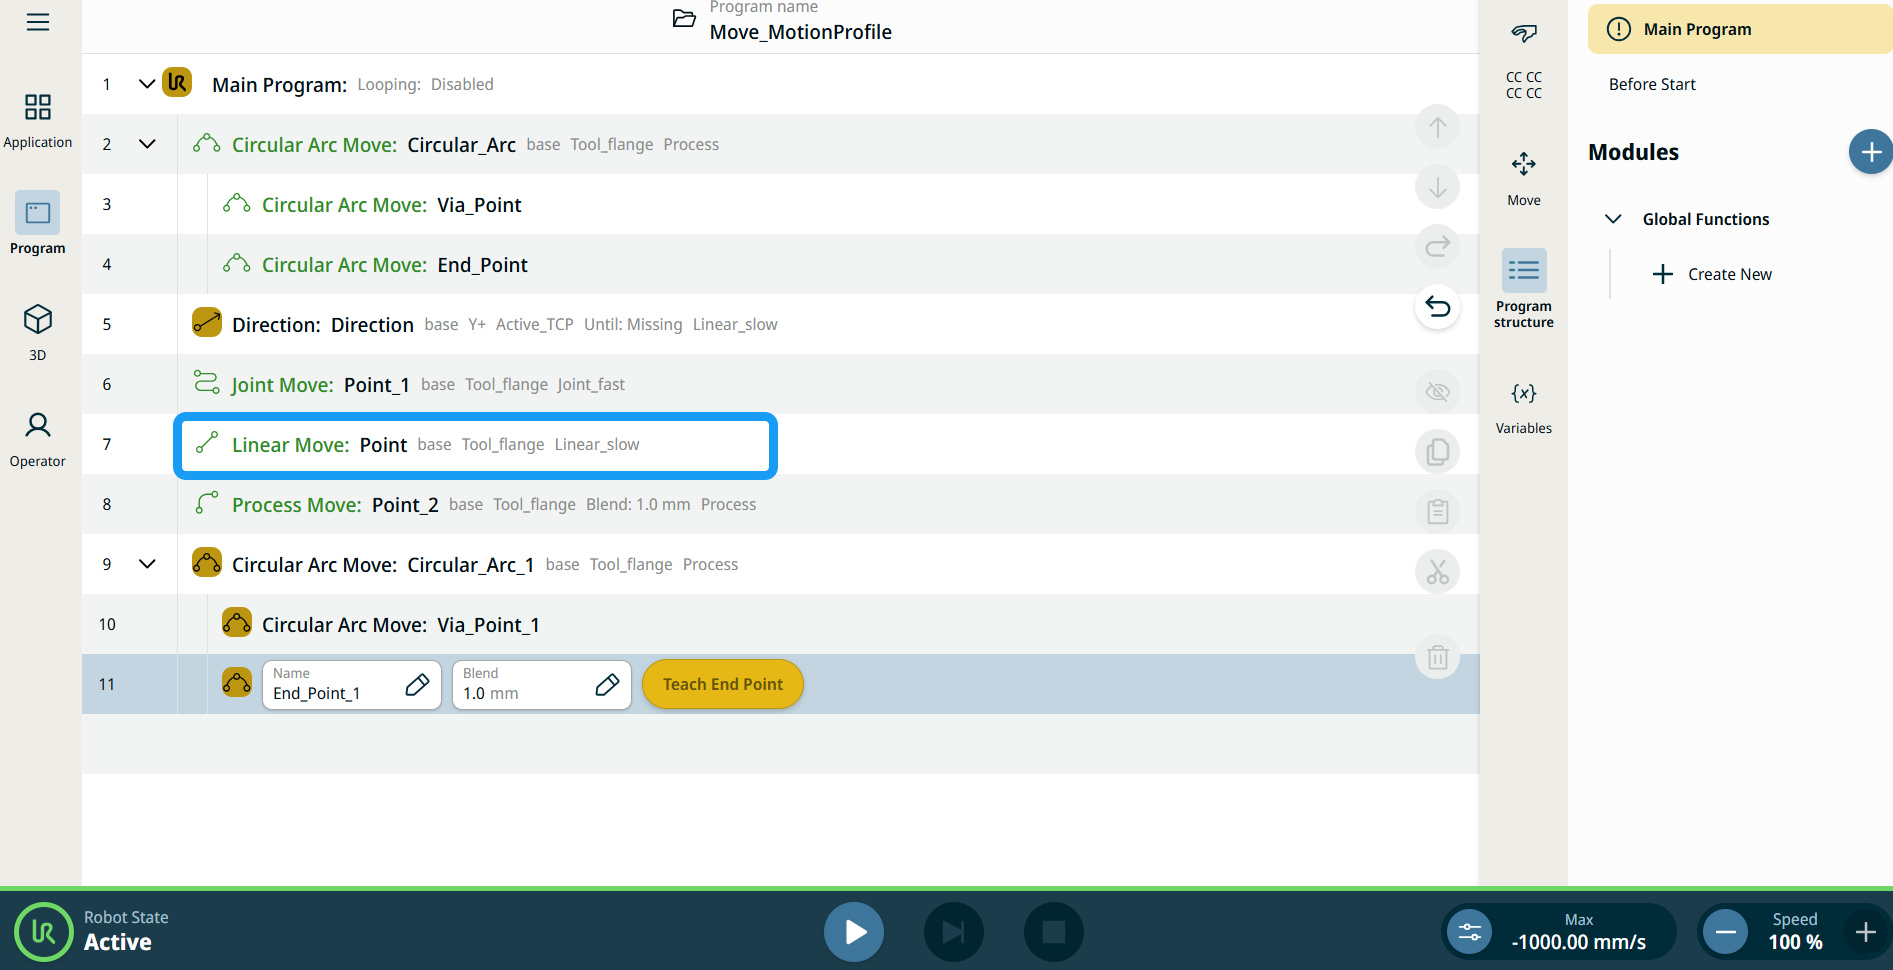
| Hareket Et Düğümlerindeki Devinim Profili etiketleri |
Program ağacındaki tüm Hareketle ilişkili komut düğümleri, her bir düğümle ilişkili Devinim Profilini gösterir. Bu özellik, kullanıcıların Hareket düğümünde seçili bir Devinim Profilini görebilmesini sağlar. Bu özellik, aşağıdaki komut düğümlerine uygulanır: Özel devinim profili olan Hareket düğümleri, Devinim profili yerine hız ve ivme değerlerini gösterir. |
|
|
|
| Movement setting |
|
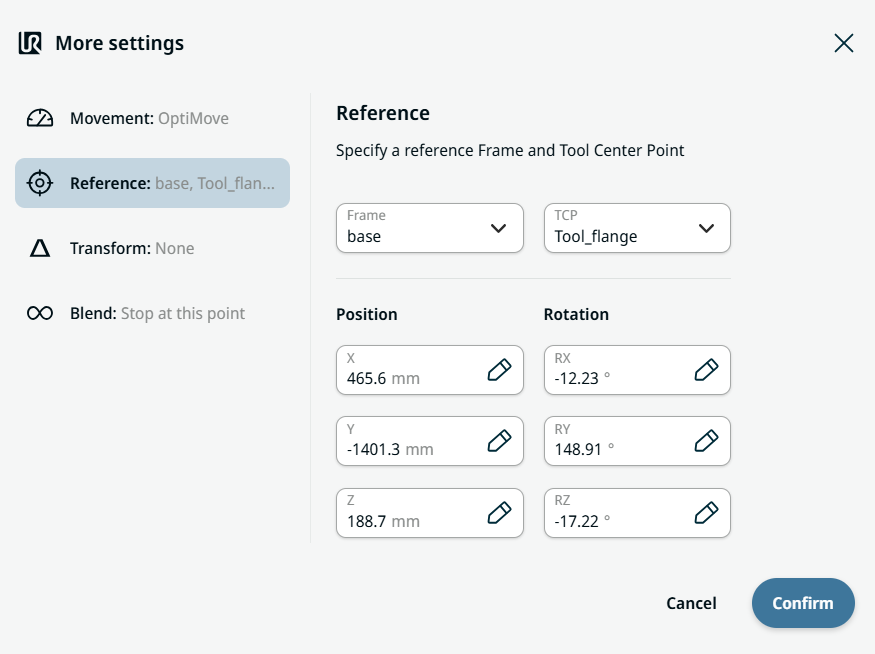
| Reference setting |
|
| Transform setting |
|
|
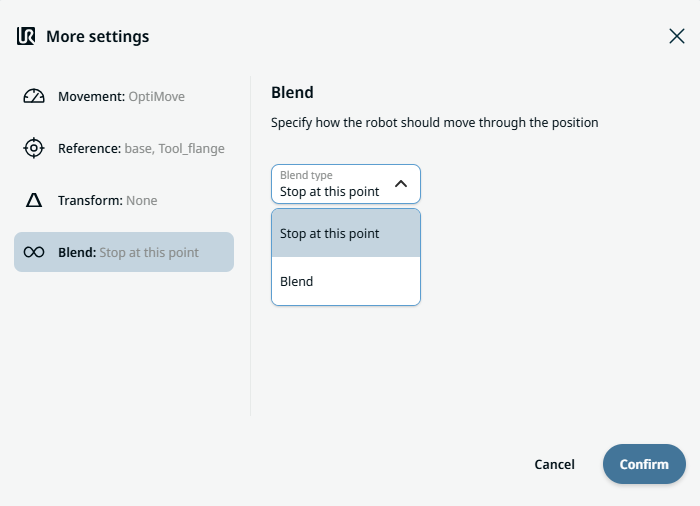
Blend setting |
|