Joint Move
| Açıklama |
The Joint Move is a move command node that supports Motion Profiles. The command creates a movement from point A to point B that is optimal for the robot. Hareket, A noktasından B noktasına doğrudan bir çizgi olmayabilir ancak eklemlerin başlangıç pozisyonu ve eklemlerin bitiş pozisyonu için optimaldir. Joint Move makes movements that are calculated in the robot arm joint space. Eklemler, hareketlerini aynı anda bitirmeleri için kontrol edilir. Bu hareket türü, uç ekipmanın takip edeceği kavisli yolla sonuçlanır.
|
|
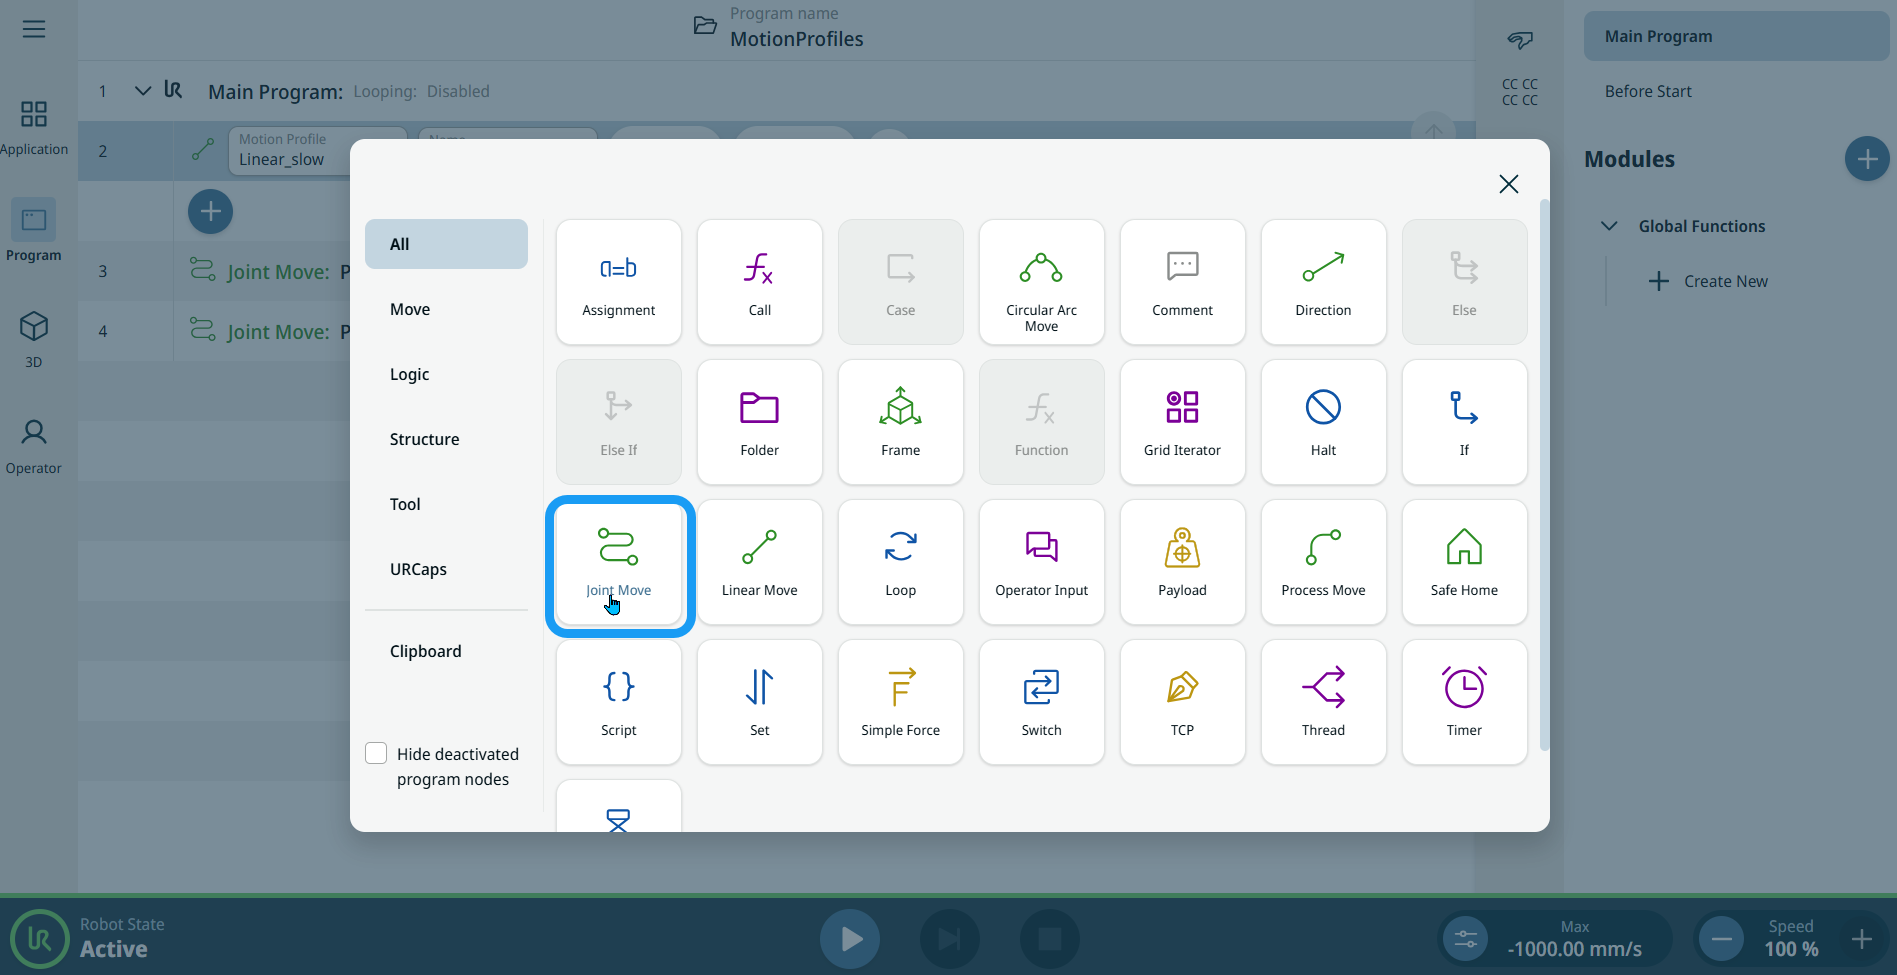
To access Joint Move command |
|
|
|
|
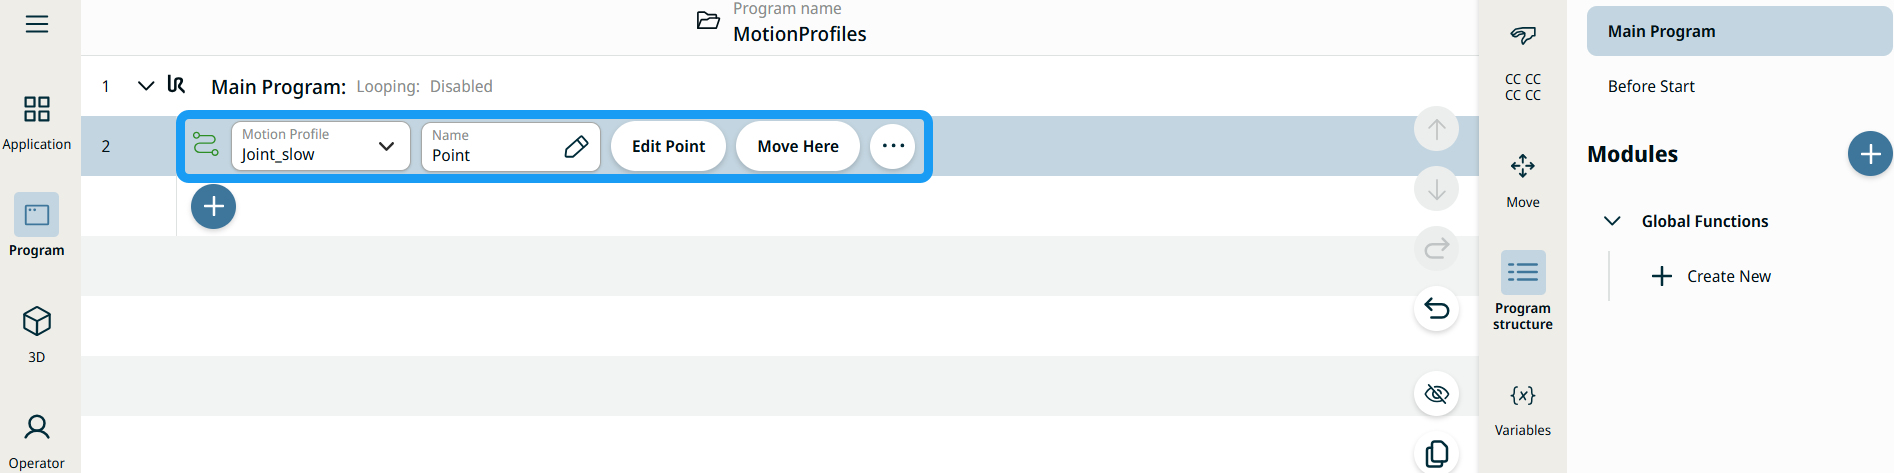
| Hareket Et Düğümlerindeki Devinim Profili etiketleri |
Program ağacındaki tüm Hareketle ilişkili komut düğümleri, her bir düğümle ilişkili Devinim Profilini gösterir. Bu özellik, kullanıcıların Hareket düğümünde seçili bir Devinim Profilini görebilmesini sağlar. Bu özellik, aşağıdaki komut düğümlerine uygulanır: Özel devinim profili olan Hareket düğümleri, Devinim profili yerine hız ve ivme değerlerini gösterir. |
|
|
|
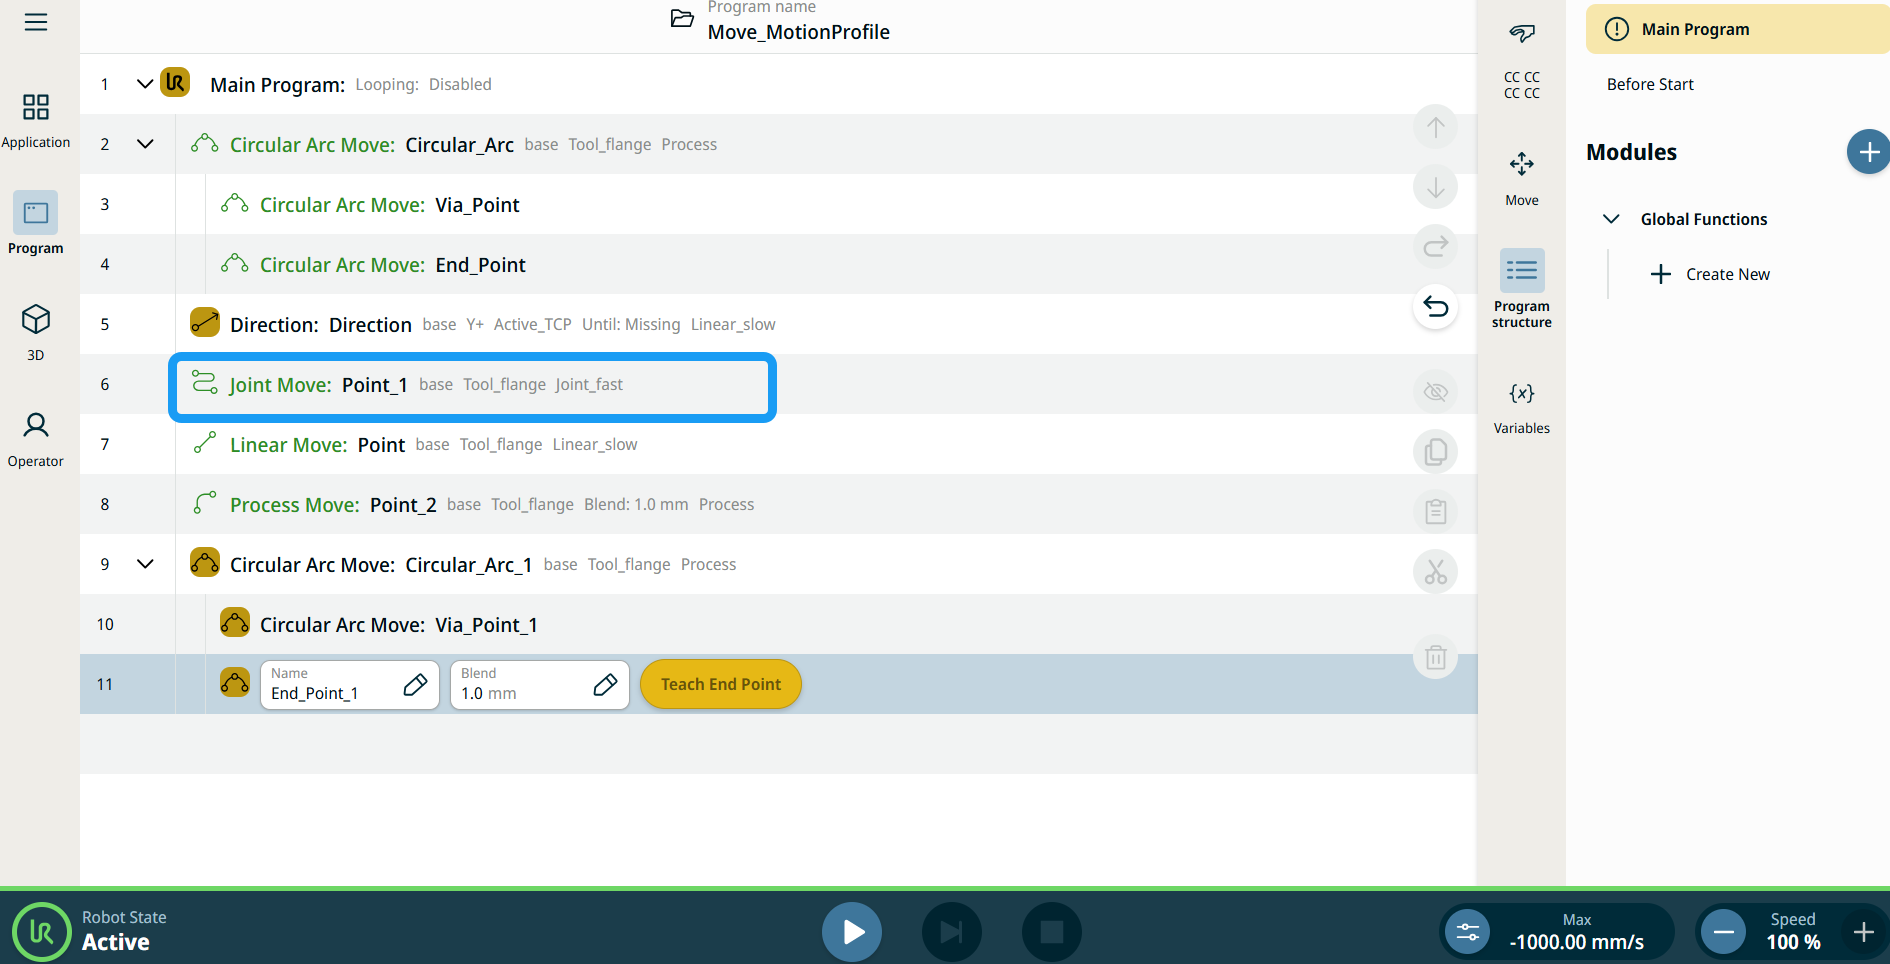
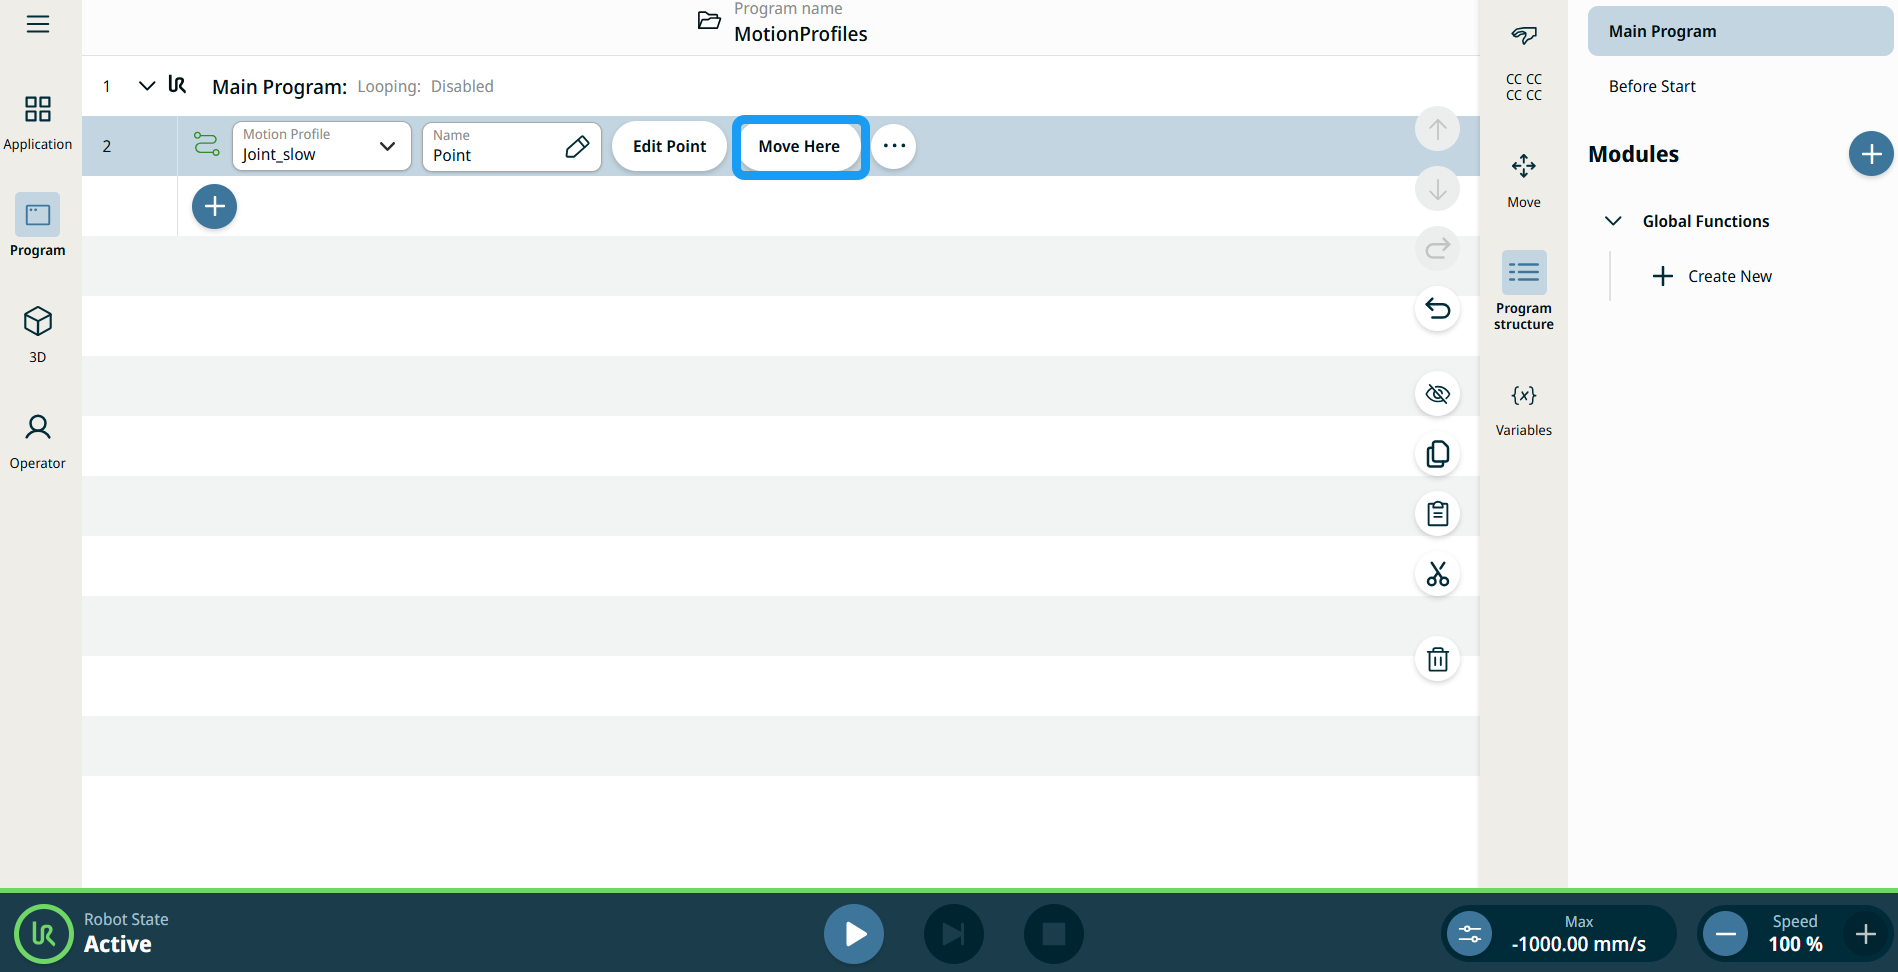
| Buraya Hareket Ettir düğmesini kullanma |
Buraya Hareket Et düğmesi, Linear Move ve Joint Move komutlarında görünür. Bu özellik, doğrudan program ağacından bir geçiş noktası pozisyonuna hareket etmenizi sağlar. Buraya Hareket Et düğmesine basmak, Robotu pozisyona hareket ettir diyaloğunu açar. Düğme, geçiş noktası öğretildiğinde görünür olur ve yalnızca robot durumu Normal veya Azaltılmış modda olduğunda etkinleşir.
|
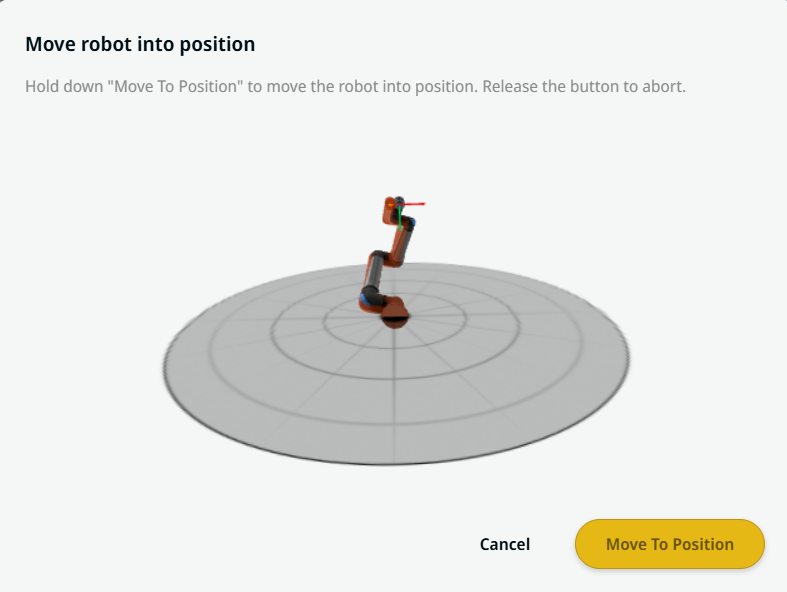
| Movement setting |
|
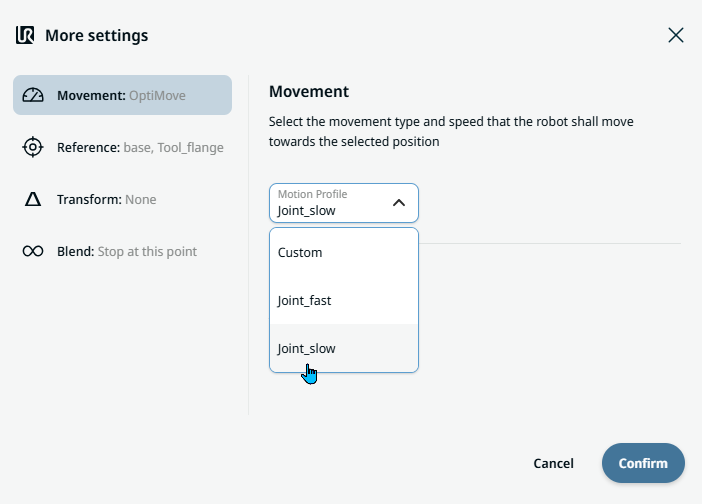
| Reference setting |
|
| Transform setting |
|
|
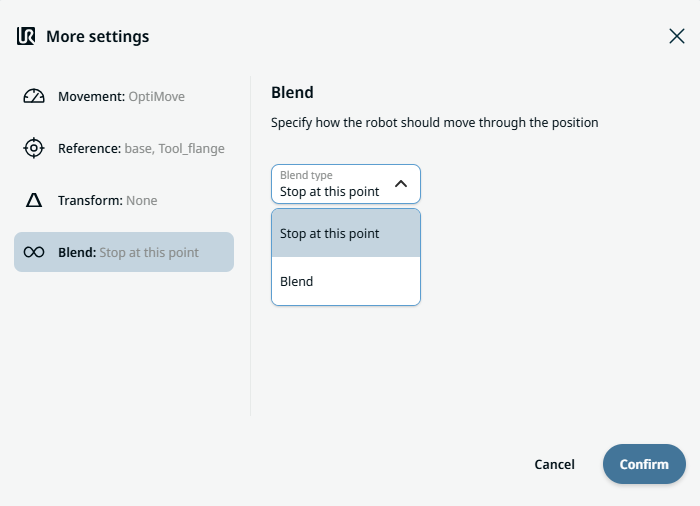
Blend setting |
|