Pohyb kĺbov
| Popis |
The Joint Move is a move command node that supports Motion Profiles. The command creates a movement from point A to point B that is optimal for the robot. Pohyb nemusí byť priamy medzi bodmi A a B, ale optimálny pre počiatočnú a konečnú polohu kĺbov. Pohyb kĺbov vykonáva pohyby, ktoré sú vypočítané v priestore kĺbov ramena robota. Kĺby sa ovládajú tak, aby skončili pohyb v tom istom čase. Výsledkom tohto typu pohybu je zakrivená dráha, ktorú má nástroj sledovať.
|
|
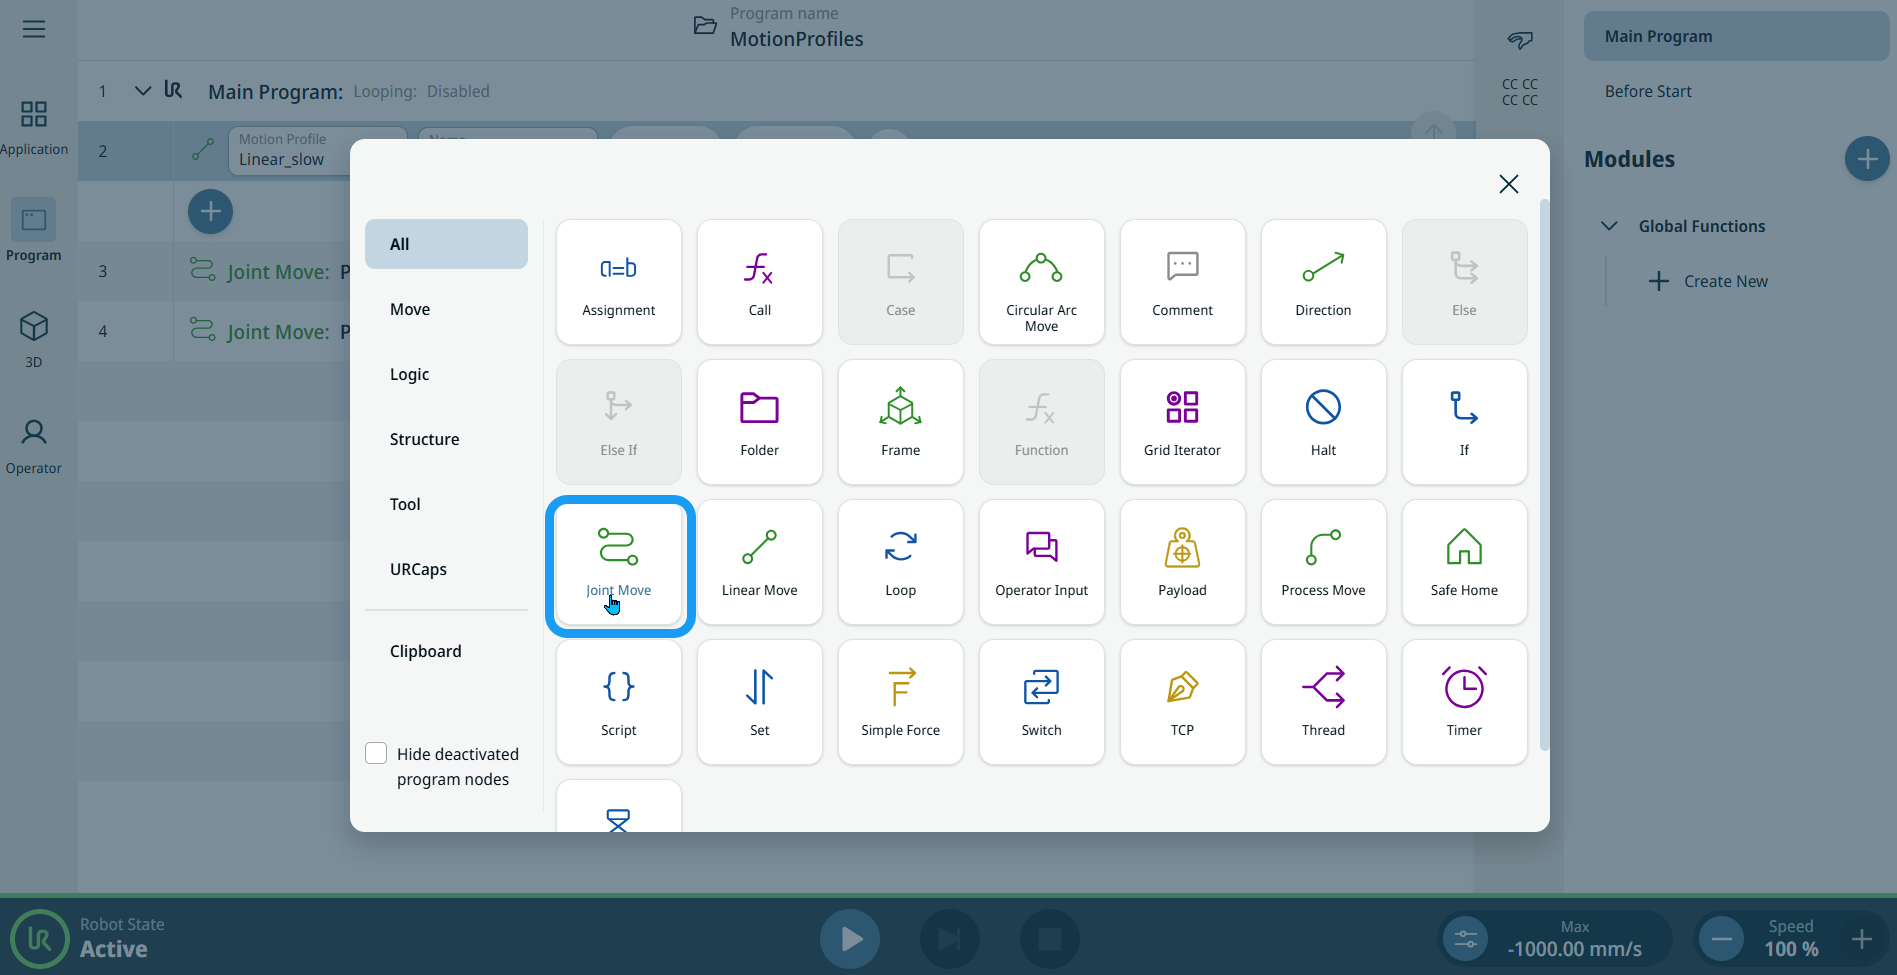
To access Joint Move command |
|
|
|
|

| Štítky profilu pohybu na uzloch pohybu |
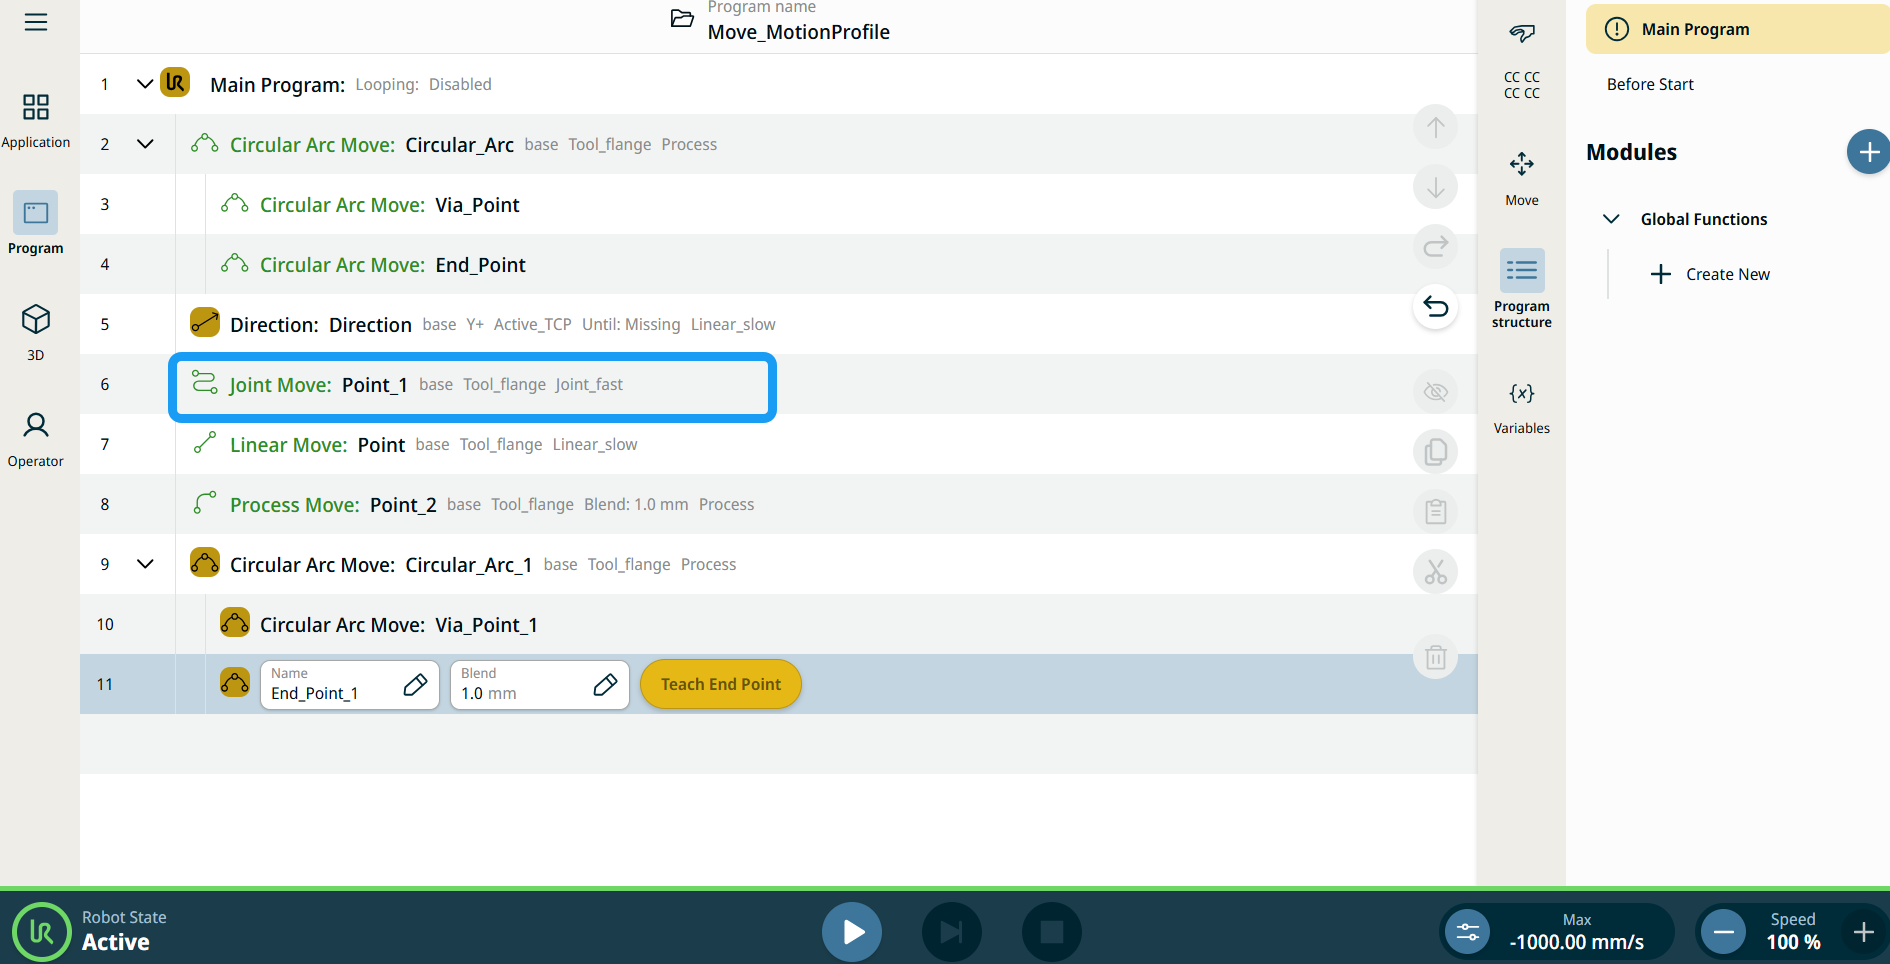
Všetky uzly príkazov súvisiace s pohybom v stromovej štruktúre programu zobrazujú profil pohybu pridružený ku každému uzlu. Táto funkcia umožňuje používateľom zobraziť vybraný profil pohybu na uzle pohybu. Táto funkcia je implementovaná na nasledujúcich príkazových uzloch: Pohybový uzol s vlastným profilom pohybu zobrazí hodnoty rýchlosti a zrýchlenia namiesto profilu pohybu. |
|
|
|
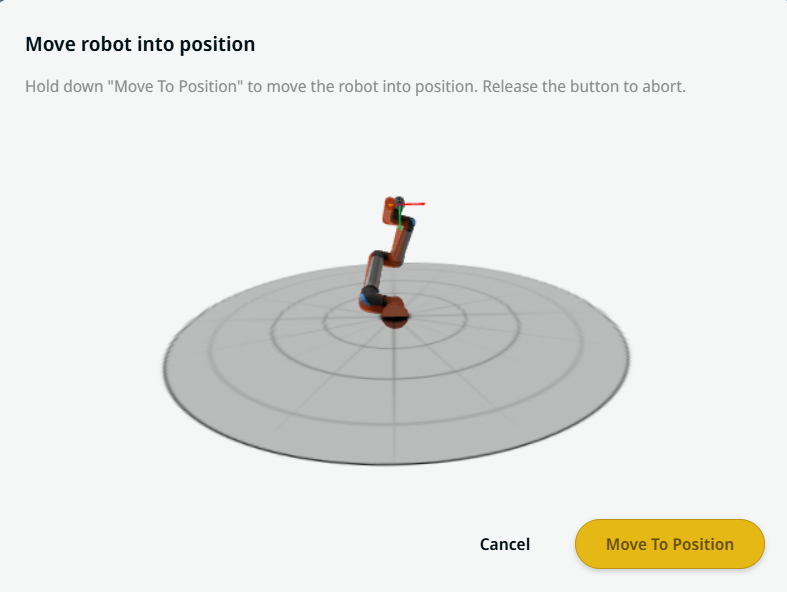
| Používanie tlačidla Presunúť sem |
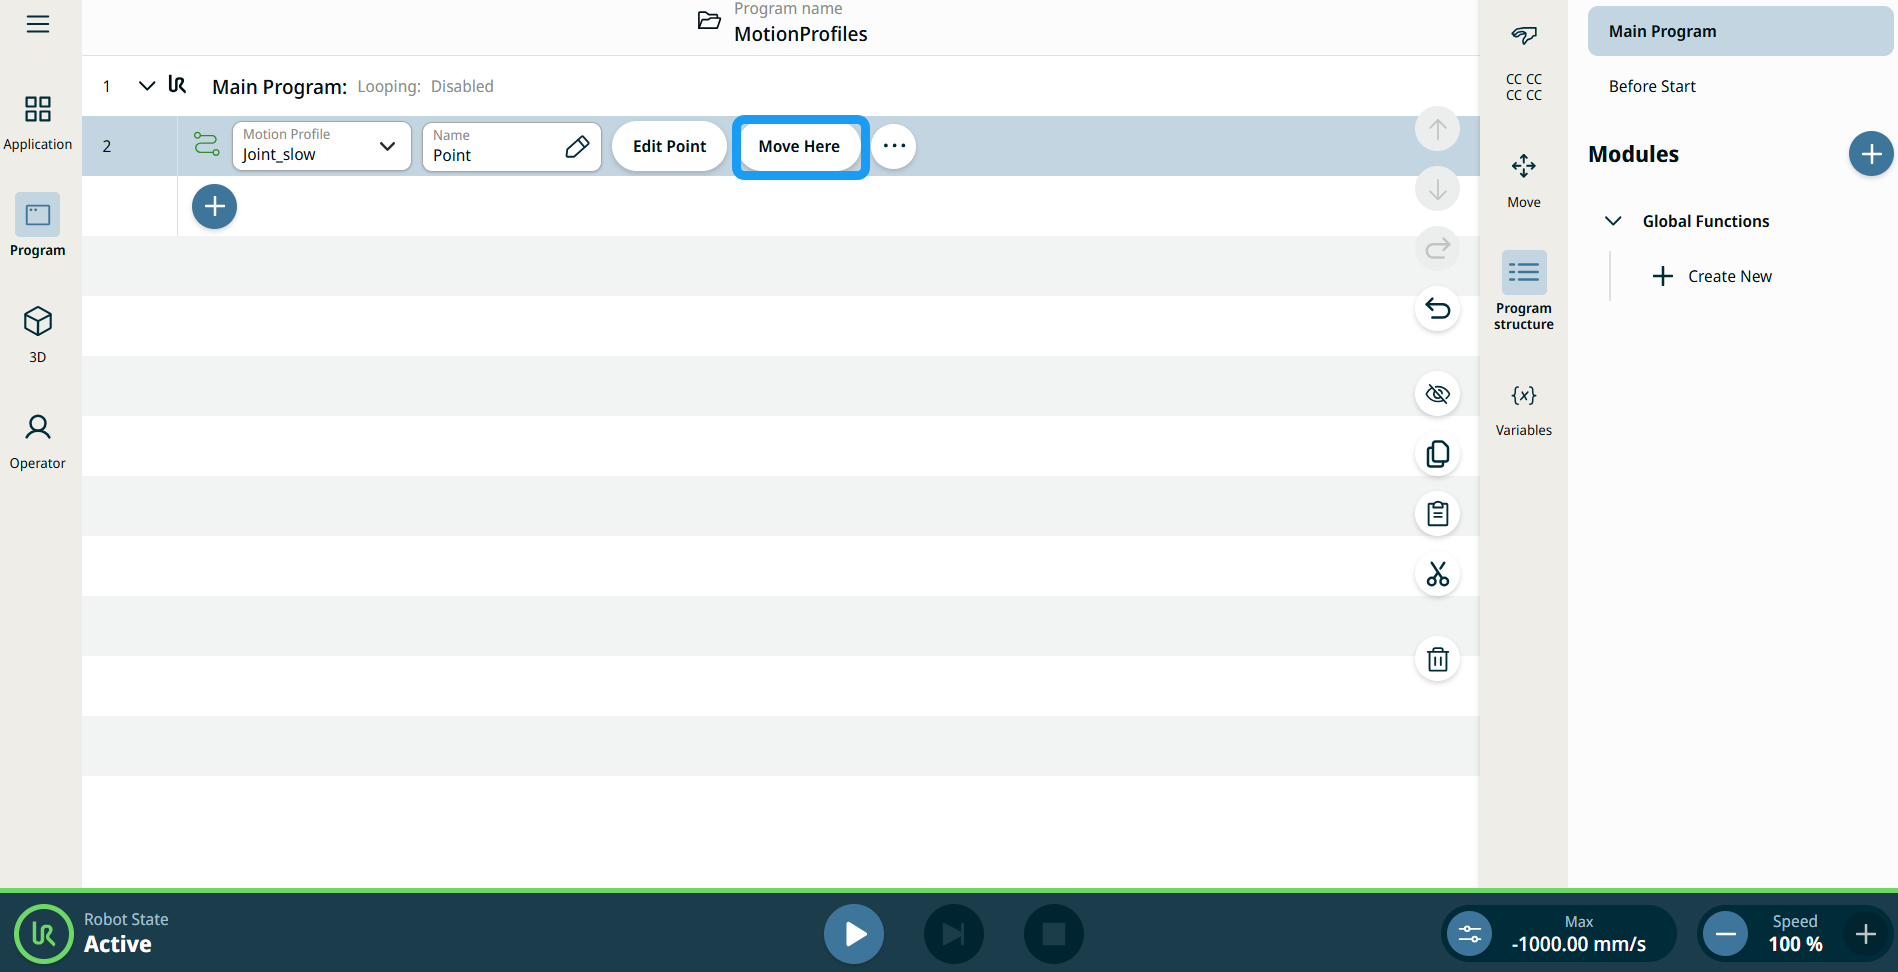
Tlačidlo Presunúť sem je viditeľné v príkazoch Lineárny pohyb a Pohyb kĺbov. Táto funkcia umožňuje presun do polohy traťového bodu priamo zo stromovej štruktúry programu. Stlačením tlačidla Presunúť sem sa otvorí dialógové okno Posunúť robota do správnej polohy. Tlačidlo je viditeľné, keď bol naučený traťový bod, a je aktivované len vtedy, keď je stav robota v režime Normálny alebo Znížený.
|
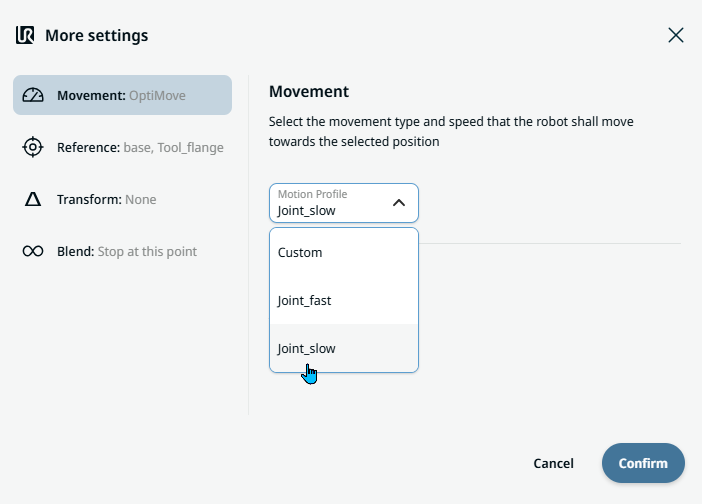
| Movement setting |
|
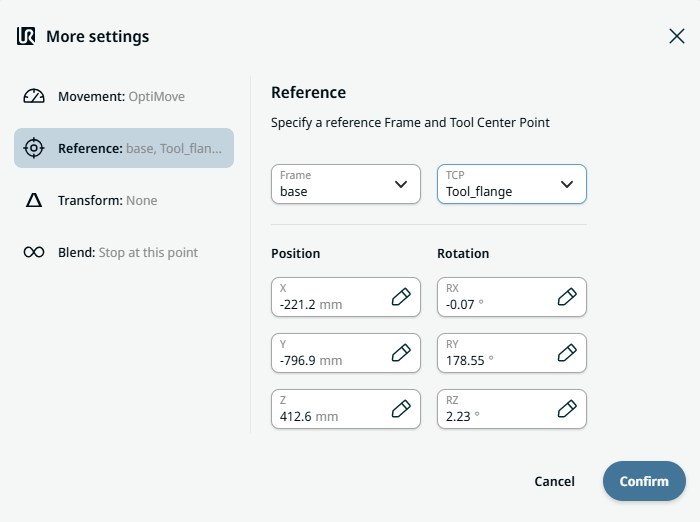
| Reference setting |
|
| Transform setting |
|
|
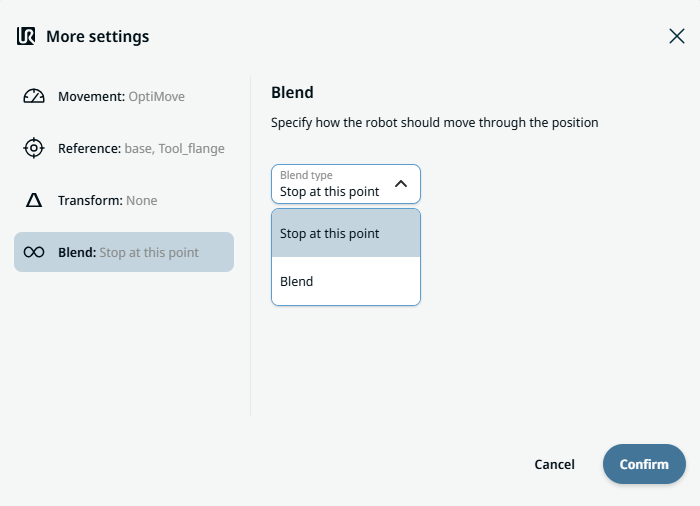
Blend setting |
|