Movimento da articulação
| Descrição |
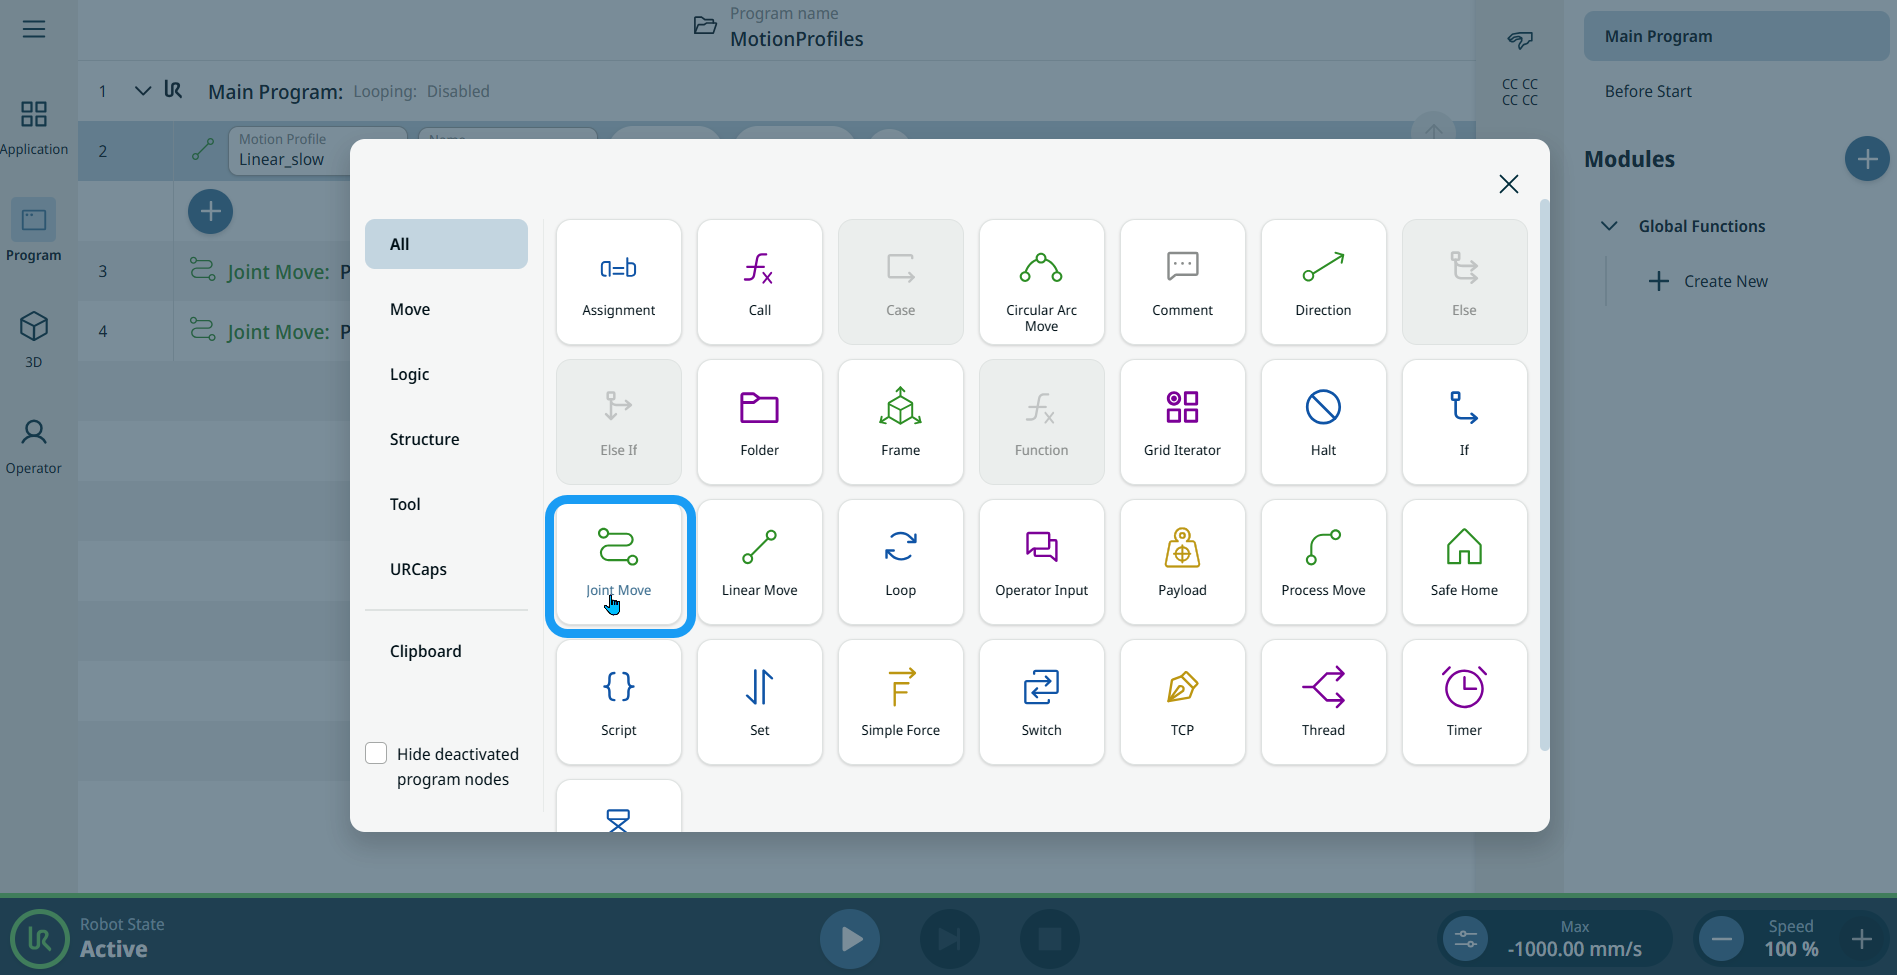
The Joint Move is a move command node that supports Motion Profiles. The command creates a movement from point A to point B that is optimal for the robot. O movimento pode não ser uma linha direta entre A e B, mas ideal para a posição inicial das articulações e a posição final das articulações. Movimento da Articulação faz movimentos calculados no espaço da articulação do braço robótico. As articulações são controladas para terminarem os seus movimentos em simultâneo. Este tipo de movimento resulta num caminho curvo para a ferramenta seguir.
|
|
To access Joint Move command |
|
|
|
|

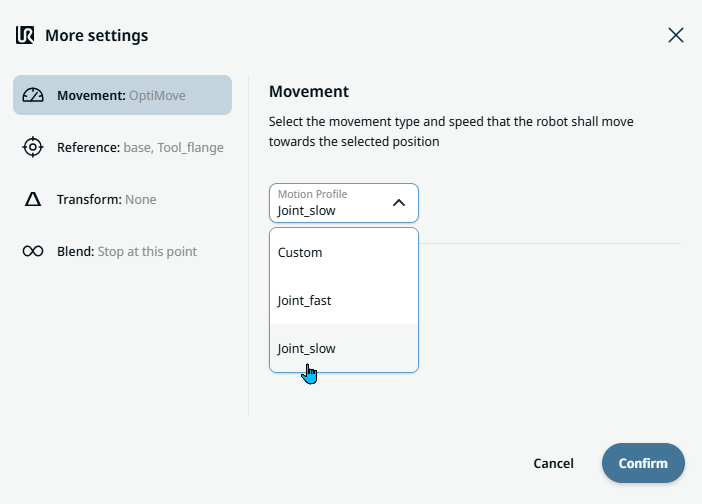
| Etiquetas de perfil de movimento nos nós de movimento |
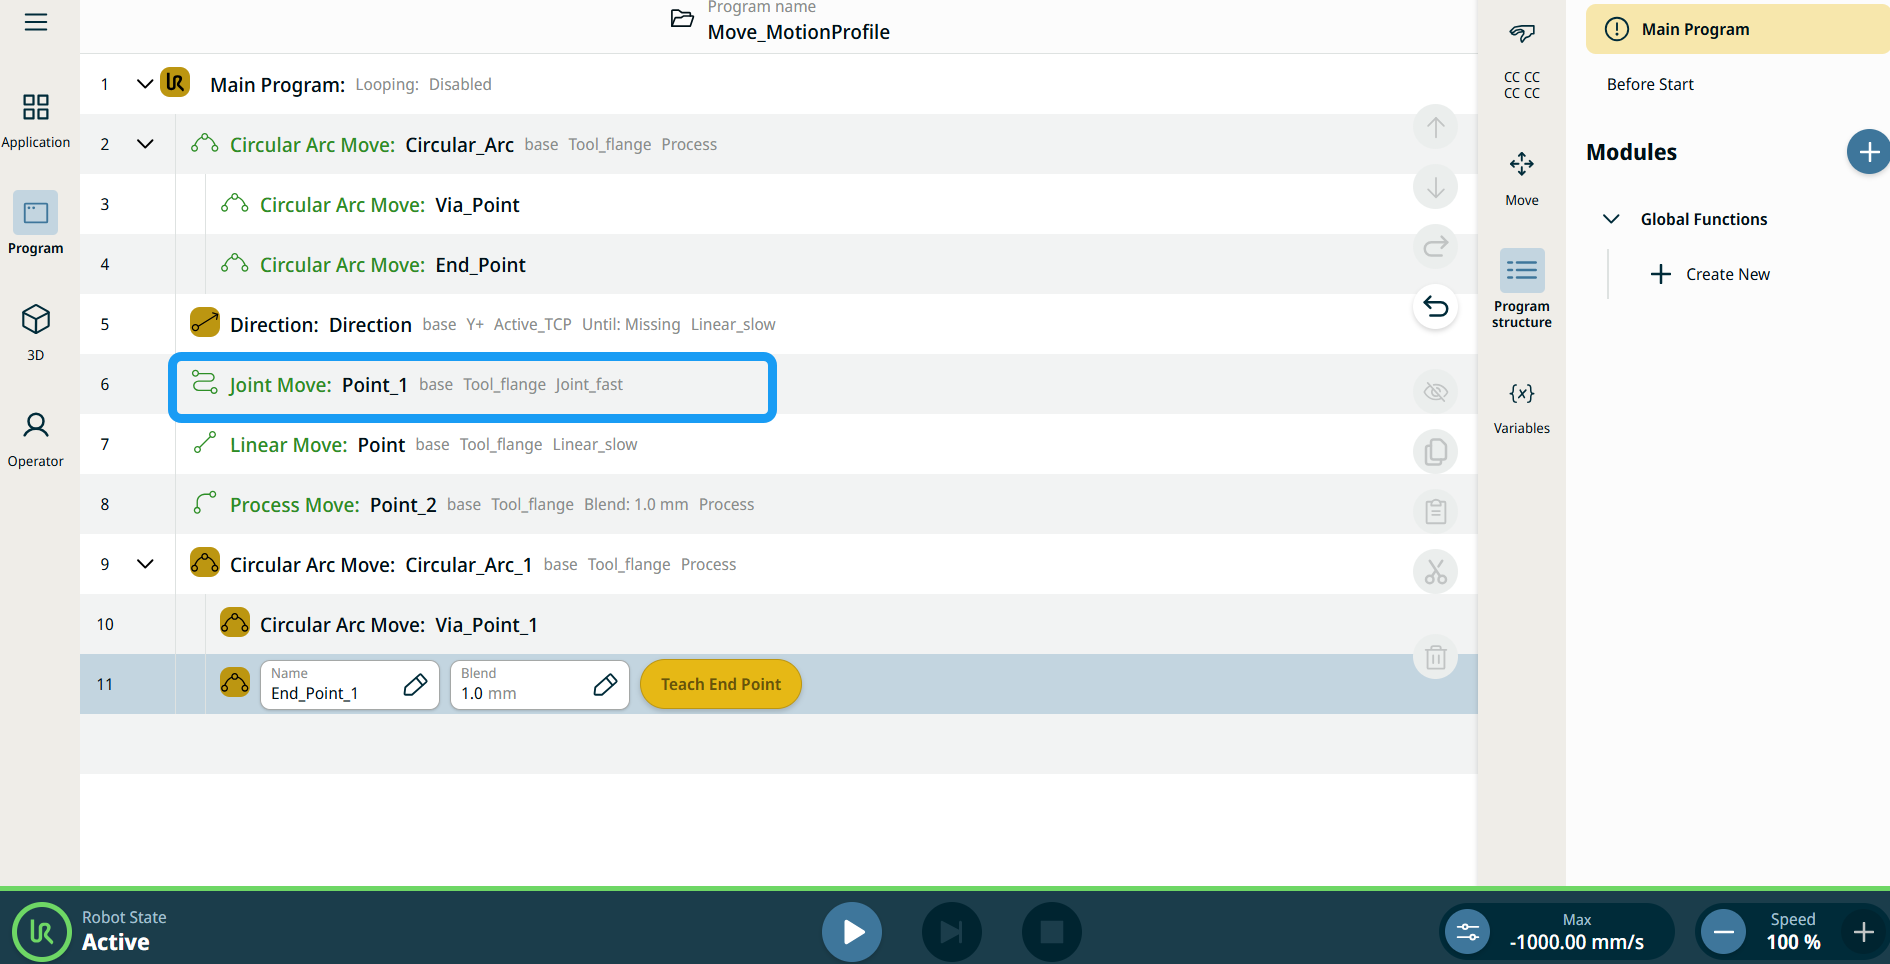
Todos os comandos de Mover relacionados a nós na árvore do programa apresentam o perfil Movimento associado a cada nó. Esta funcionalidade permite aos utilizadores ver o Perfil de Movimento selecionado num nó Move. Esta funcionalidade está implementada nos seguintes nós de comando: Os nós com perfil de movimento personalizado apresentarão os valores de velocidade e aceleração em vez do perfil de movimento. |
|
|
|
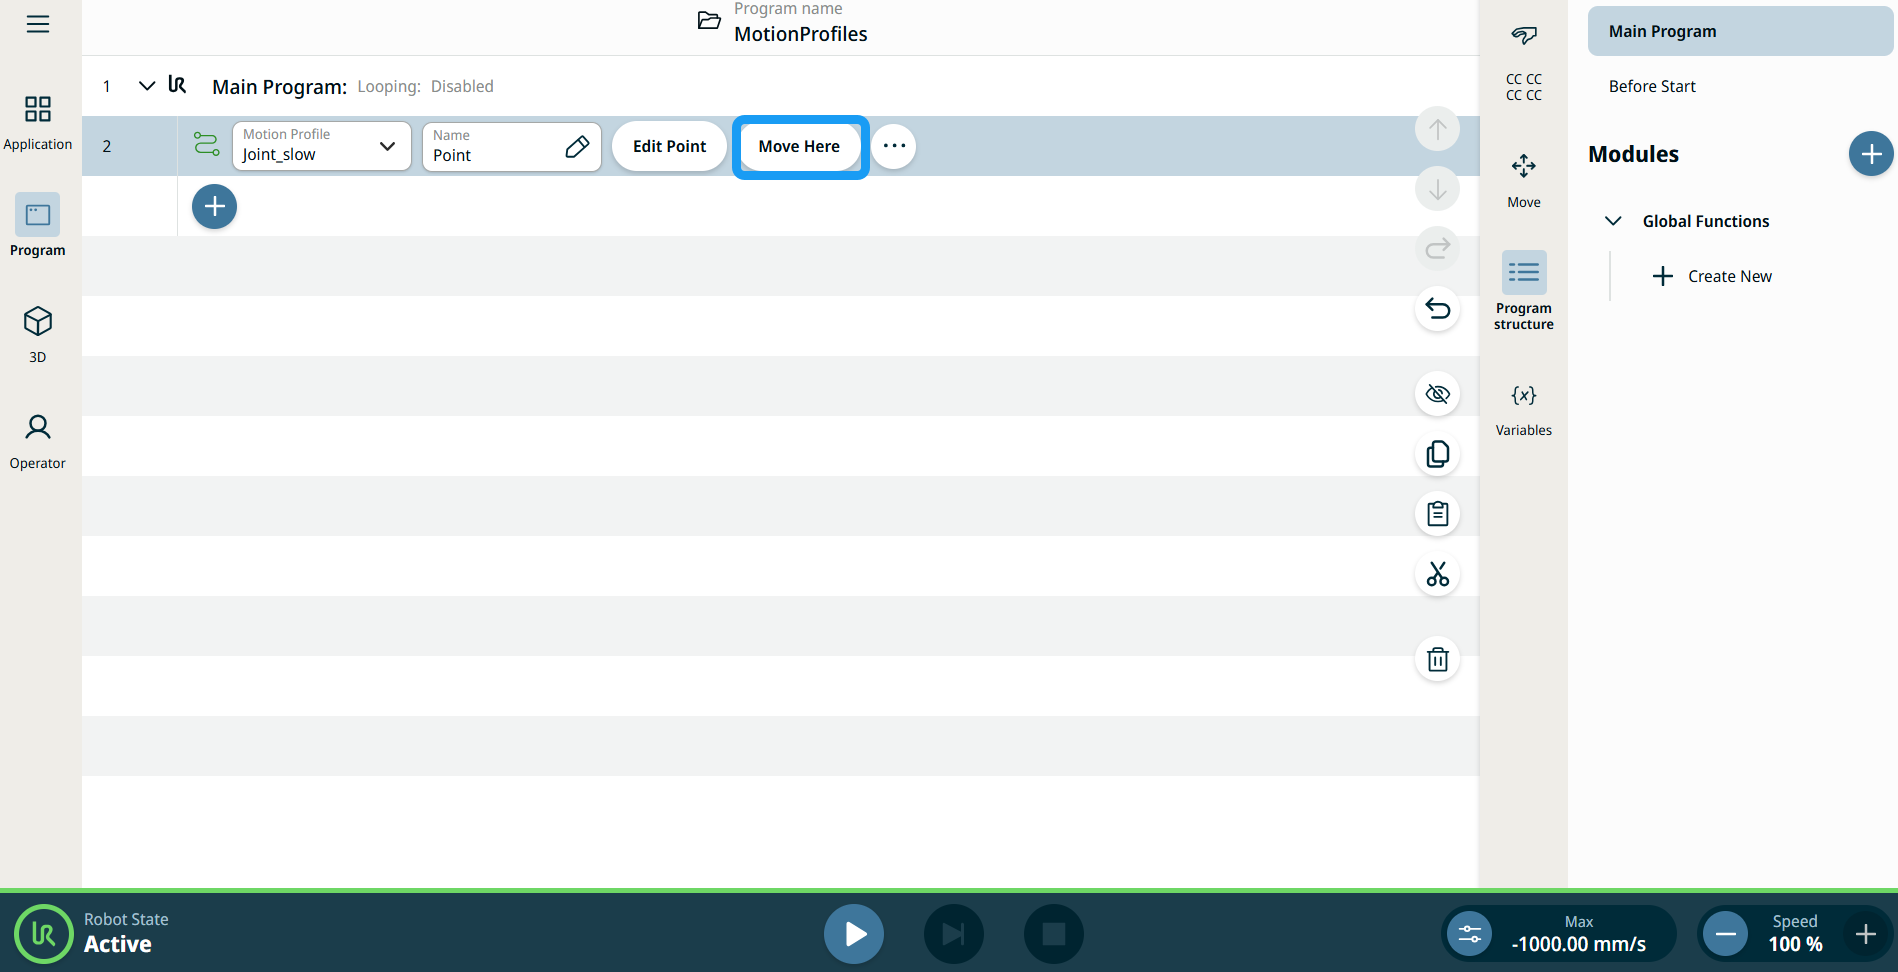
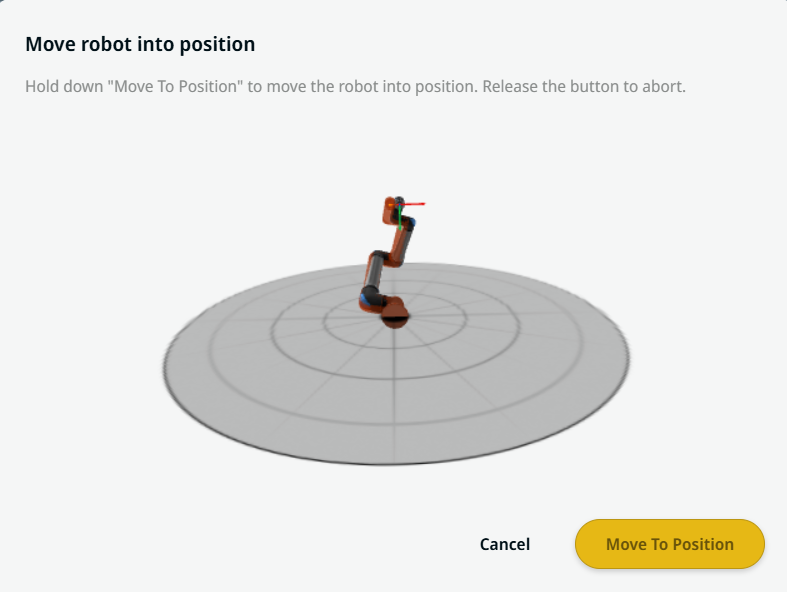
| Utilizar o botão Mover para aqui |
O botão Mover para aqui é visto em comandos Movimento linear e Movimento da articulação. Esta funcionalidade permite mover-se para a posição de um ponto de referência diretamente a partir da árvore do programa. Pressionar o botão Mover Aqui abre o robô Mover na caixa de diálogo da posição. O botão é visível quando o ponto de rota foi ensinado, e só é ativado quando o estado do robô está no modo Normal ou Reduzido.
|
| Movement setting |
|
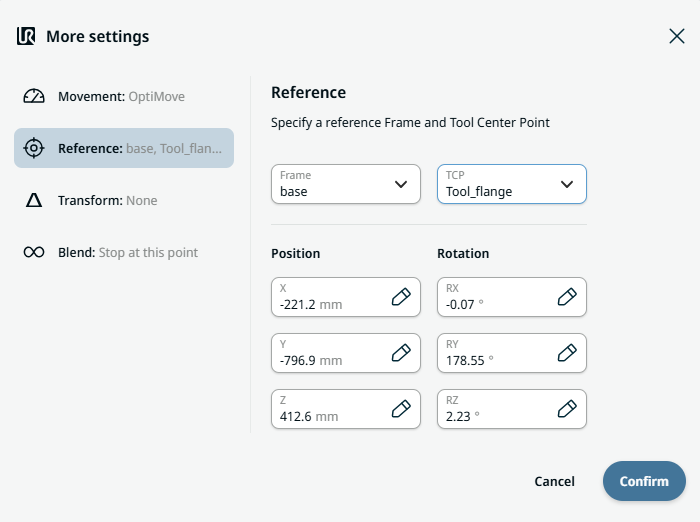
| Reference setting |
|
| Transform setting |
|
|
Blend setting |
|
