Movimento de arco circular

Descrição

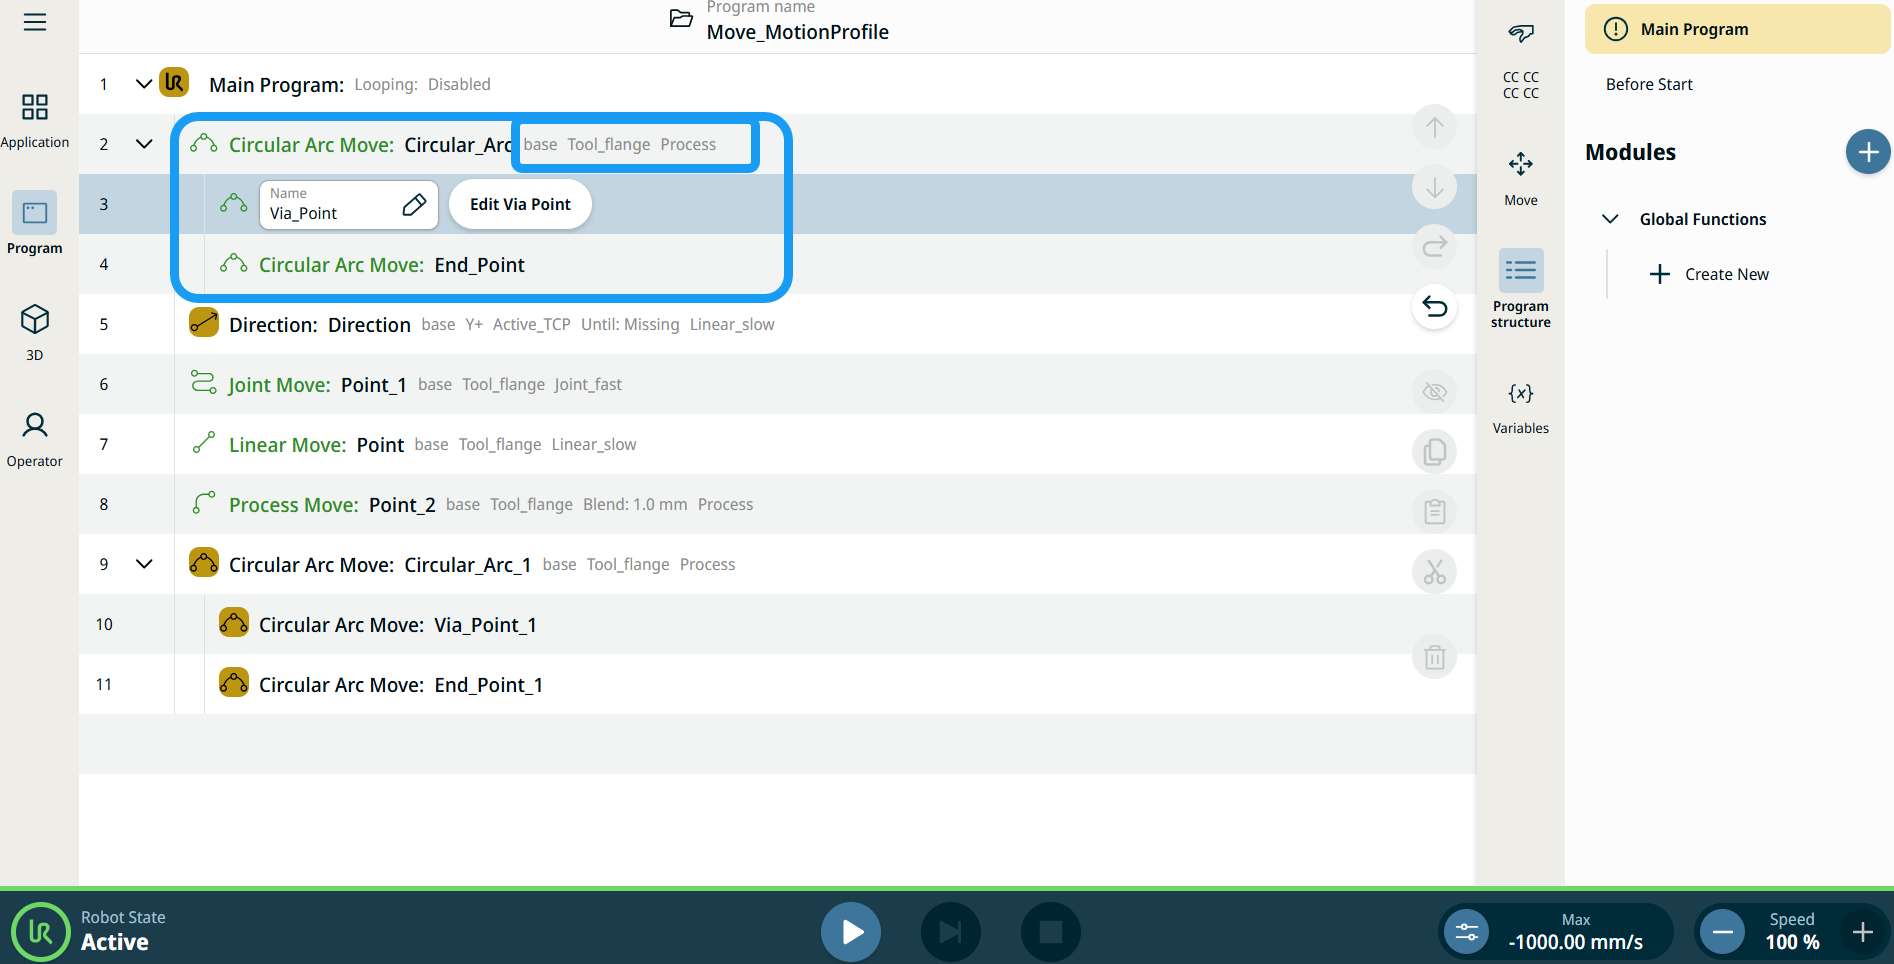
The Circular Arc Move enables you to program the robot to move in a circular motion while keeping the tool orientation either fixed or unconstrained.


To access Circular Arc Move command

  1. Go to the main program screen. Consulte Command Nodes.

  2. Tap the Circular Arc Move icon in the Commands toolbox.

    A parent node and two child nodes are inserted into the program tree.

    • First child node = Circular Arc Move: Via_Point

    • Second child node = Circular Arc Move: End_point

    The node has three editable fields and a More button for advanced options.


The three editable fields are:

  • Nome

    A name for referencing the node.

  • Velocidade

    The robot speed during the move.

  • Aceleração

    The robot acceleration during the move.

  1. Tap the Name field, and three tabs appear:

    • Valor

    • Variável

    • Expressão

  2. Enter the data in each tab and tap Confirm. See Value-Variable-Expression Tabs.

  3. Tap the Speed field, and three tabs appear:

    • Valor

    • Variável

    • Expressão

  4. Repeat step 4.

  5. Tap the Acceleration field, and three tabs appear:

    • Valor

    • Variável

    • Expressão

  6. Repeat step 4.

Etiquetas de perfil de movimento nos nós de movimento

Todos os comandos de Mover relacionados a nós na árvore do programa apresentam o perfil Movimento associado a cada nó. Esta funcionalidade permite aos utilizadores ver o Perfil de Movimento selecionado num nó Move. Esta funcionalidade está implementada nos seguintes nós de comando:

Os nós com perfil de movimento personalizado apresentarão os valores de velocidade e aceleração em vez do perfil de movimento.


To access More settings

Tap the More button, and the More settings screen appears.

On the left side, you see four advanced options:

  • Orientação

  • Movimento

  • Referência

  • Transformar


To use Orientation

  1. Tap Orientation.

    On the right side, two buttons are provided:

    • Fixo

    • Sem restrições

  2. Tap Fixed when you want the start point only to be used to define the tool orientation, and Confirm.

  3. Tap Unconstrained when you want the start point to transform to the endpoint to define tool orientation and Confirm.

    Note: A diagram shows the difference between the two endpoints when you choose unconstrained.


To use Movement

  1. Tap Movement.

    Two fields appear:

    • Velocidade

    • Aceleração

  2. Tap the Speed field, and three tabs appear:

    • Valor

    • Variável

    • Expressão

  3. Enter the data in each tab and tap Confirm. See Value-Variable-Expression Tabs.

  4. Tap the Acceleration field, and three tabs appear:

    • Valor

    • Variável

    • Expressão

  5. Enter the data in each tab and tap Confirm. See Value-Variable-Expression Tabs.


To use Reference

  1. Tap Reference, and two editable Frame and TCP fields appear.

    Tap the Frame field, and four options are selectable:

    • mundo

    • base

    • flange

    • tcp

  2. Tap the TCP field, and two options are selectable:

    • Tool_flange

    • Active_TCP

  3. In the Position column, tap X, Y, Z fields to enter the value, and Confirm.

  4. In the Rotation column, tap RX, RY, RZ fields to enter the value, and tap Confirm.


To use Transform

  1. Tap Transform.

  2. Tap the Pose field to specify how the position needs to be transformed and Confirm.


To use Circular Arc Move: Via_point

  1. Tap the Circular Arc Move: Via_Point node and two fields appear:

    • Nome

    • Teach Via Point

  2. Tap the Name field, and three tabs appear:

    • Valor

    • Variável

    • Expressão

  3. Enter the data in each tab and tap Confirm. See Value-Variable-Expression Tabs.

  4. Tap Teach Via Point.

    The 3D viewer screen of the robot appears. (See Movimento da articulação and Movimento linear for details of use.)


To use Circular Arc Move: End_Point

  1. Tap the Circular Arc Move: End_Point node, and three fields appear:

    • Nome

    • Misturar

    • Teach Via Point

  2. Tap the Name field, and three tabs appear:

    • Valor

    • Variável

    • Expressão

  3. Enter the data in each tab and tap Confirm. See Value-Variable-Expression Tabs.

  4. Tap the Blend field, and three tabs appear:

    • Valor

    • Variável

    • Expressão

  5. Repeat step 3.

  6. Tap Teach End Point.

    The 3D viewer screen of the robot appears. (See Movimento da articulação and Movimento linear for details of use.)