Leddbevegelse
| Beskrivelse |
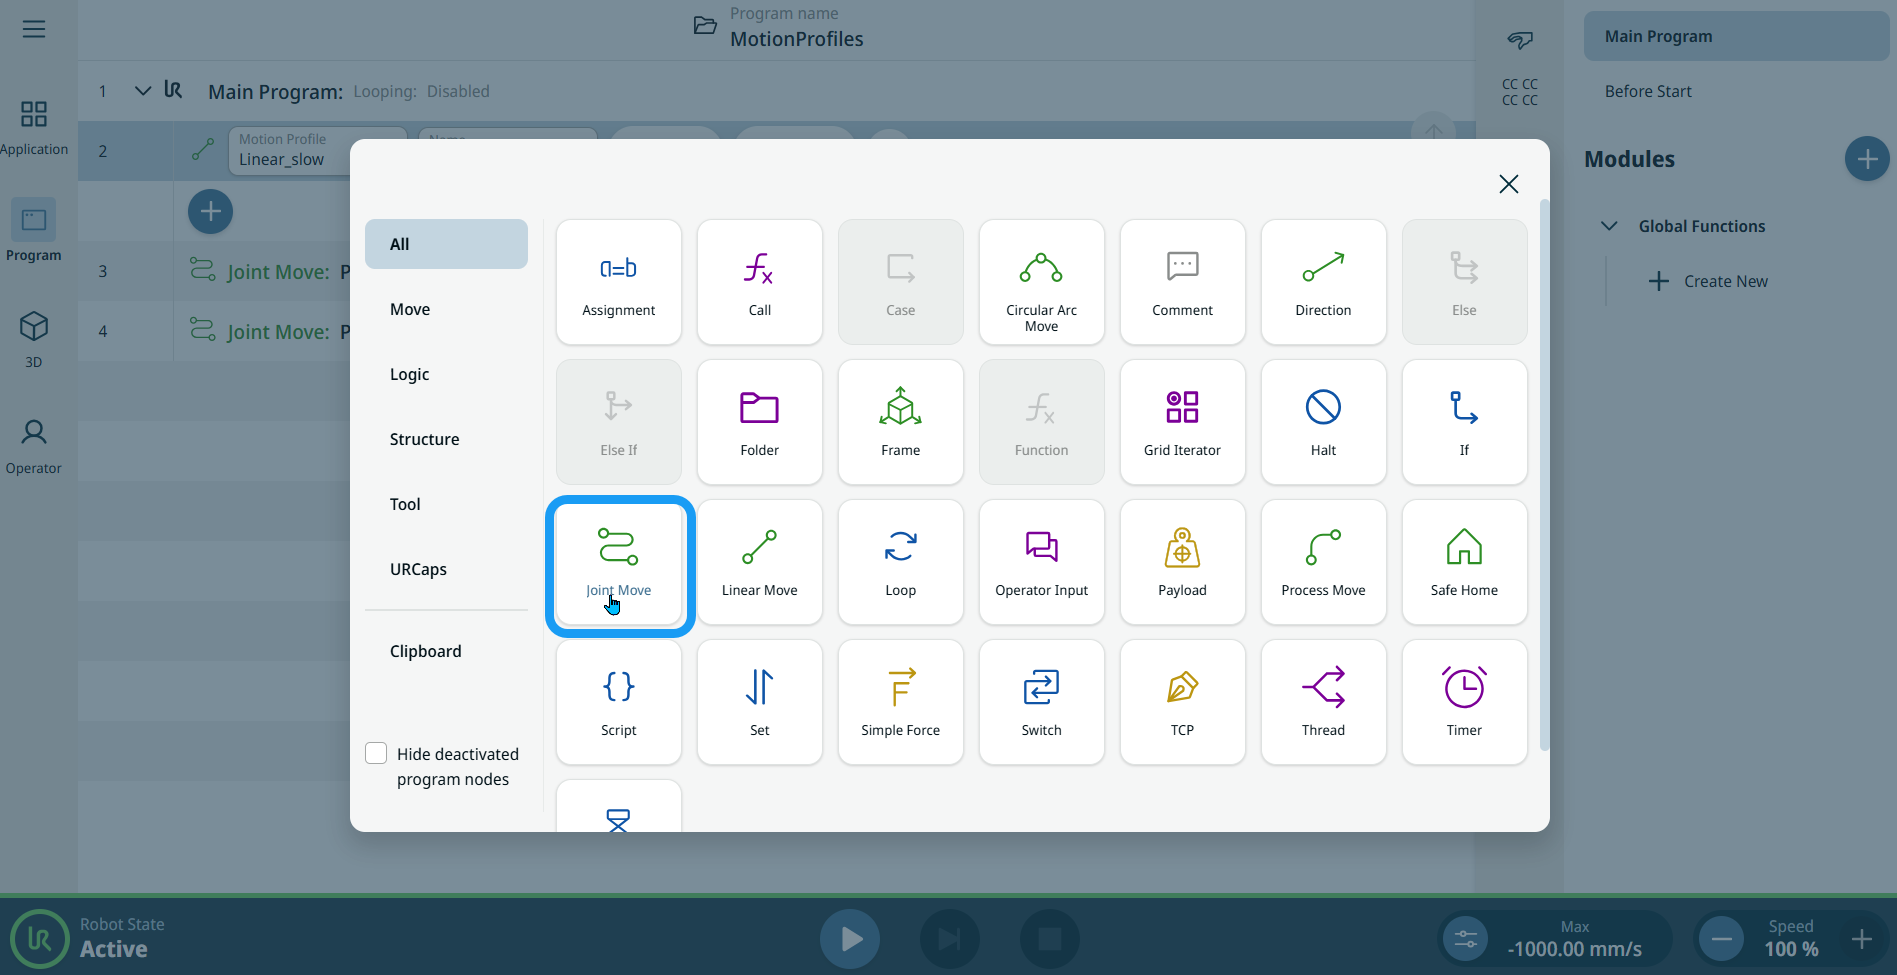
The Joint Move is a move command node that supports Motion Profiles. The command creates a movement from point A to point B that is optimal for the robot. Bevegelsen er kanskje ikke en direkte linje mellom A og B, men optimal for startposisjonen til leddene og sluttposisjonen til leddene. Flytt ledd gjør bevegelser som beregnes i robotarmens leddrom. Leddene styres for å fullføre bevegelsene sine samtidig. Denne bevegelsestypen resulterer i en buet bane som verktøyet skal følge.
|
|
To access Joint Move command |
|
|
|
|
| Bevegelsesprofiletiketter på Flytt-noder |
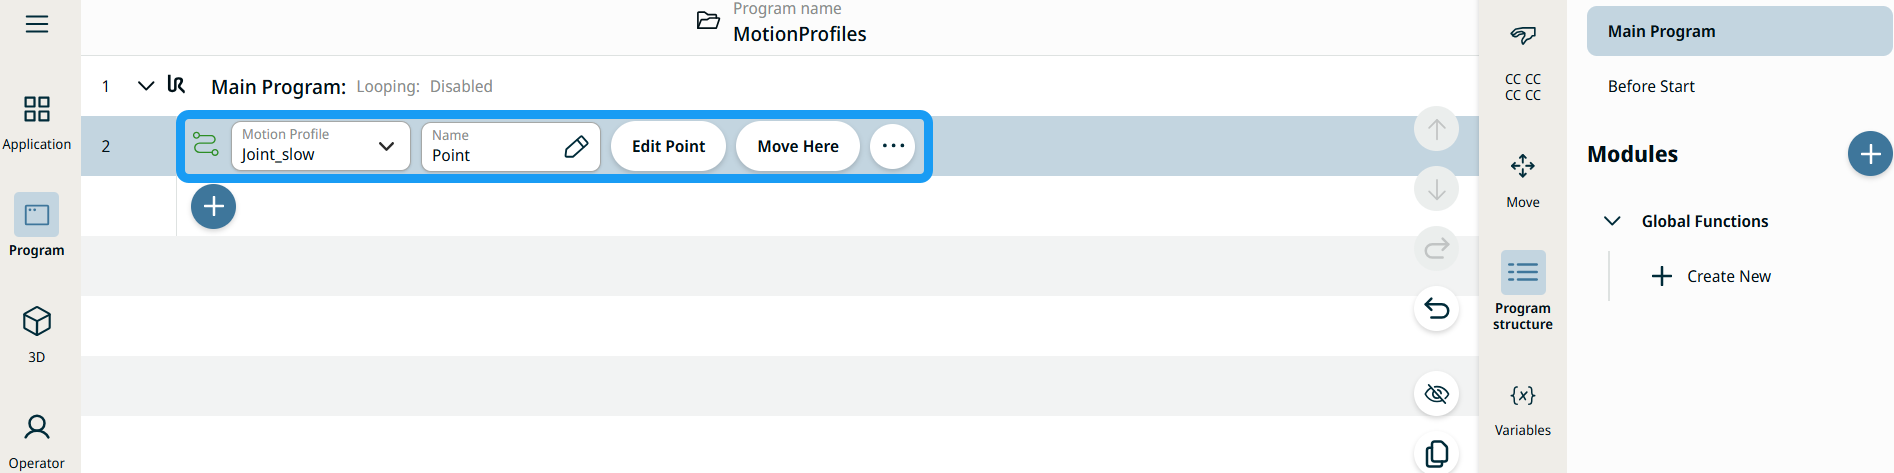
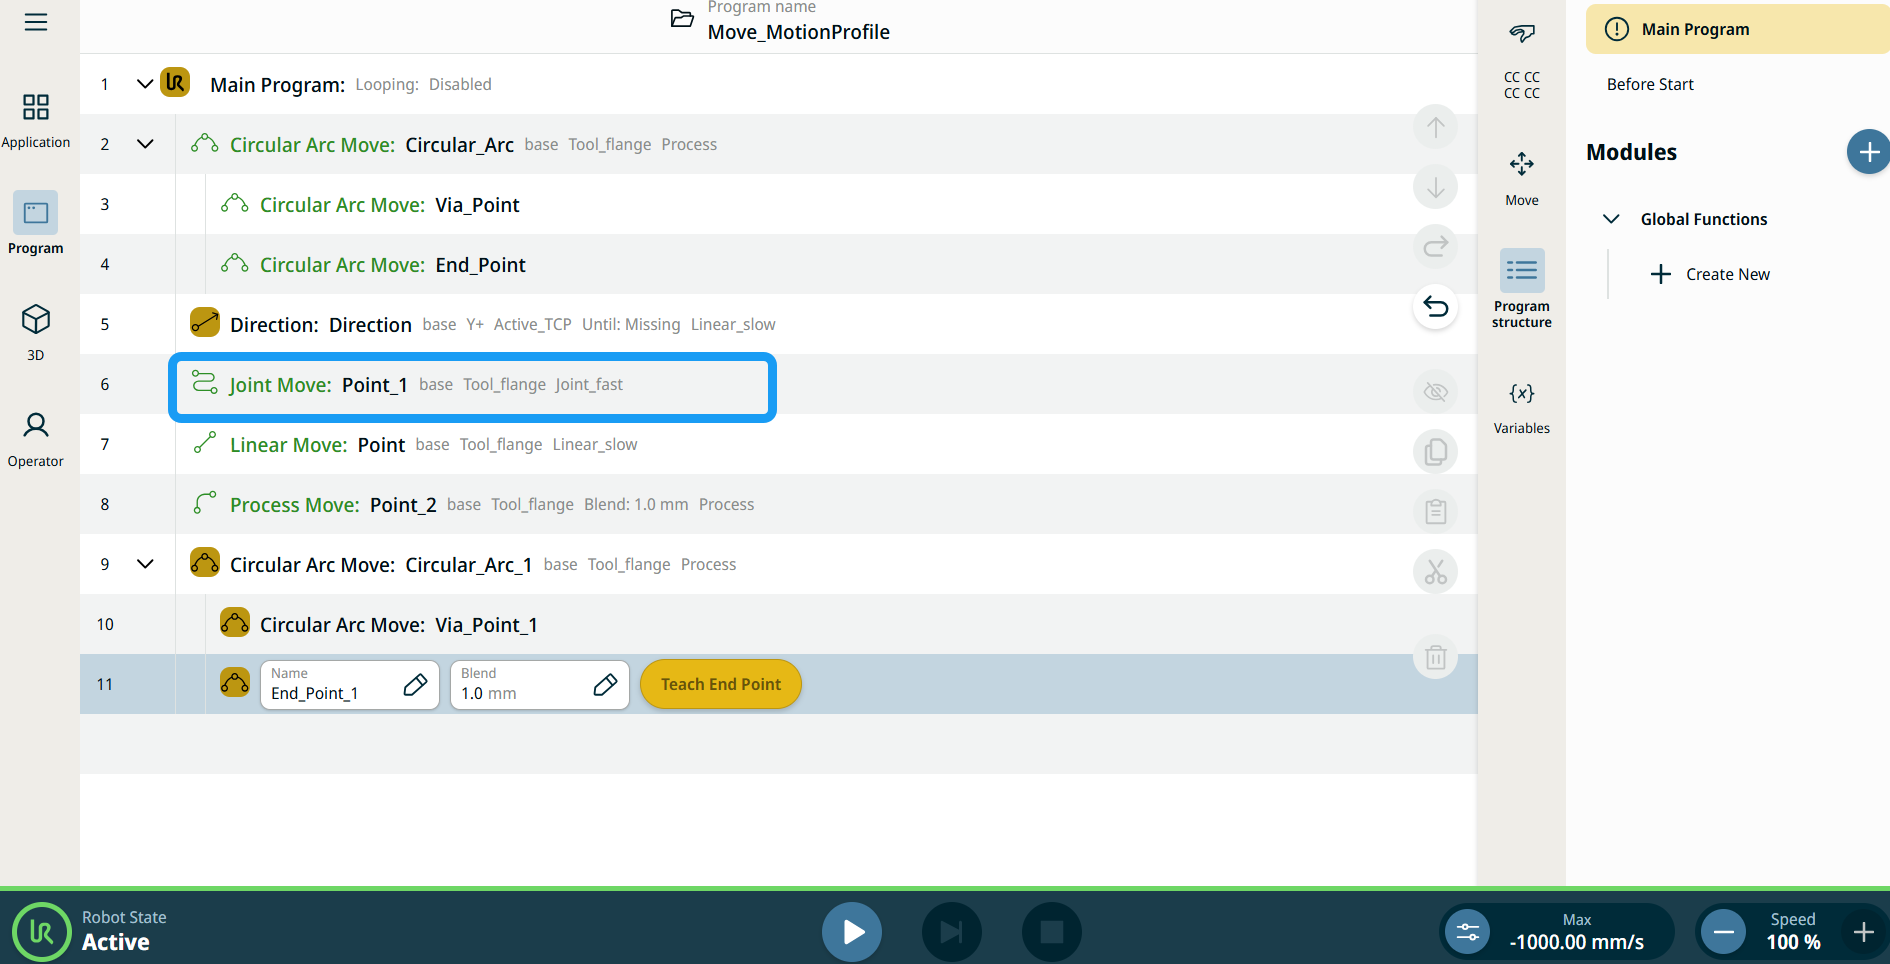
Alle Flytt-relaterte kommandonoder i programtreet viser Bevegelsesprofilen knyttet til hver node. Denne funksjonen gjør det mulig for brukere å se den valgte Bevegelsesprofilen på en Flytt-node. Denne funksjonen er implementert på følgende kommandonoder: Flytt-noder med egendefinert bevegelsesprofil vil vise verdiene for hastighet og akselerasjon i stedet for Bevegelsesprofil. |
|
|
|
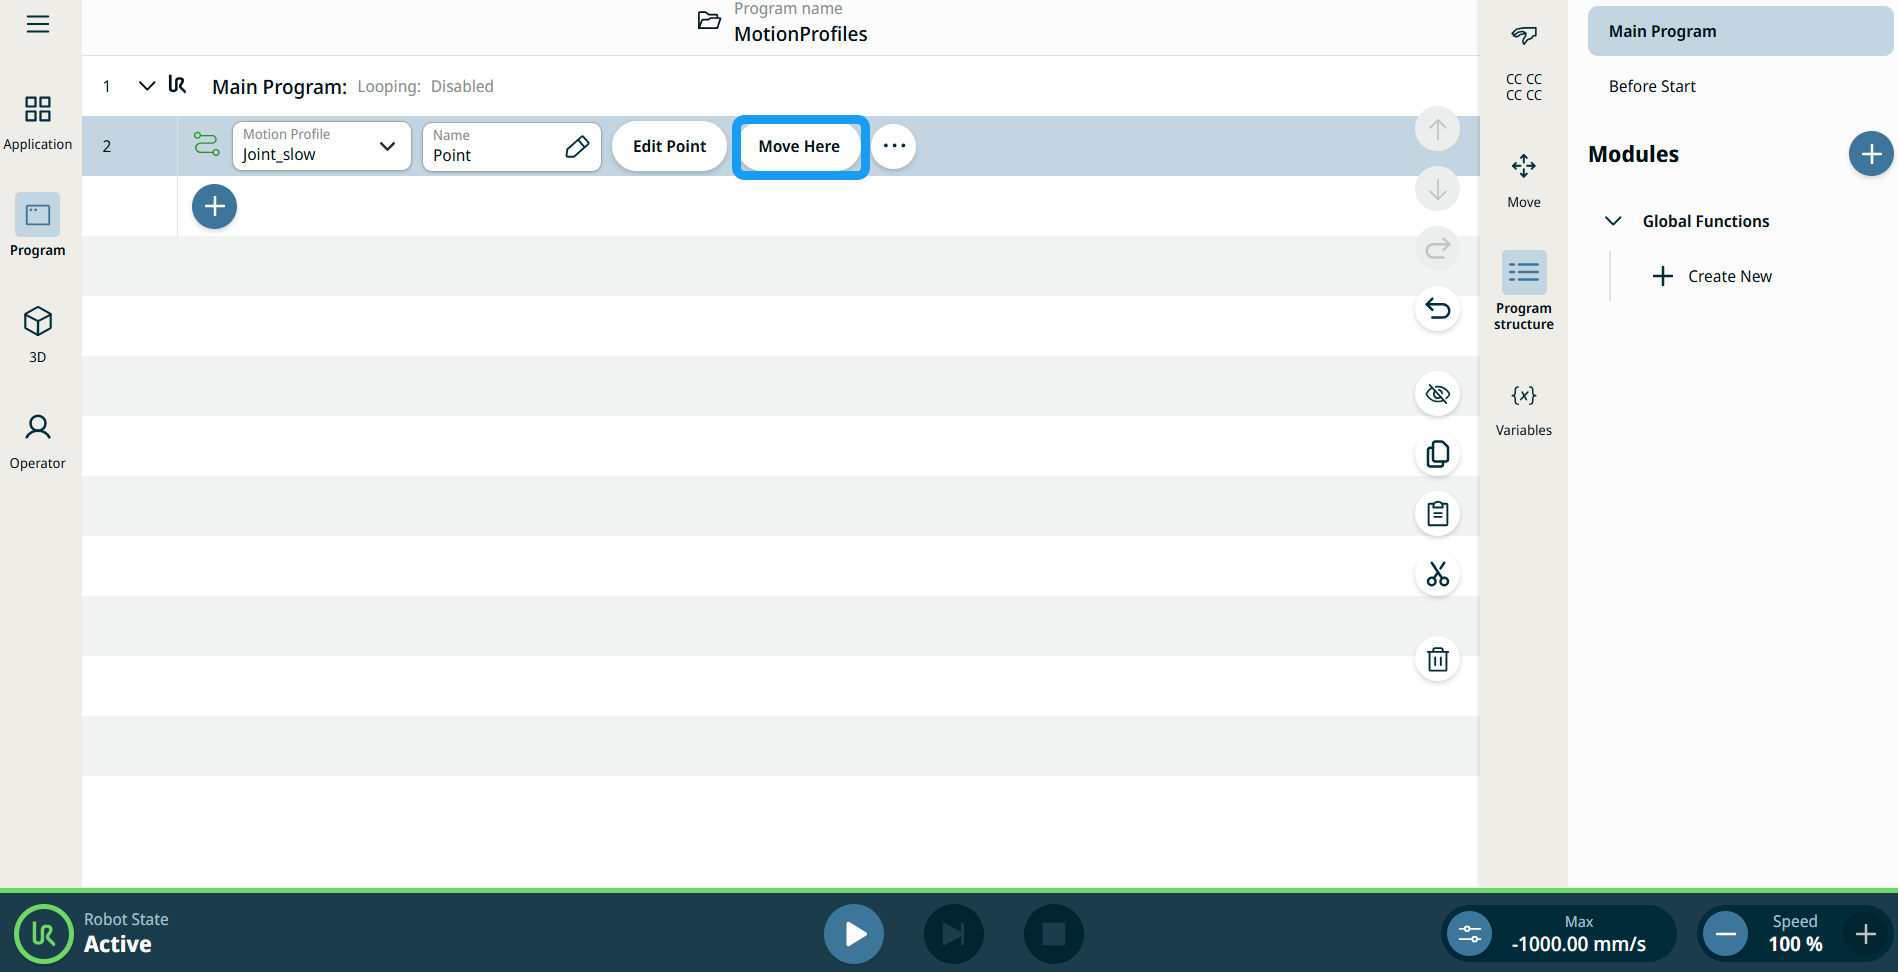
| Bruke Flytt hit-knappen |
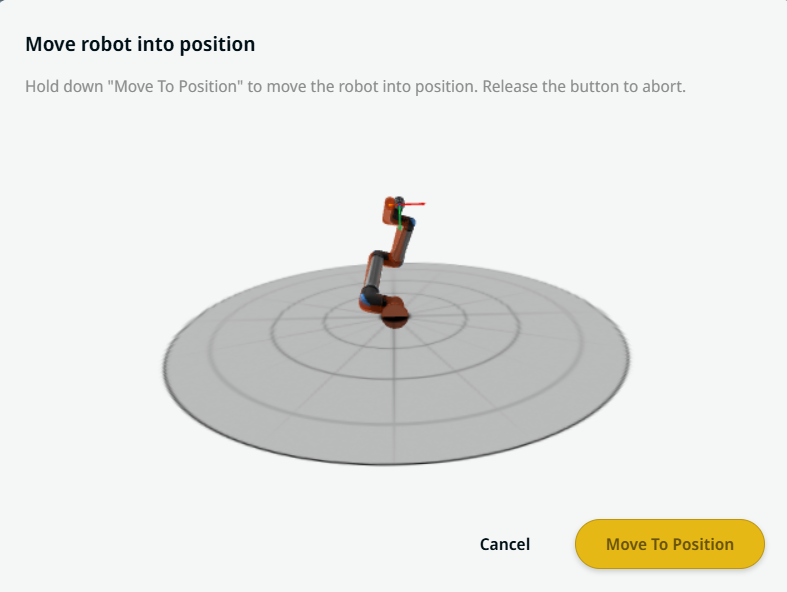
Flytt hit-knappen er tilgjengelig i kommandoene Lineær bevegelse og Leddbevegelse. Denne funksjonen gjør det mulig å gå direkte til posisjonen til et vendepunkt fra programtreet. Å trykke på Flytt her-knappen åpner Flytt roboten til posisjon-dialogen. Knappen er synlig når vendepunktet er lært, og er kun aktivert når robotens status er i Normal eller Redusert modus.
|
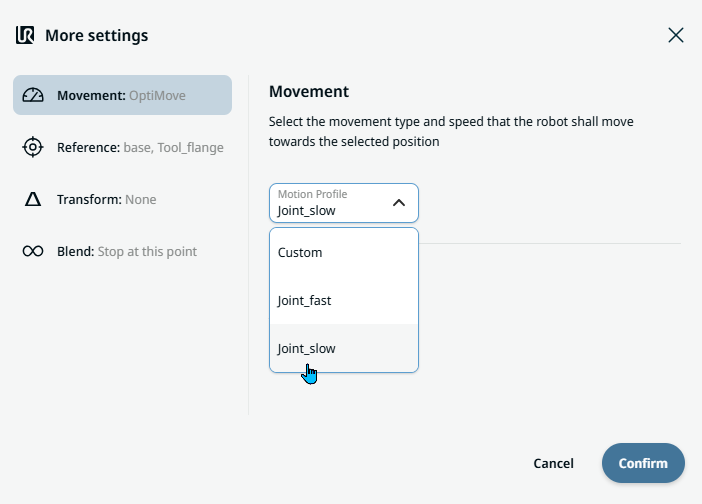
| Movement setting |
|
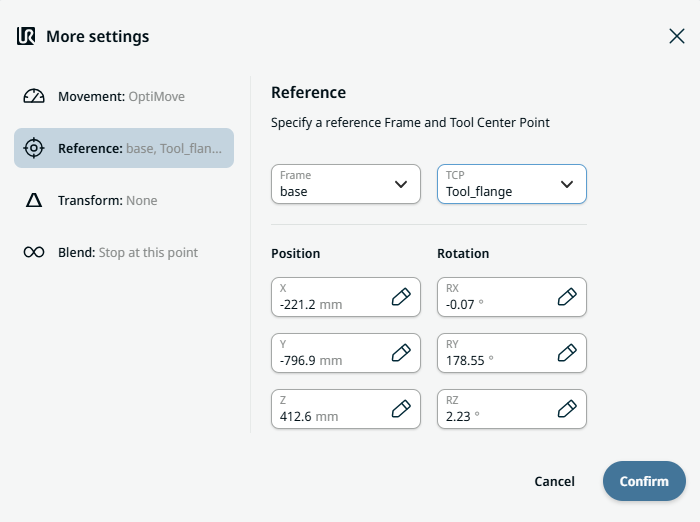
| Reference setting |
|
| Transform setting |
|
|
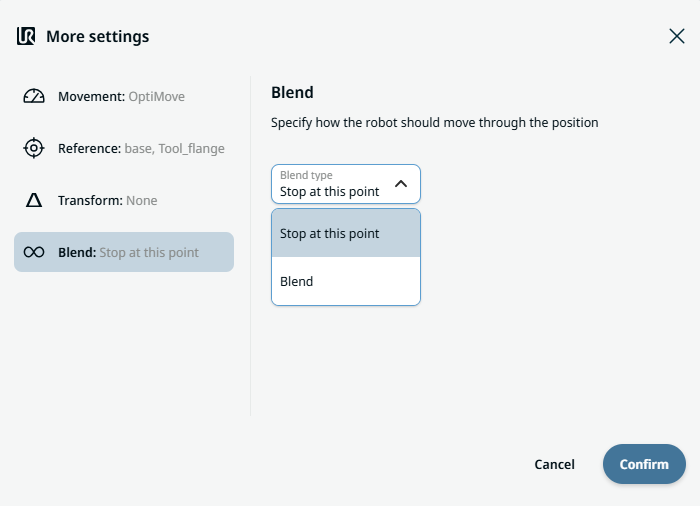
Blend setting |
|