선형 이동
| 설명 |
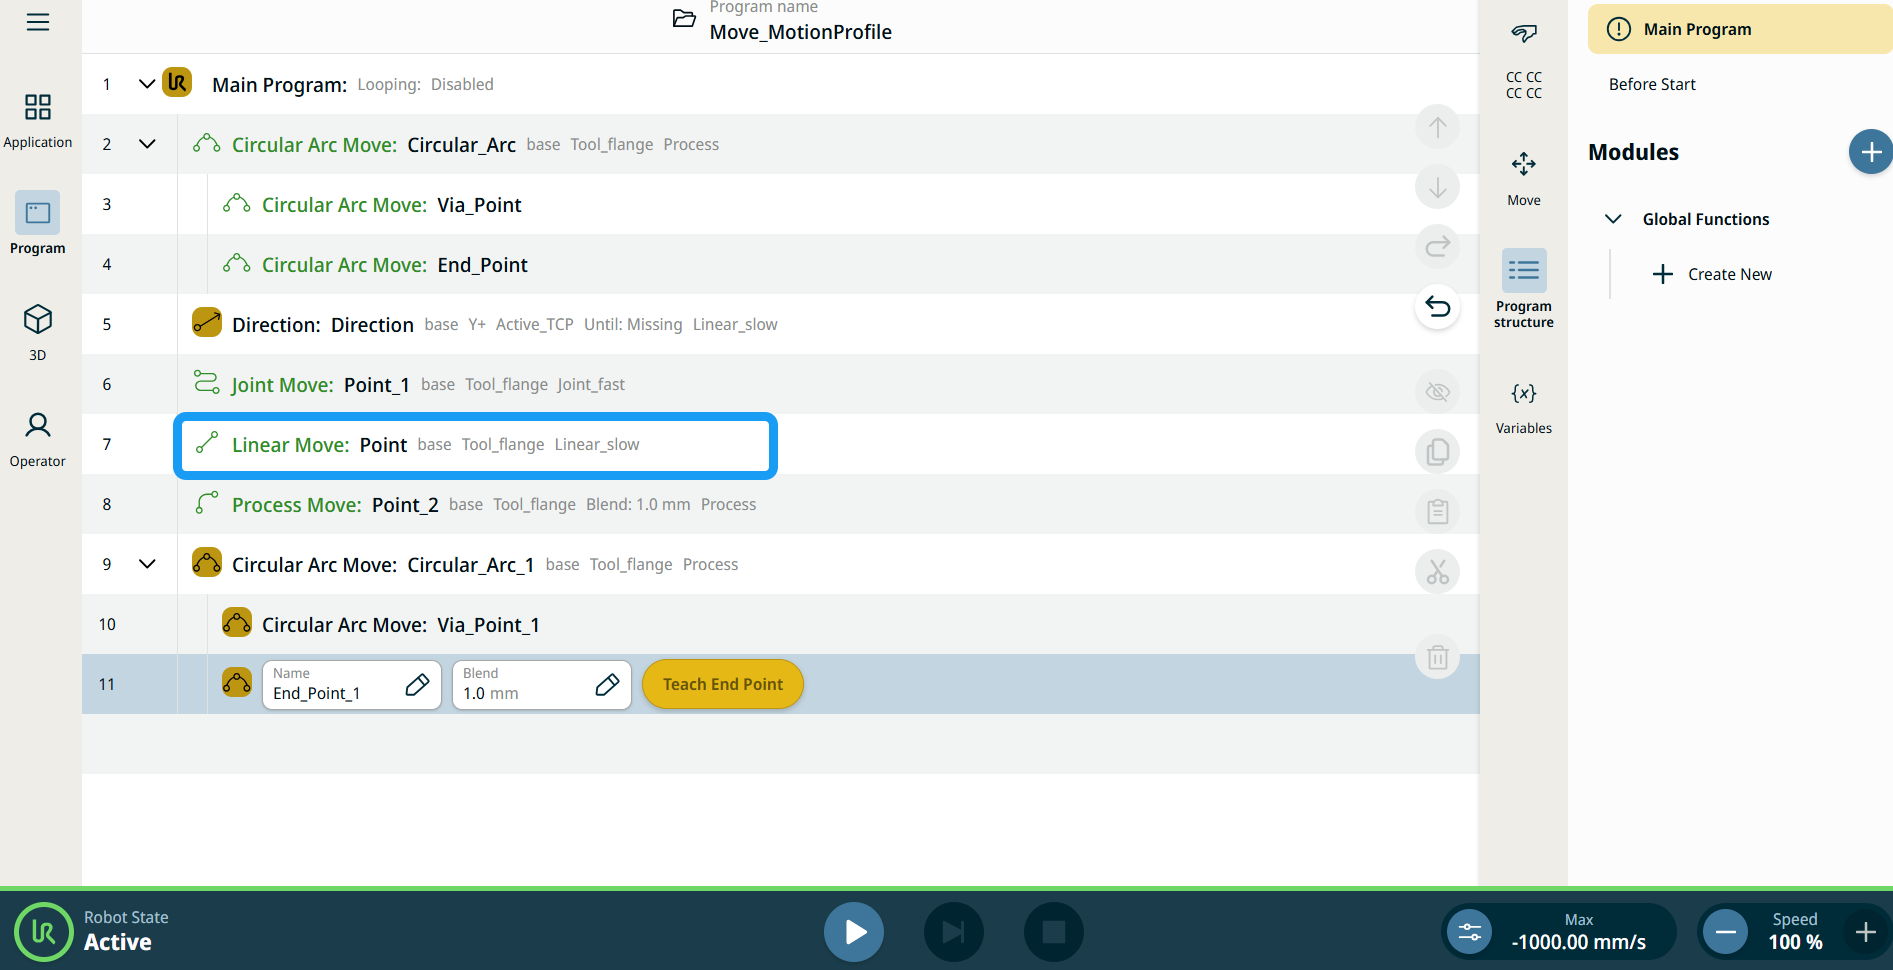
The Linear Move command node supports Motions Profiles as Joint Move, but it creates a movement that is a direct line from point A and point B. It moves the Tool Center Point (TCP) linearly between waypoints. 즉, 각 조인트는 공구를 직선 경로로 유지하기 위해 더 복잡한 동작을 수행합니다.
|
|
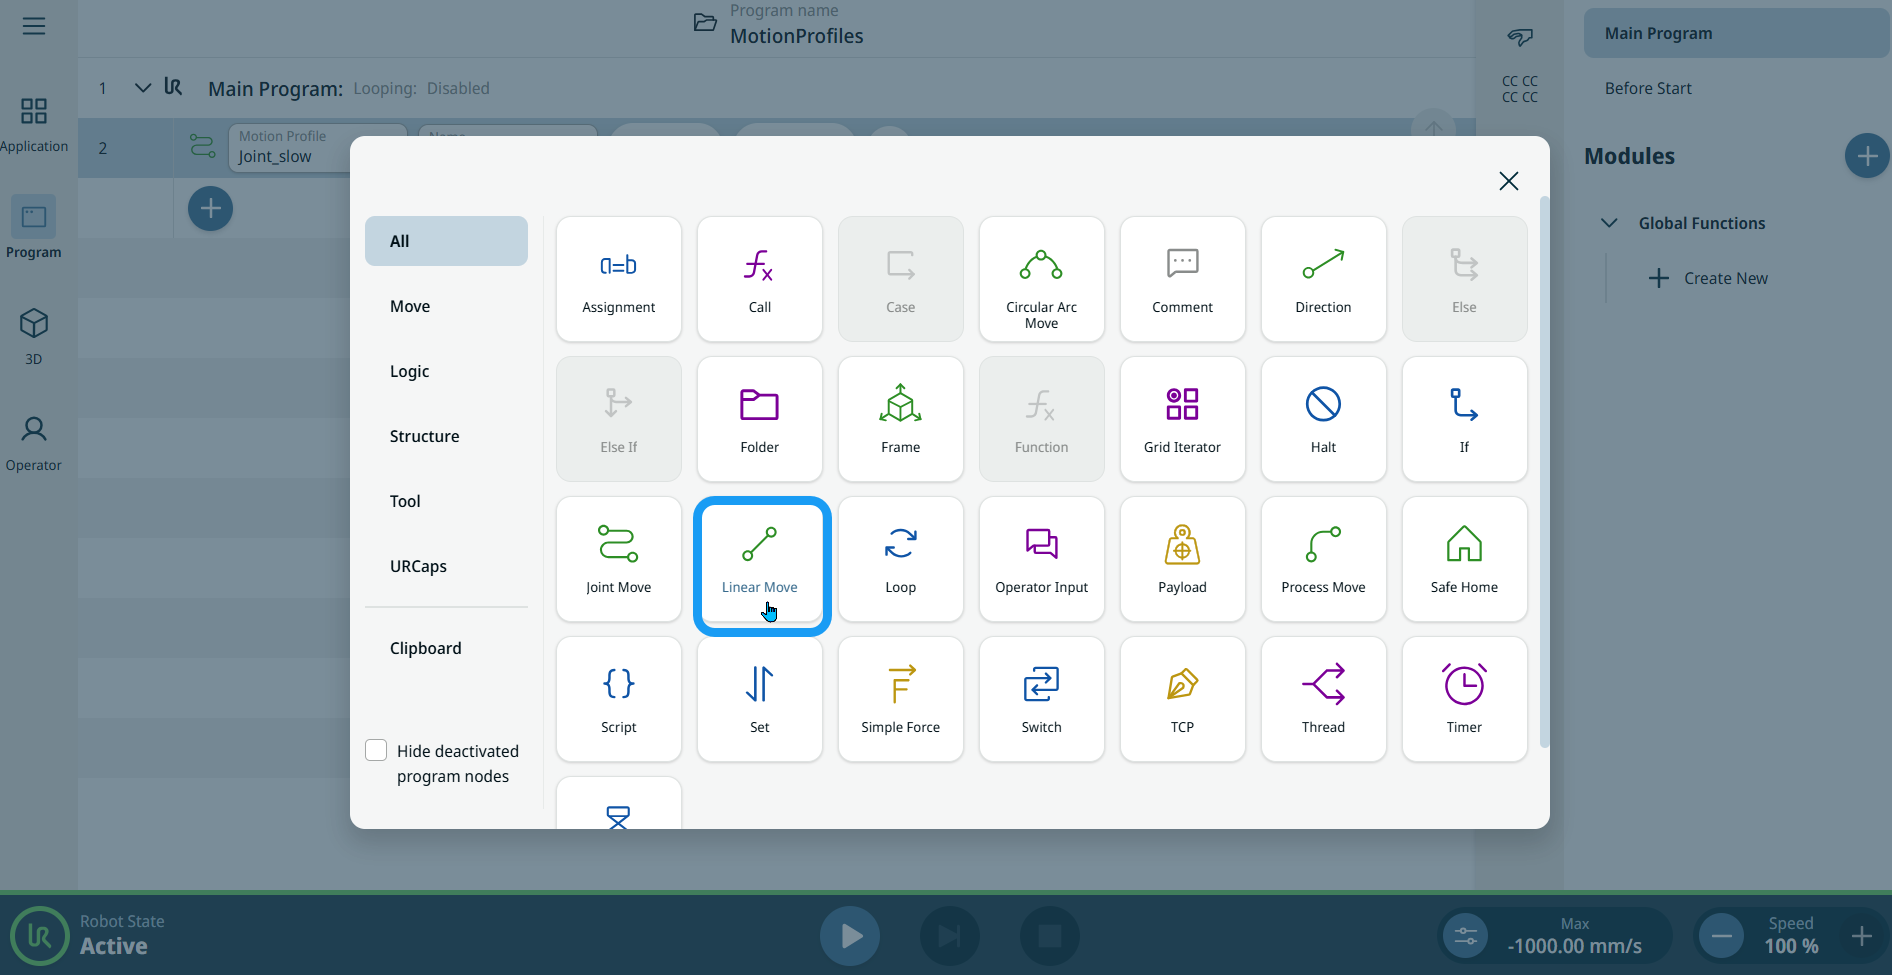
To access Linear Move command |
|
|
|
|
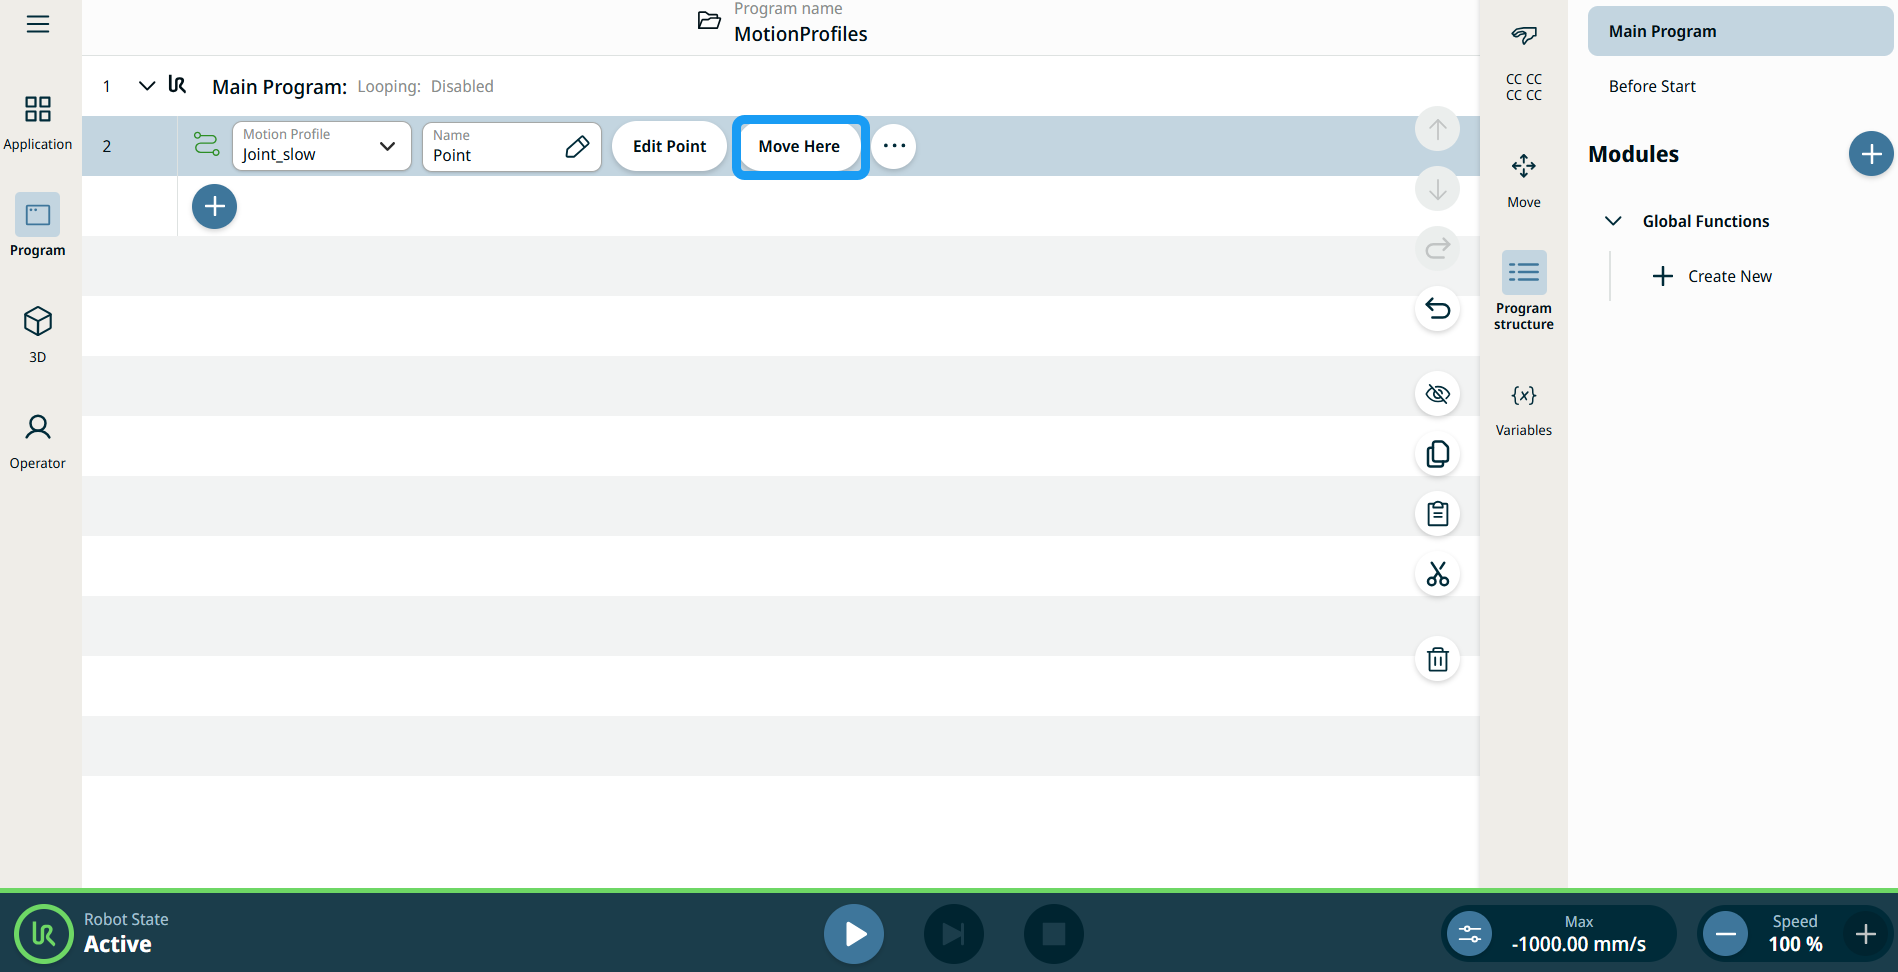
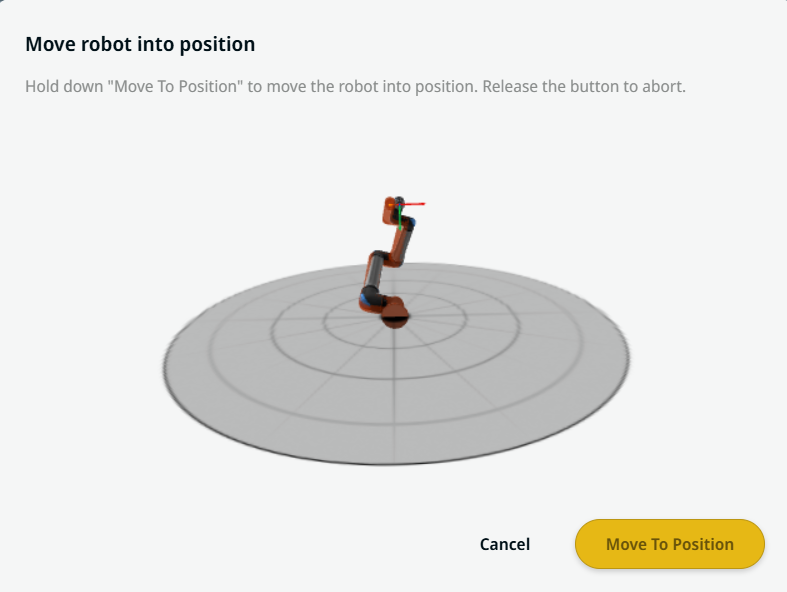
| 여기로 이동 버튼 사용 |
여기로 이동 버튼은 선형 이동 및 조인트 이동 명령에 표시됩니다. 이 기능을 사용하면 프로그램 트리에서 웨이포인트 위치로 바로 이동할 수 있습니다. 여기로 이동 버튼을 누르면 위치로 로봇 이동 대화 상자가 열립니다. 이 버튼은 웨이포인트를 티칭한 경우 표시되며, 로봇 상태가 정상 또는 감소 모드일 때만 활성화됩니다.
|
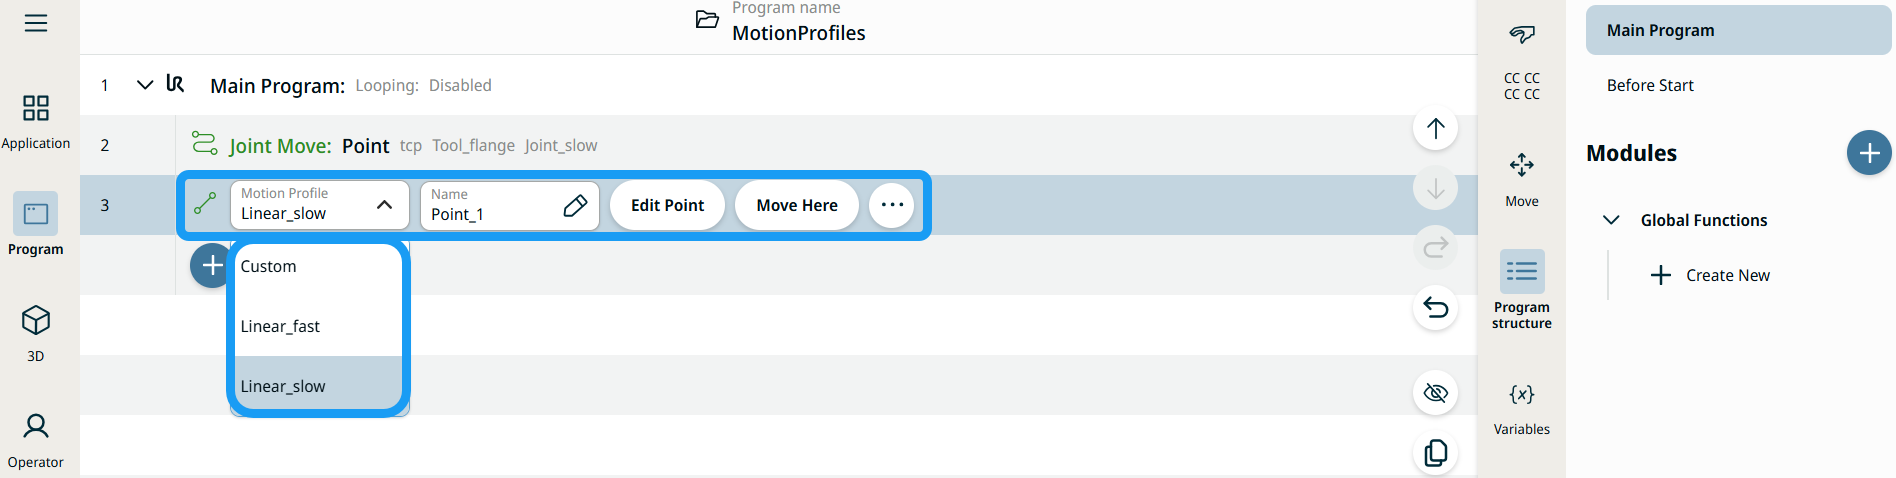
| 이동 노드의 모션 프로필 레이블 |
프로그램 트리의 모든 이동 관련 명령 노드에는 각 노드와 연결된 모션 프로필이 표시됩니다. 이 기능을 통해 사용자는 선택한 모션 프로필을 이동 노드에서 확인할 수 있습니다. 이 기능은 다음과 같은 명령 노드에서 구현됩니다. 커스텀 모션 프로필이 있는 이동 노드에는 모션 프로필 대신 속도 및 가속도 값이 표시됩니다. |
|
|
|
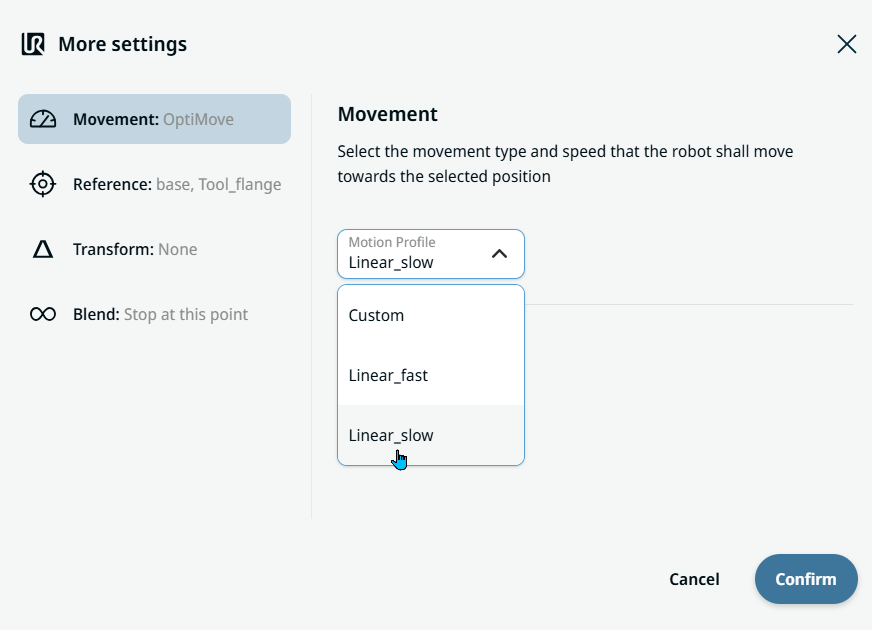
| Movement setting |
|
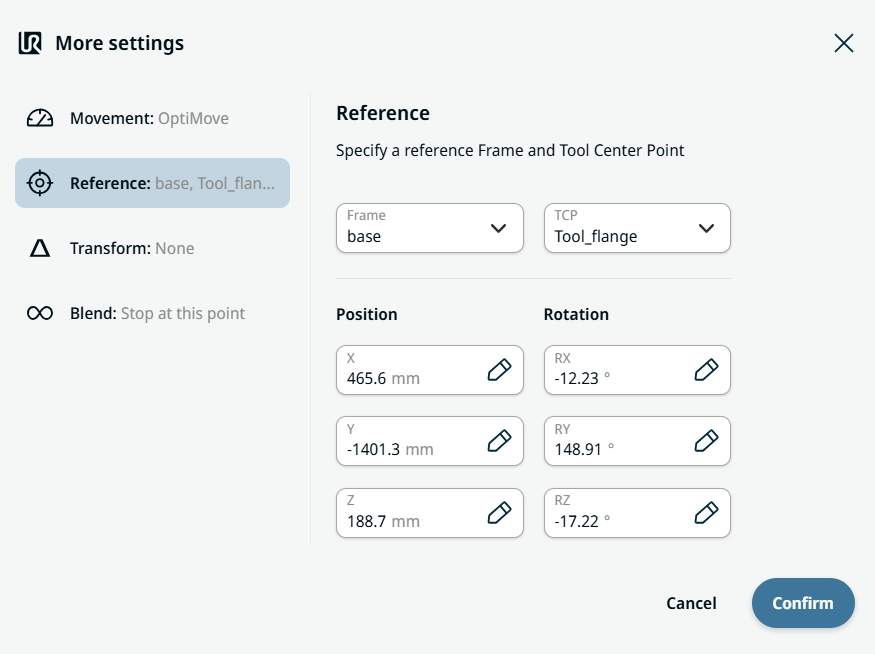
| Reference setting |
|
| Transform setting |
|
|
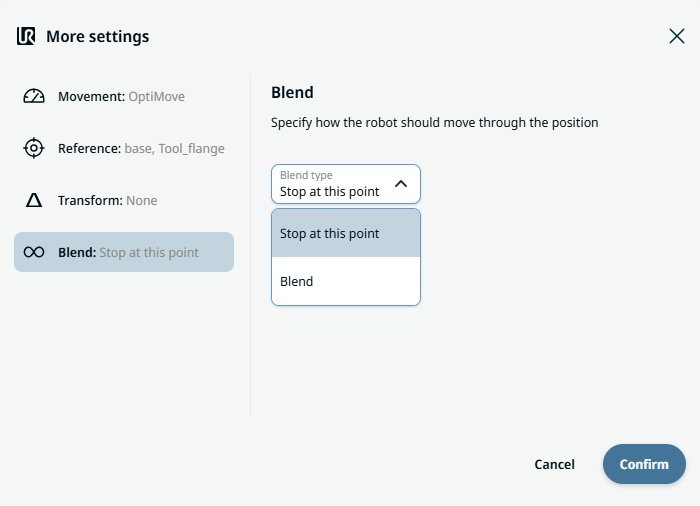
Blend setting |
|