Teach Pendant Configuration

Description

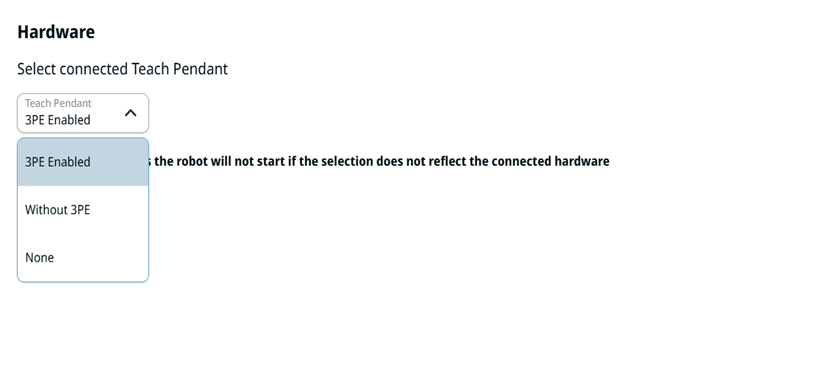
The Hardware section allows you to select the type of Teach Pendant to be connected to the Control Box, so the robot's safety system knows what hardware to expect at power-up.

Your selection must match the physically connected hardware to prevent starting the robot while the safety system expects an emergency stop source that is not actually present.

The selections are:

  • 3PE Enabled. The robot operates with a three‑position enabling Teach Pendant (3PE TP).

  • Without 3PE. The robot is used with a Teach Pendant that does not include the three‑position enabling device.

  • None. No Teach Pendant is connected.

For safety reasons, the robot will not start if the selection does not reflect the connected hardware.


3PE Enabled

The connected Teach Pendant has an integrated 3-Position Enabling device (3PE TP). The 3PE buttons are a safety‑critical interface where motion in Manual Mode requires you to hold one of the two underside enabling buttons at the center light-press position. When you release or fully press the button, an immediate Category 2 safety stop (SF19 – 3PE Stop) is triggered.

These are its main characteristics:

  • Mandatory for UR15, UR20, UR30 per ISO 10218-1:2025.

  • Unlocks Manual High Speed through the slider in the footer that lets TCP/elbow speed temporarily exceed 250 mm/s during teaching.

  • Required to use Backdrive through the physical 3PE switch and to enable Freedrive through the rapid light-press, release, light-press, hold gesture.

  • Plug-and-play; no URCap required

Without 3PE

The connected Teach Pendant is a standard e-Series Teach Pendant that does not have the integrated 3-Position Enabling buttons. The robot accepts a TP for operating PolyScope X, but motion in Manual Mode is not gated by a 3PE press.

These are its main characteristics:

  • Allowed for e-Series robots only under ISO 10218-1:2011 certification.

  • A risk assessment may still require an external 3PE enabling device wired to the safety I/O (3PE Stop input) if you are inside a safeguarded space during Manual Mode.

  • Manual Mode is locked to the default 250 mm/s reduced speed.

None

The None option supports setups where a Teach Pendant is not required or physically present, enabling more streamlined and flexible deployments, especially in automated or remote-controlled environments.

It gives you three key benefits:

  • Supports headless configurations where no Teach Pendant is used.

  • Simplifies hardware requirements for minimal setups.

  • Improves start-up flexibility by removing dependency on Teach Pendant presence.


How to access Hardware
  1. Tap Hardware on the left panel of the Safety application screen.

  2. Unlock the main screen in the topmost right part, enter your safety password, and Confirm.

  3. On the central panel, tap the Teach Pendant field, and select from the drop down.


  1. Tap Apply beside the Lock button.

  2. Tap Apply and restart in the pop-up of Apply Safety Configuration.

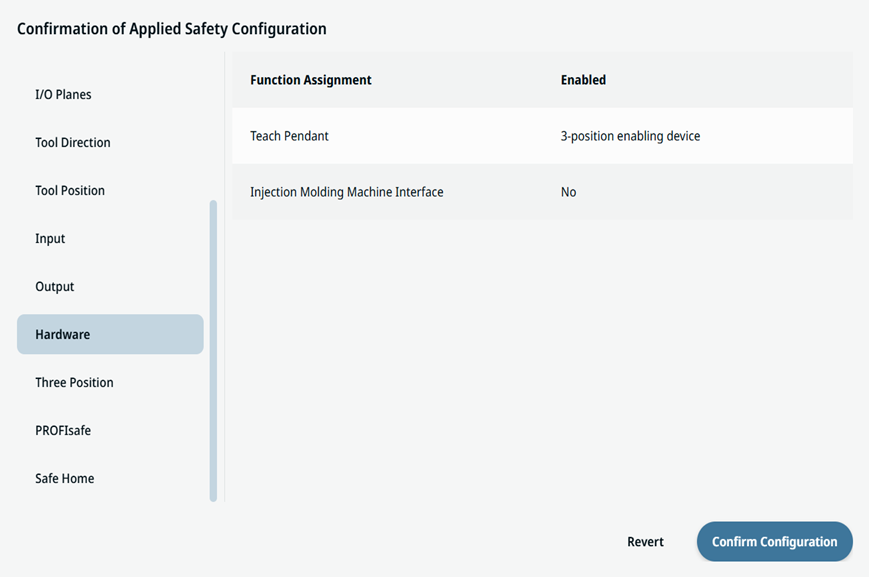
  3. A Confirmation of Applied Safety Configuration pop-up screen appears, and you can either Revert or Confirm Configuration.