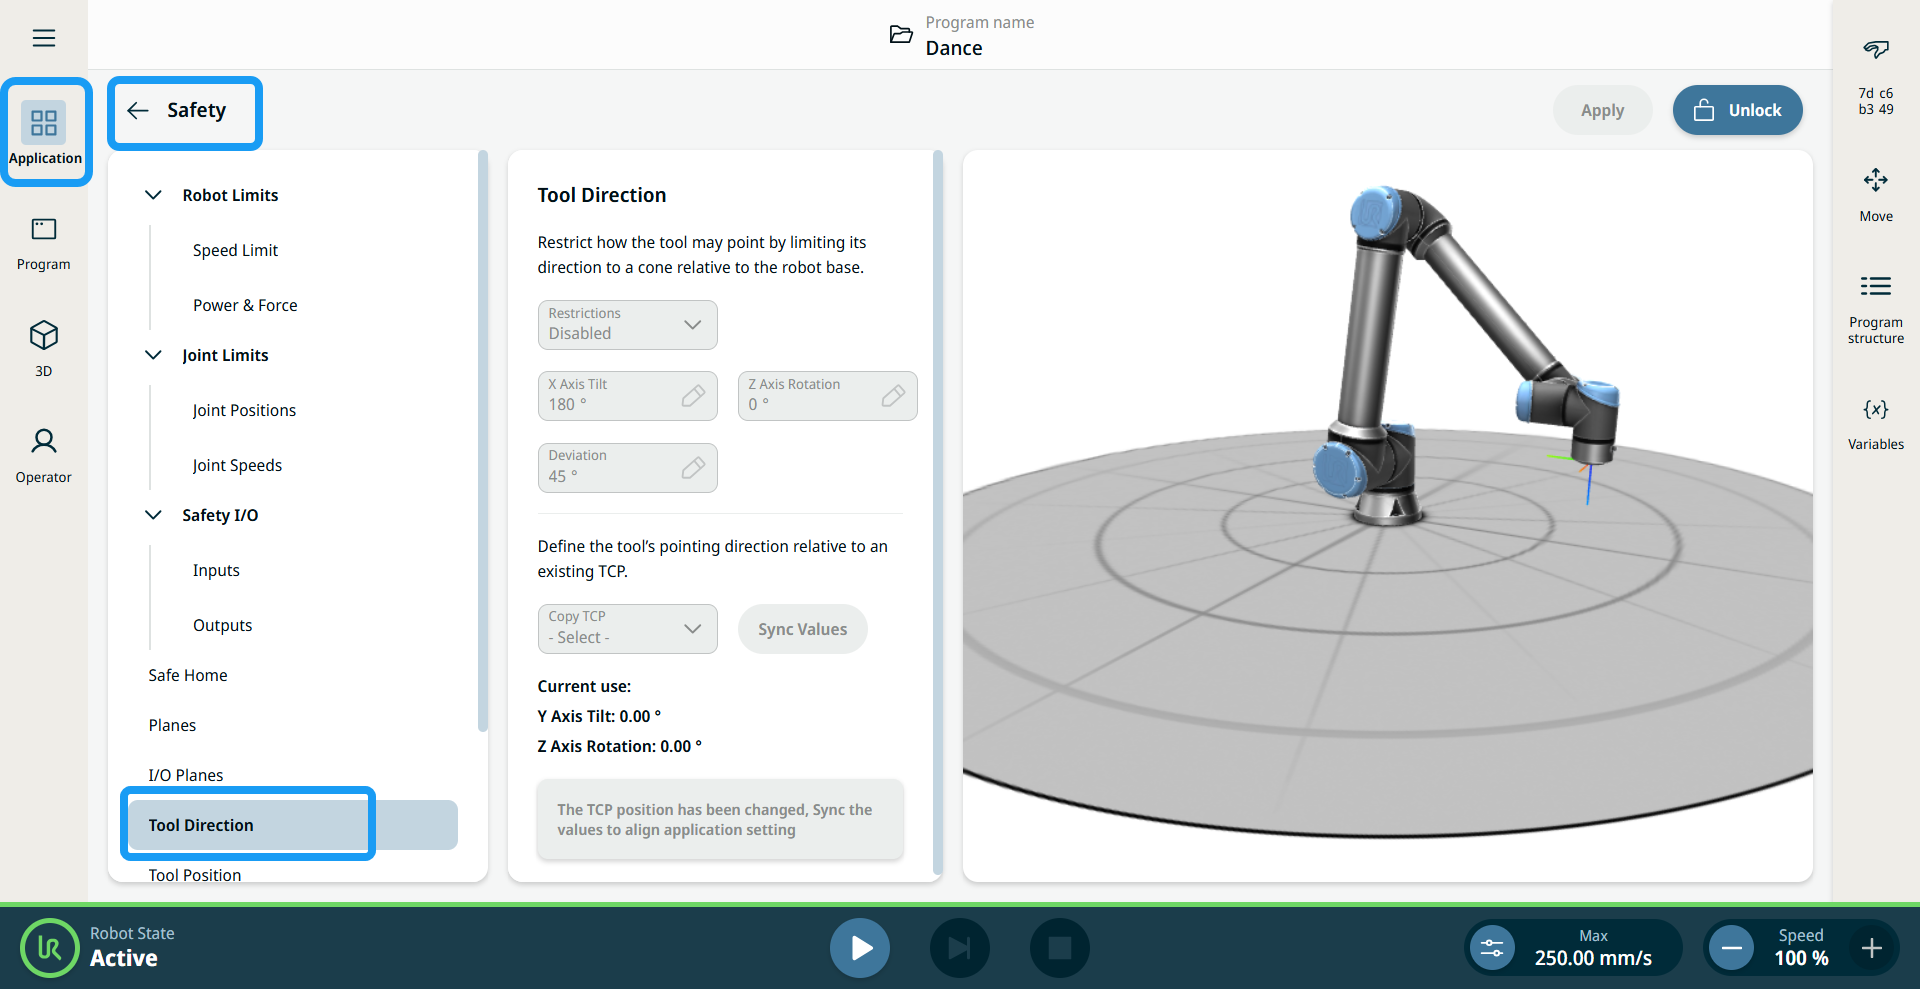
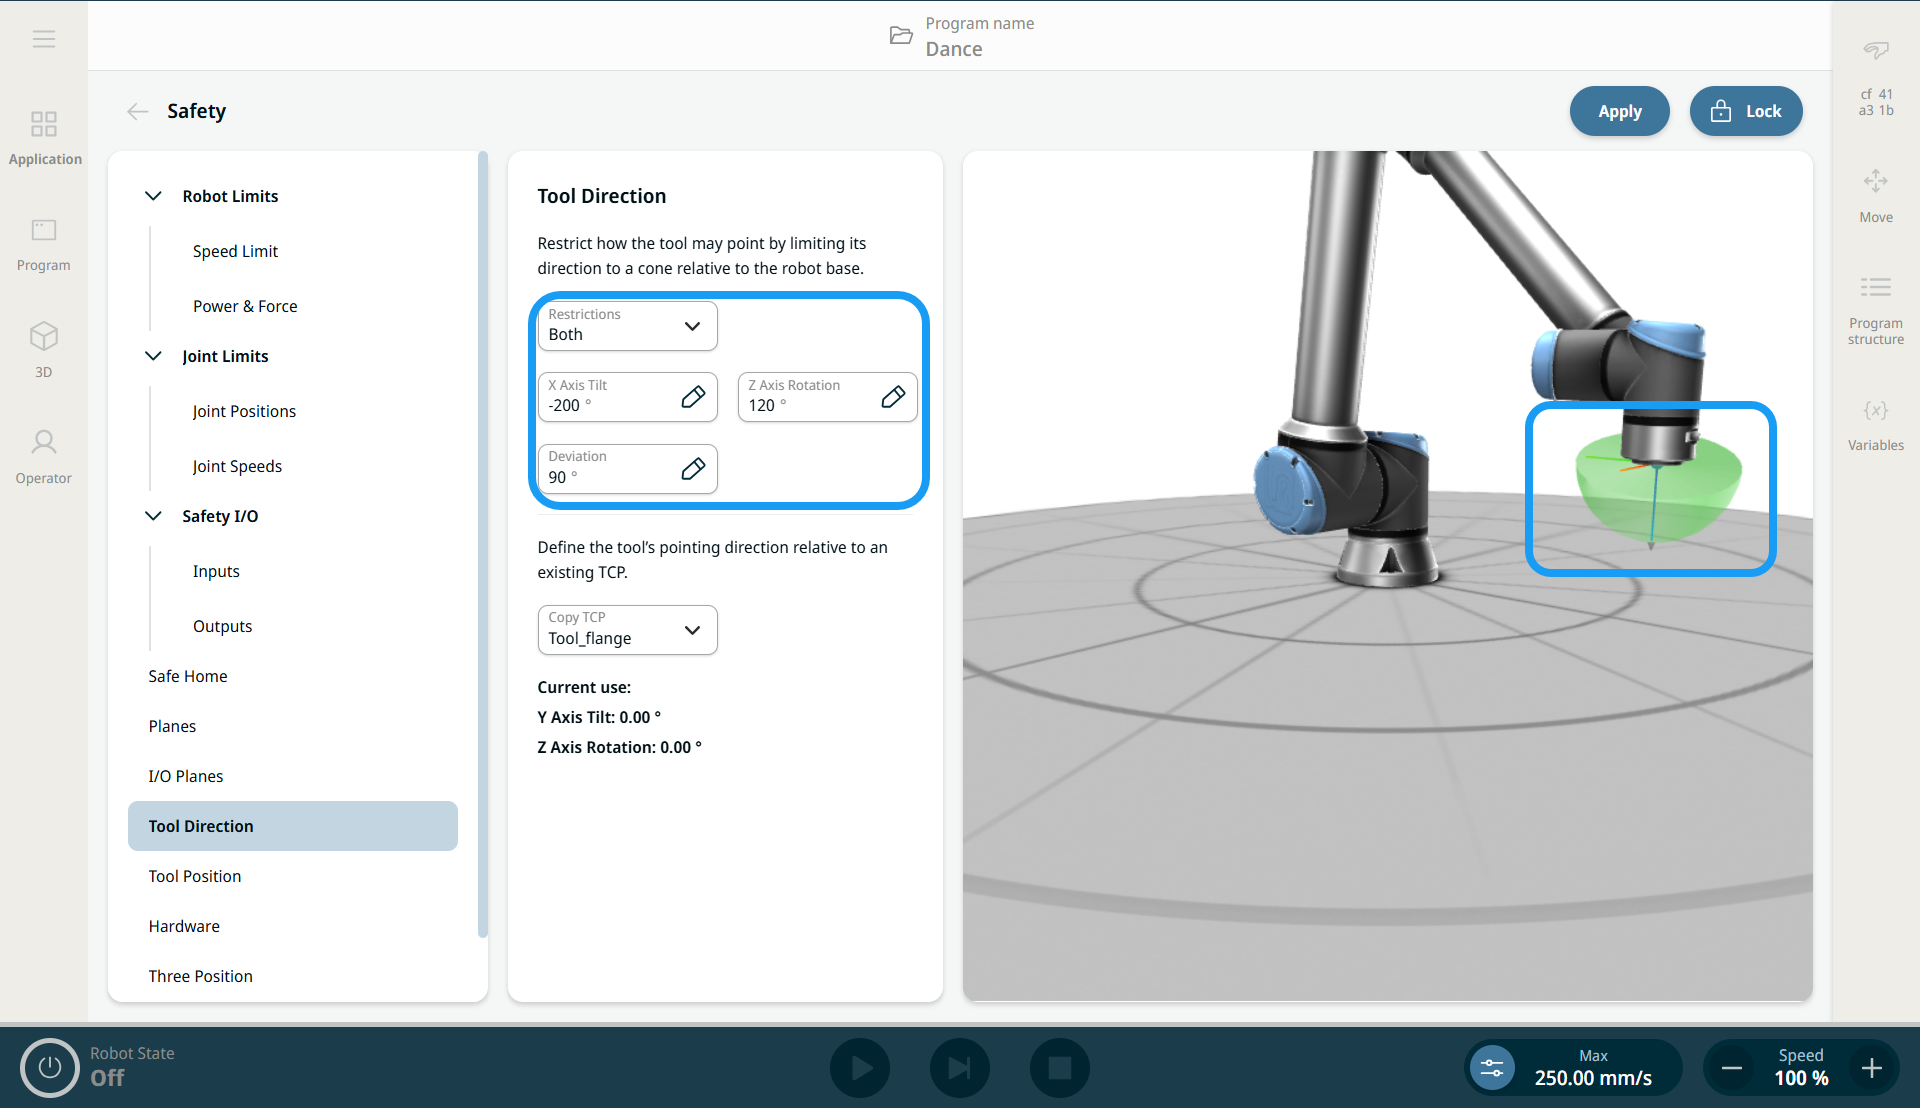
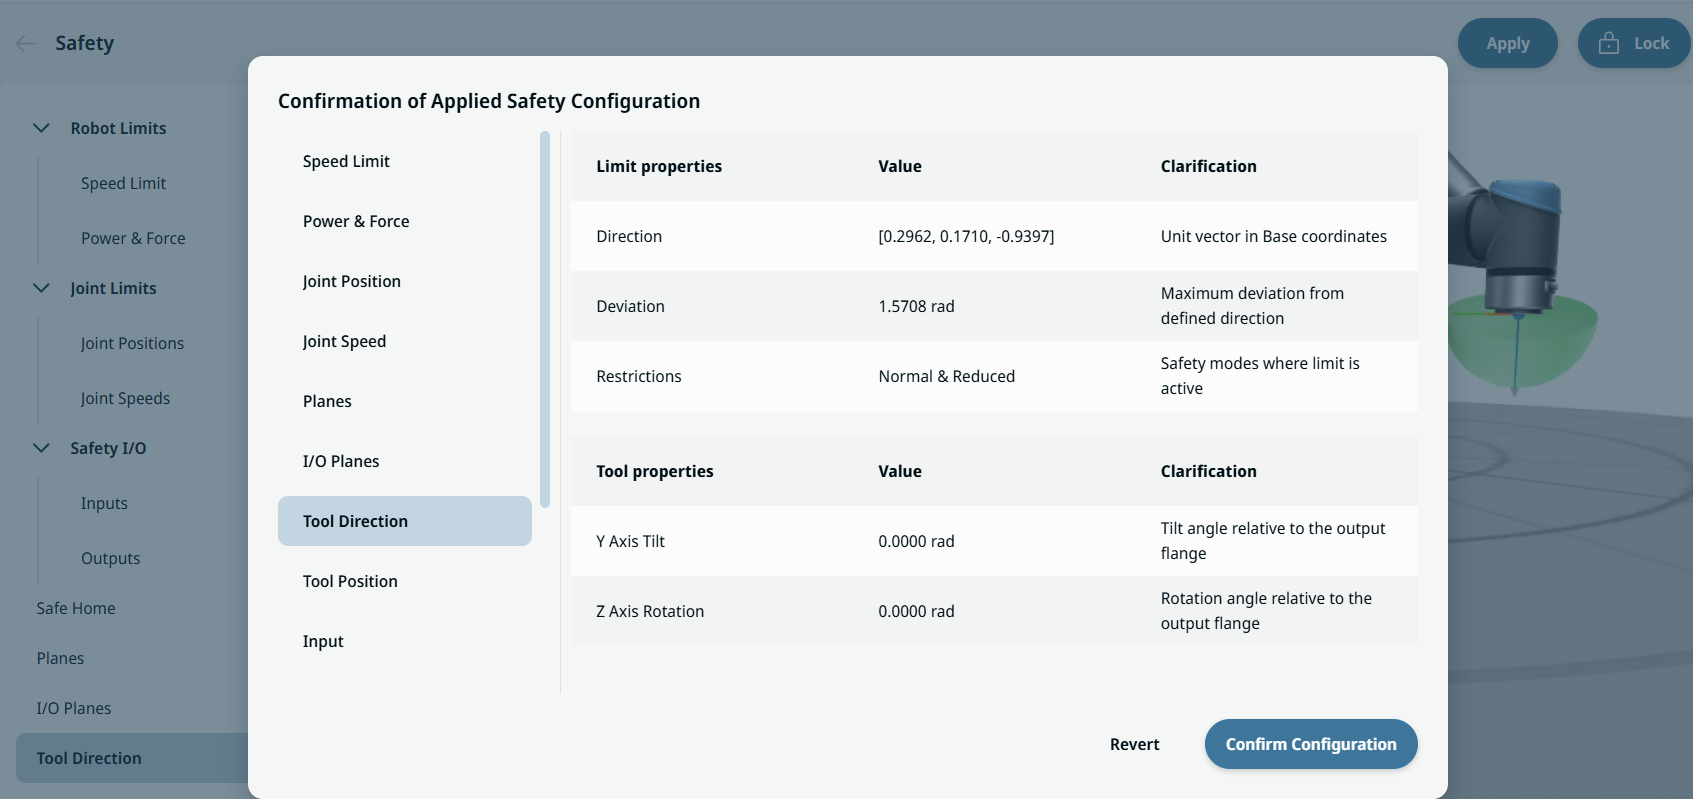
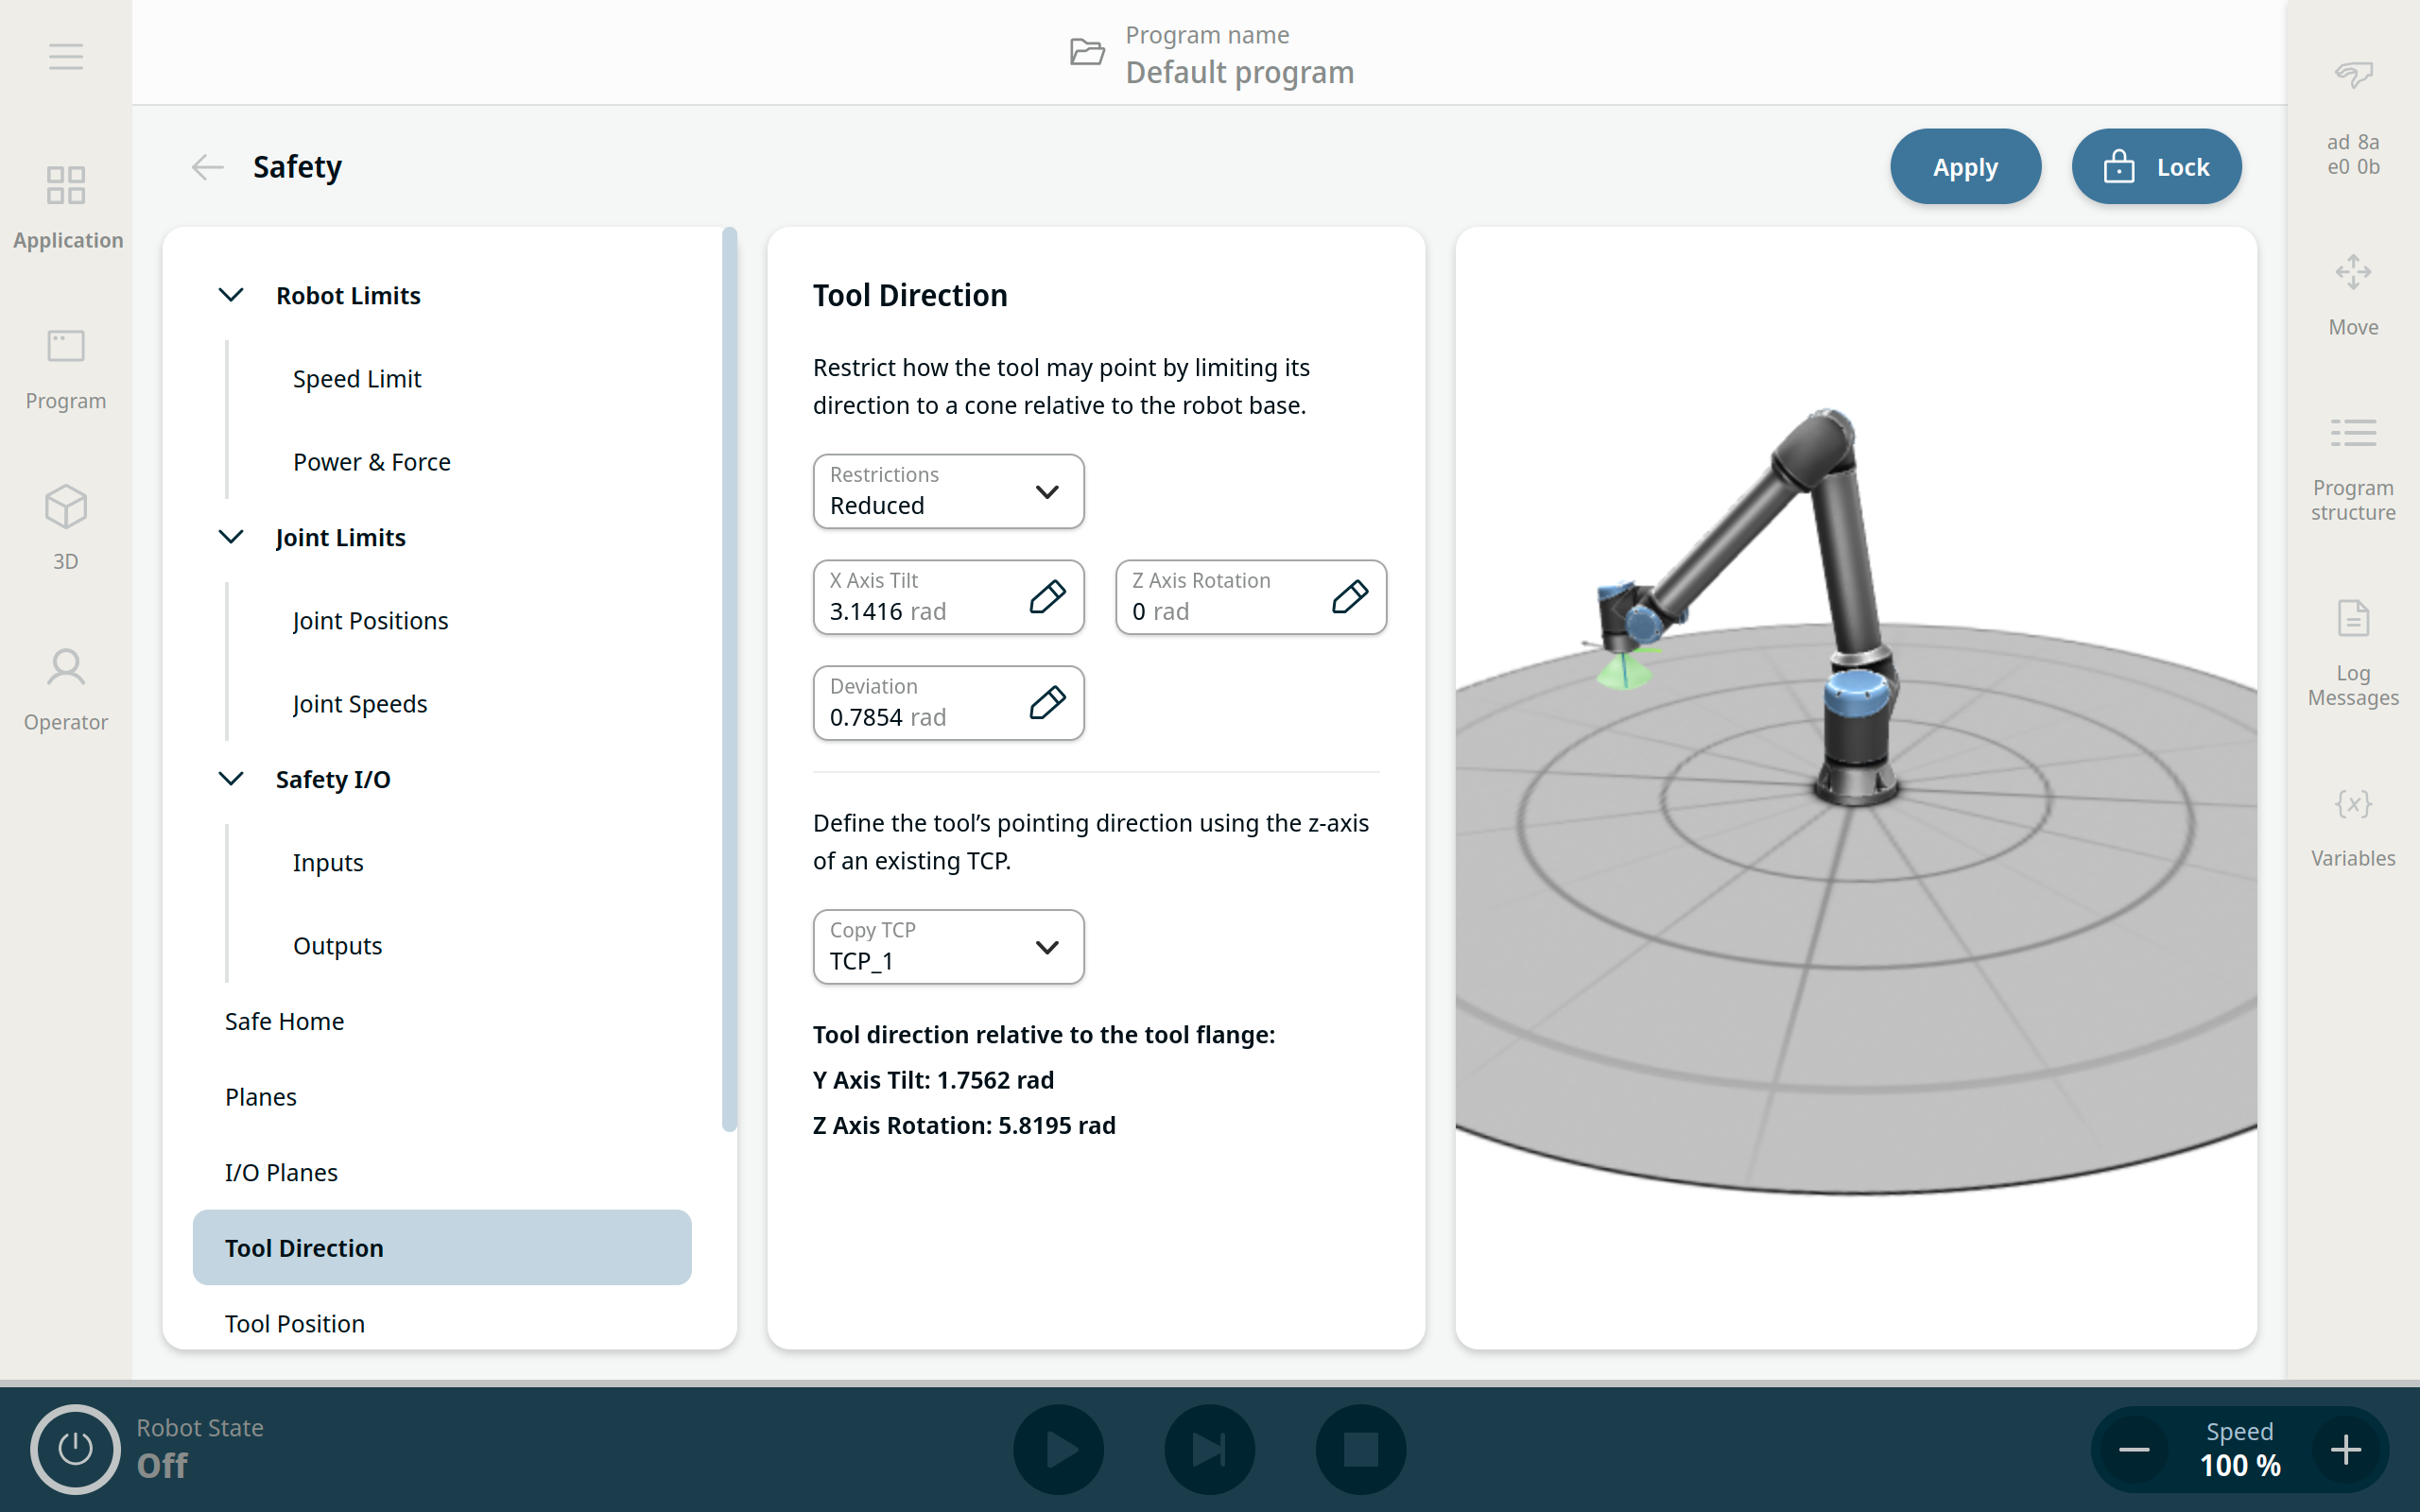
Tool Direction

Description

The Tool Direction screen enables you to configure a safety feature that restricts the angle at which the tool is allowed to point. You can see the Tool Direction limit, which is added to the safety settings. The limit is defined by a cone that has a fixed orientation relative to the robot arm’s base reference frame. As the robot arm moves around, the tool direction is restricted so it remains within the defined cone.

The restrictions can be disabled or configured to apply in Reduced mode, Normal mode, or both.


The Tool Direction feature enables you to increase the safety of an application when you use a tool that can cause harm or injury when facing in a particular direction.


Limit Properties

The Tool Direction limit has three configurable properties:

  1. Tilt: You can define the cone’s opening angle from the central (reference) direction.

  2. Rotation: You can define how the cone rotates around its central axis.

  3. Deviation: You can define the maximum angular offset that is allowed between the desired direction and any direction inside the cone.

Disabled Tool direction limit Never active
Normal Tool direction limit Active only when safety system is in Normal mode
Reduced Tool direction limit Active only when the safety system is in Reduced mode
Both (Normal and Reduced Tool direction limit) Active when the safety system is in Normal mode as well as when it is in Reduced mode.

The tool’s pointing direction is specified using a TCP configured in the End Effectors application settings.


Tool Properties

By default, the tool points in the same direction as the Z axis of the tool output flange. You can modify it by specifying two angles:

  • Tilt angle: How much to tilt the Z axis of the output flange towards the X axis of the output flange.

  • Z-axis rotation: How much to rotate the tilted Z axis around the original output flange Z axis.

Alternatively, you can copy the Z axis of an existing TCP by selecting that TCP from the drop-down menu.


To access Tool Direction

  1. Tap the Application Tab and select Safety Application. In the left panel, select Tool Direction.

  2. Unlock and enter the Safety password.

  3. When you enable the Restrictions field, the other fields become available. A green cone appears in the TCP, showing the tool’s pointing direction.

  4. Tap the Apply button.

  5. You can see Tool Direction in the function assignment table on the Confirmation of Applied Safety Configuration overview dialog.