Ruch przegubu
| Opis |
The Joint Move is a move command node that supports Motion Profiles. The command creates a movement from point A to point B that is optimal for the robot. Ruch może nie być linią prostą między punktami A i B, tylko krzywą optymalną dla początkowej i końcowej pozycji przegubów. Polecenie Porusz przegub powoduje wykonywanie ruchów obliczanych w przestrzeni przegubów ramienia robota. Przeguby są sterowane w taki sposób, aby kończyły ruch w tym samym momencie. Ten typ ruchu skutkuje zakrzywionym torem narzędzia.
|
|
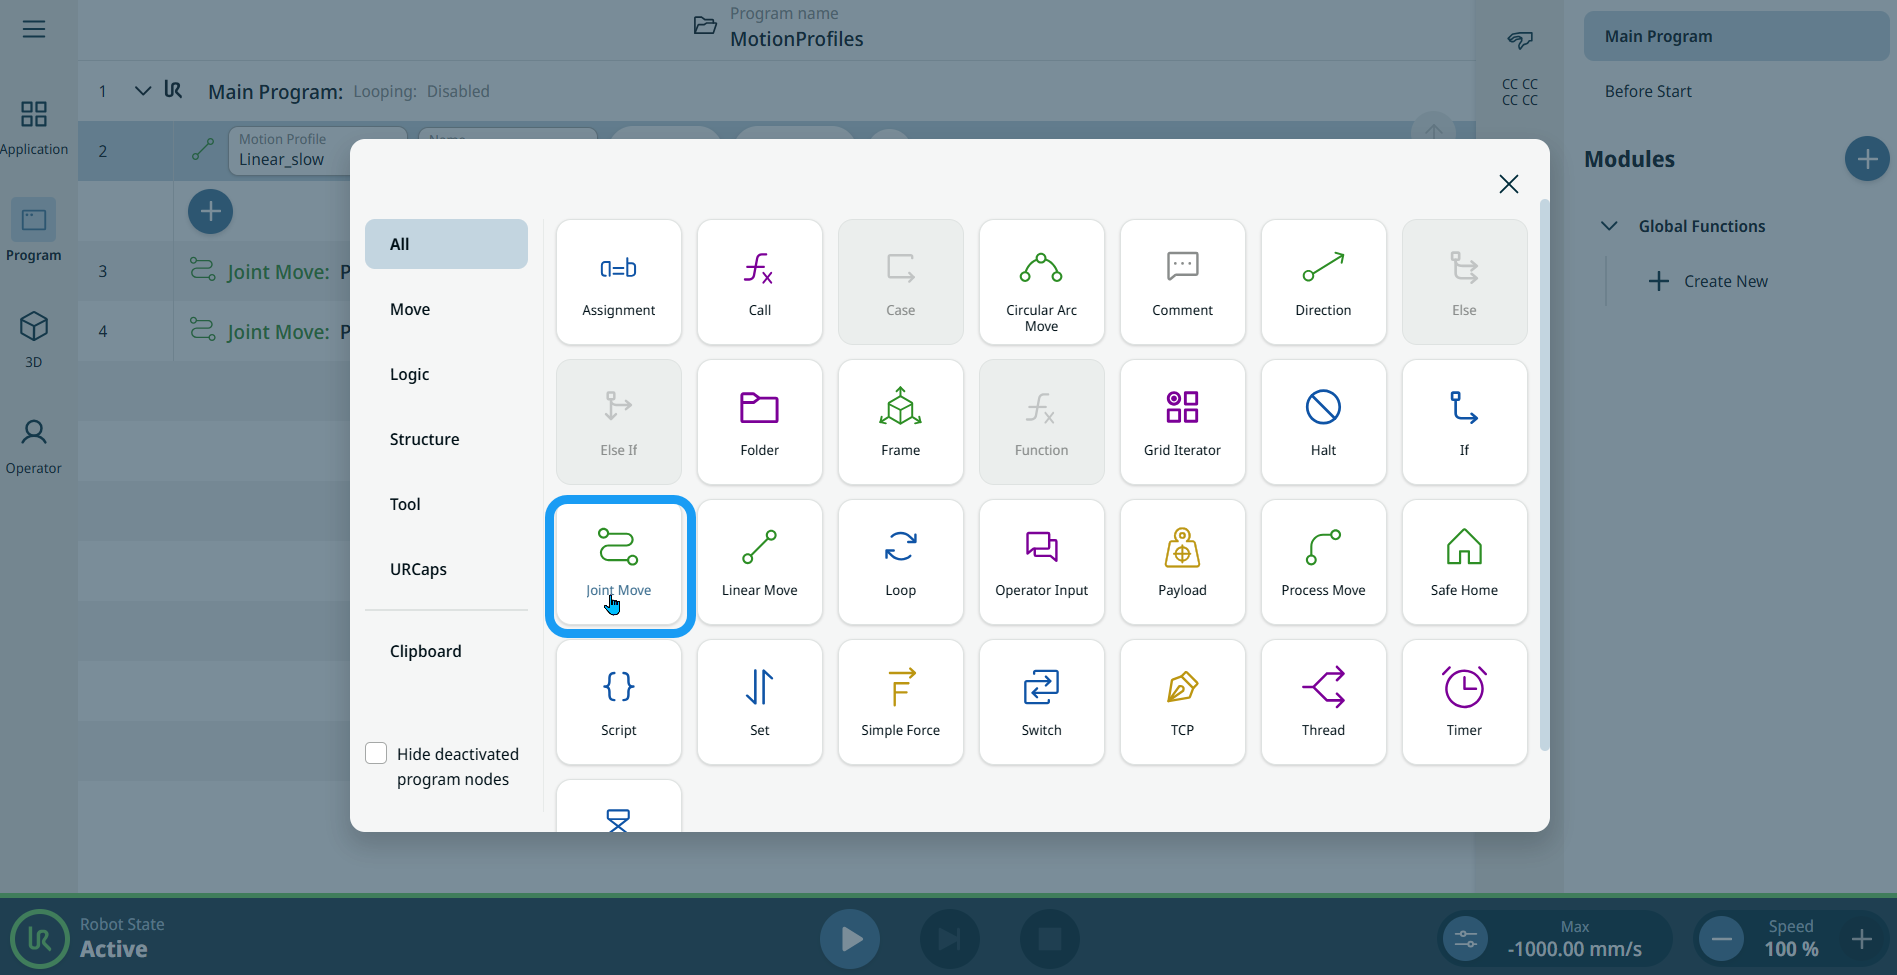
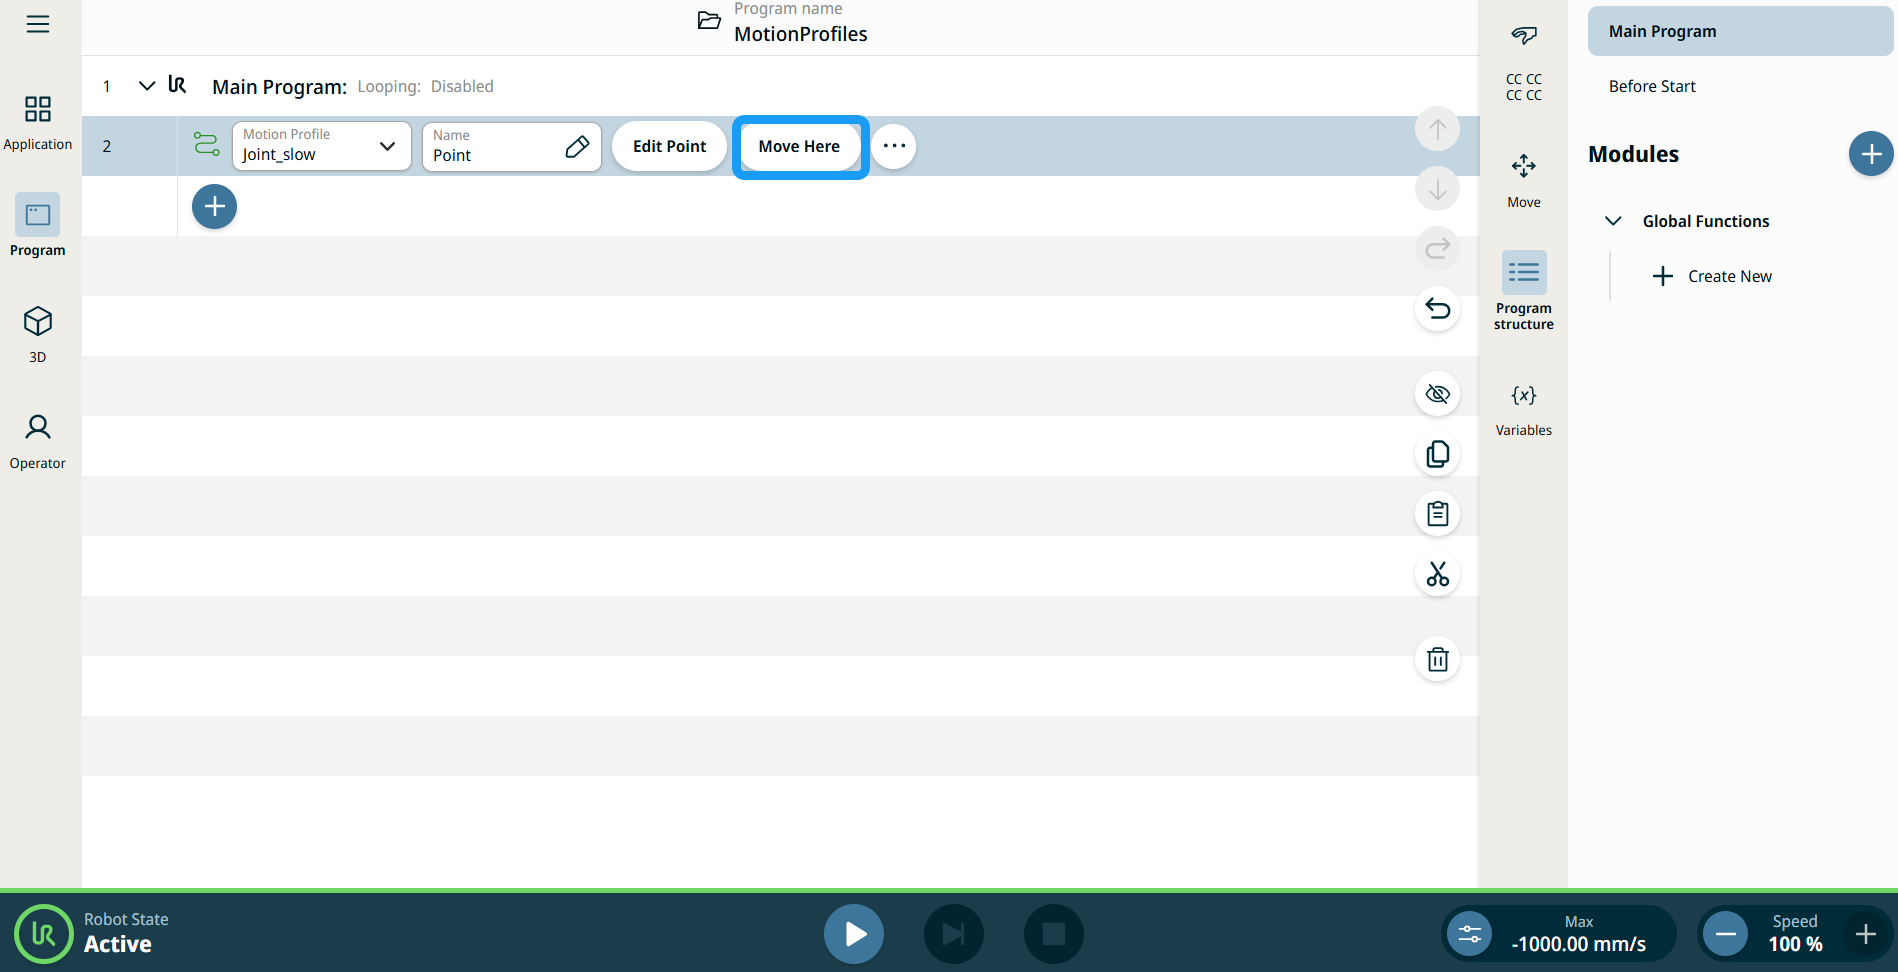
To access Joint Move command |
|
|
|
|
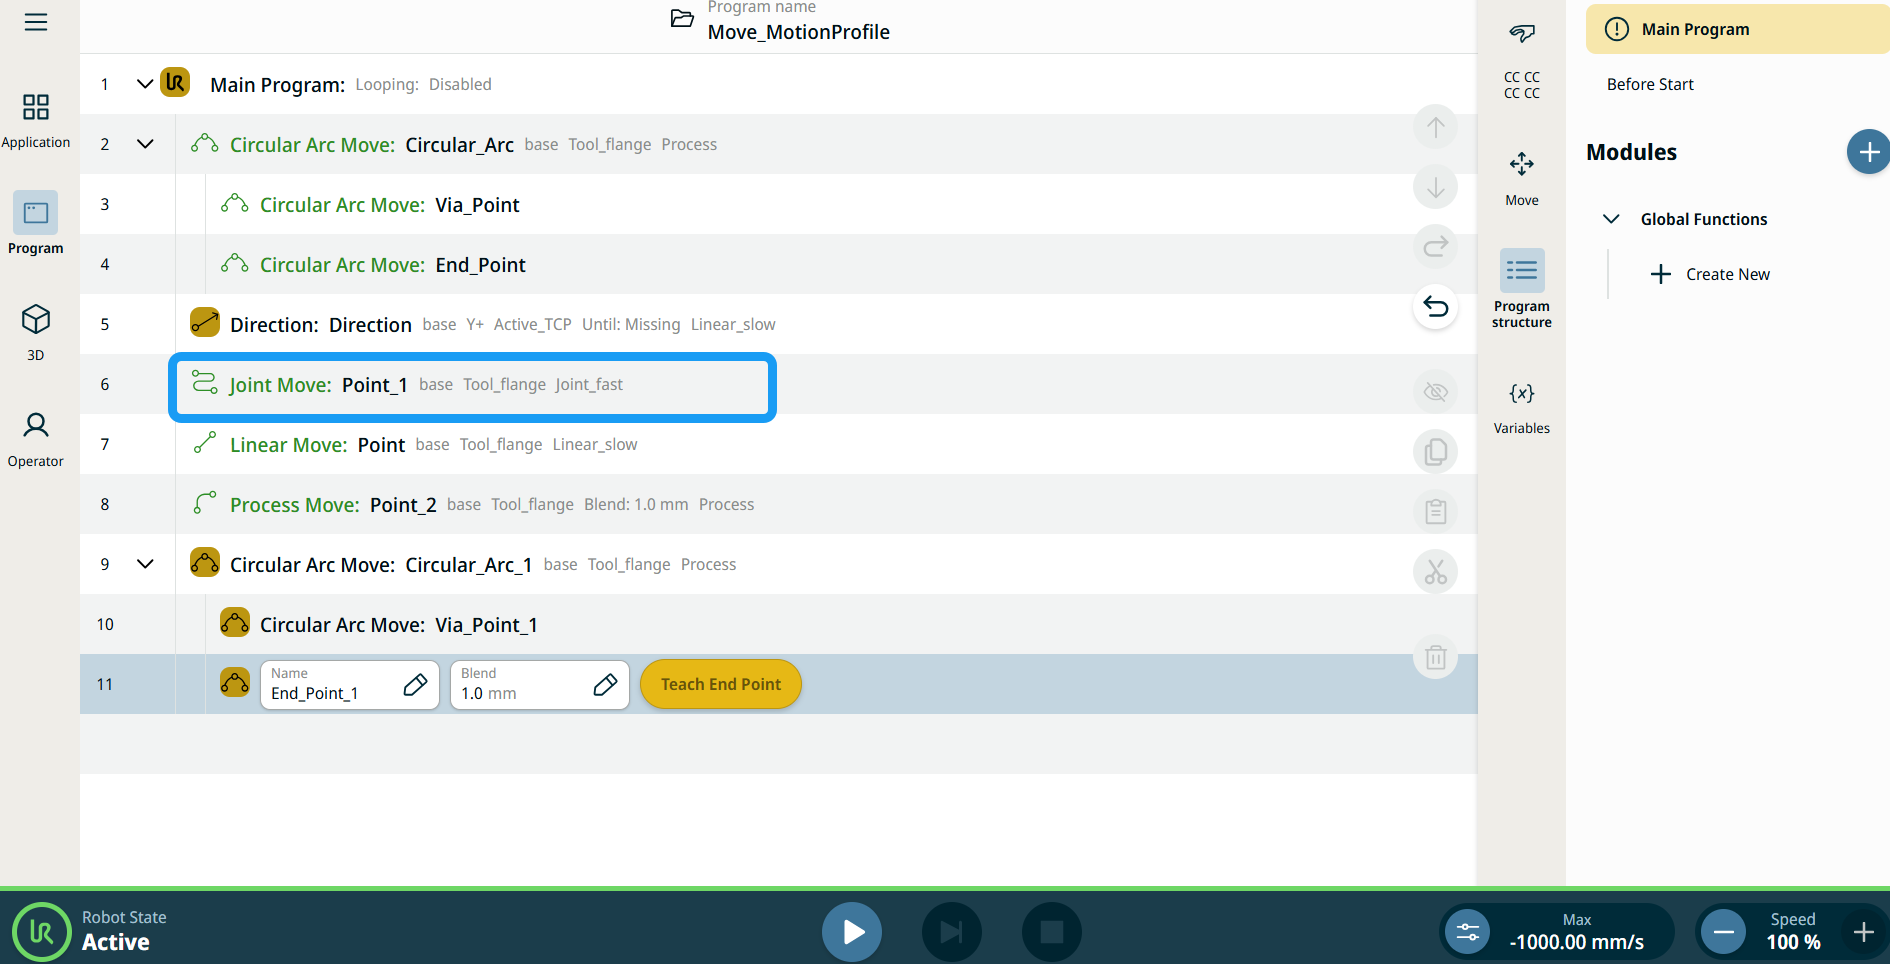
| Etykiety profilu ruchu w węzłach ruchu |
Wszystkie węzły poleceń związane z ruchem w drzewie programu wyświetlają profil ruchu powiązany z danym węzłem. Ta funkcja umożliwia użytkownikom wyświetlenie wybranego profilu ruchu w węźle ruchu. Funkcja ta jest zaimplementowana w następujących węzłach poleceń: Węzły ruchu z niestandardowym profilem ruchu będą wyświetlać wartości prędkości i przyspieszenia zamiast profilu ruchu. |
|
|
|
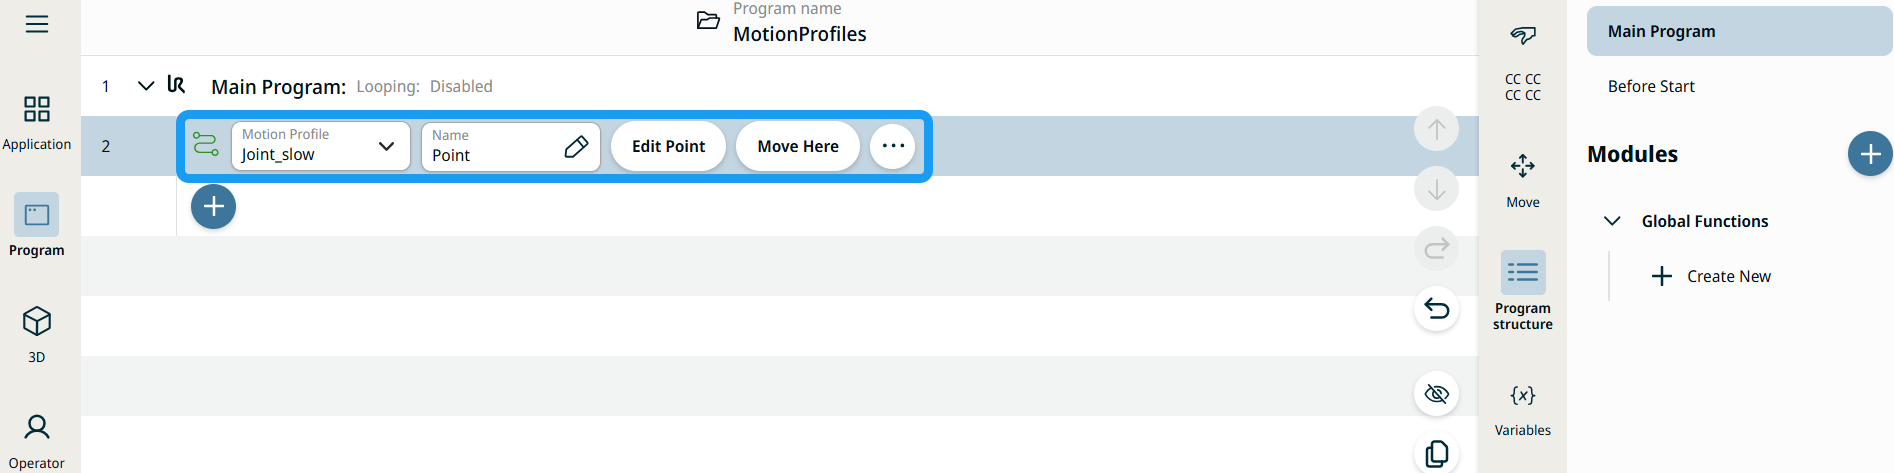
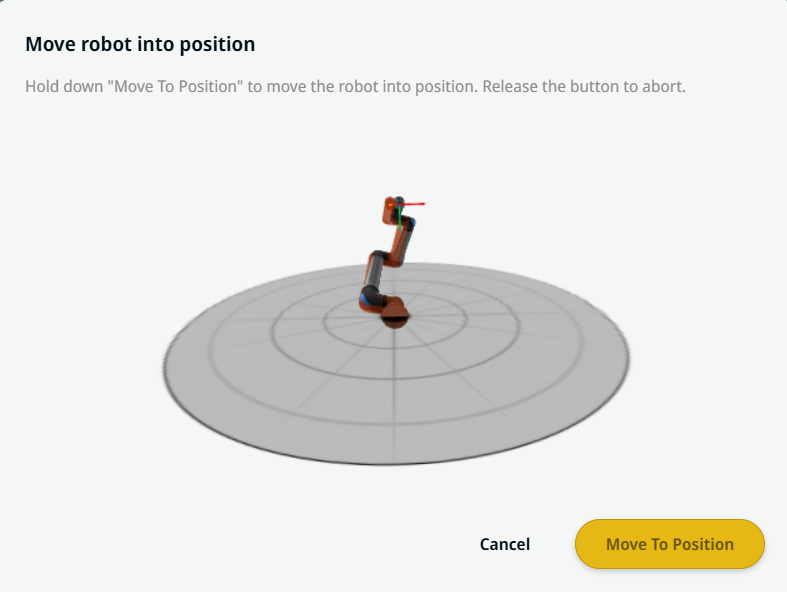
| Używanie przycisku Przenieś tutaj |
Przycisk Przenieś tutaj jest widoczny w poleceniach Ruch liniowy i Ruch przegubu. Funkcja ta umożliwia przejście do pozycji punktu orientacyjnego bezpośrednio z drzewa programu. Naciśnięcie przycisku Przenieś tutaj powoduje otwarcie okna dialogowego Przesuń robota do pozycji. Przycisk jest widoczny, gdy punkt orientacyjny został nauczony i jest włączony tylko wtedy, gdy robot ma status Normalny lub Ograniczony.
|
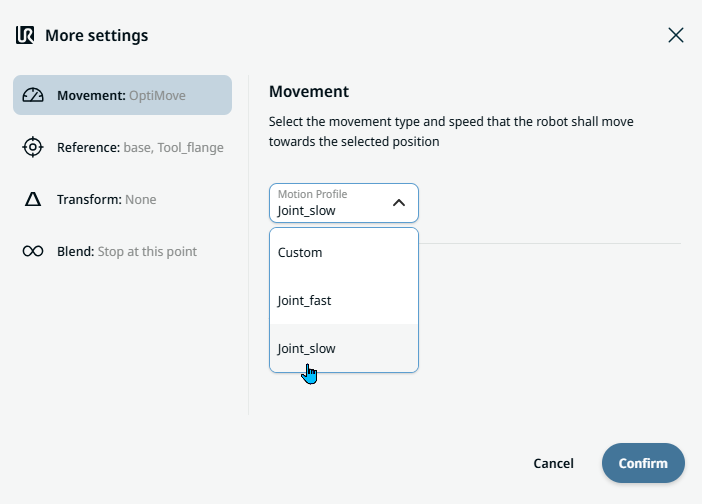
| Movement setting |
|
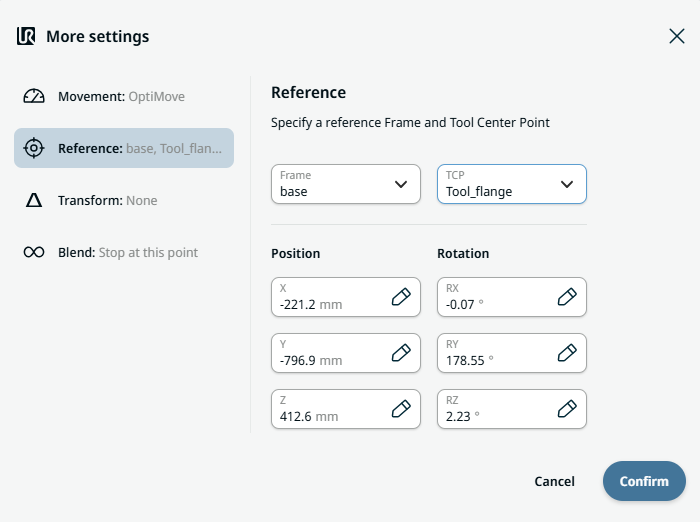
| Reference setting |
|
| Transform setting |
|
|
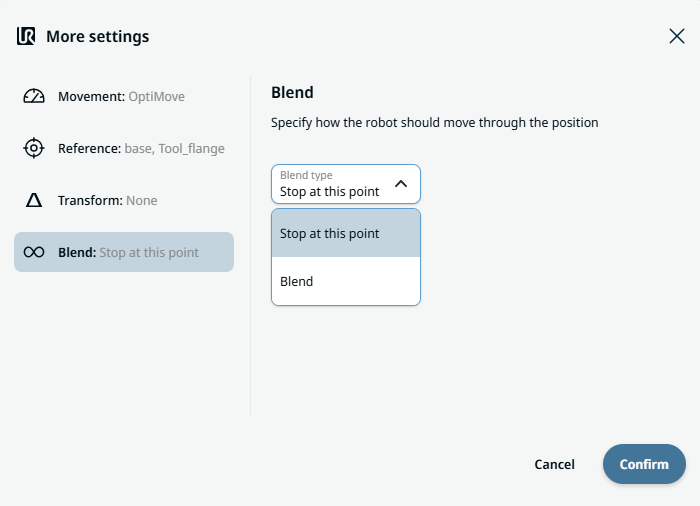
Blend setting |
|