Joint Move
| Descripción |
The Joint Move is a move command node that supports Motion Profiles. The command creates a movement from point A to point B that is optimal for the robot. El movimiento podría no ser una línea directa entre A y B, sino óptimo para la posición inicial y la posición final de las articulaciones. Joint Move makes movements that are calculated in the robot arm joint space. Las articulaciones se controlan para finalizar sus movimientos al mismo tiempo. Este tipo de movimiento da lugar a una trayectoria curva que debe seguir la herramienta.
|
|
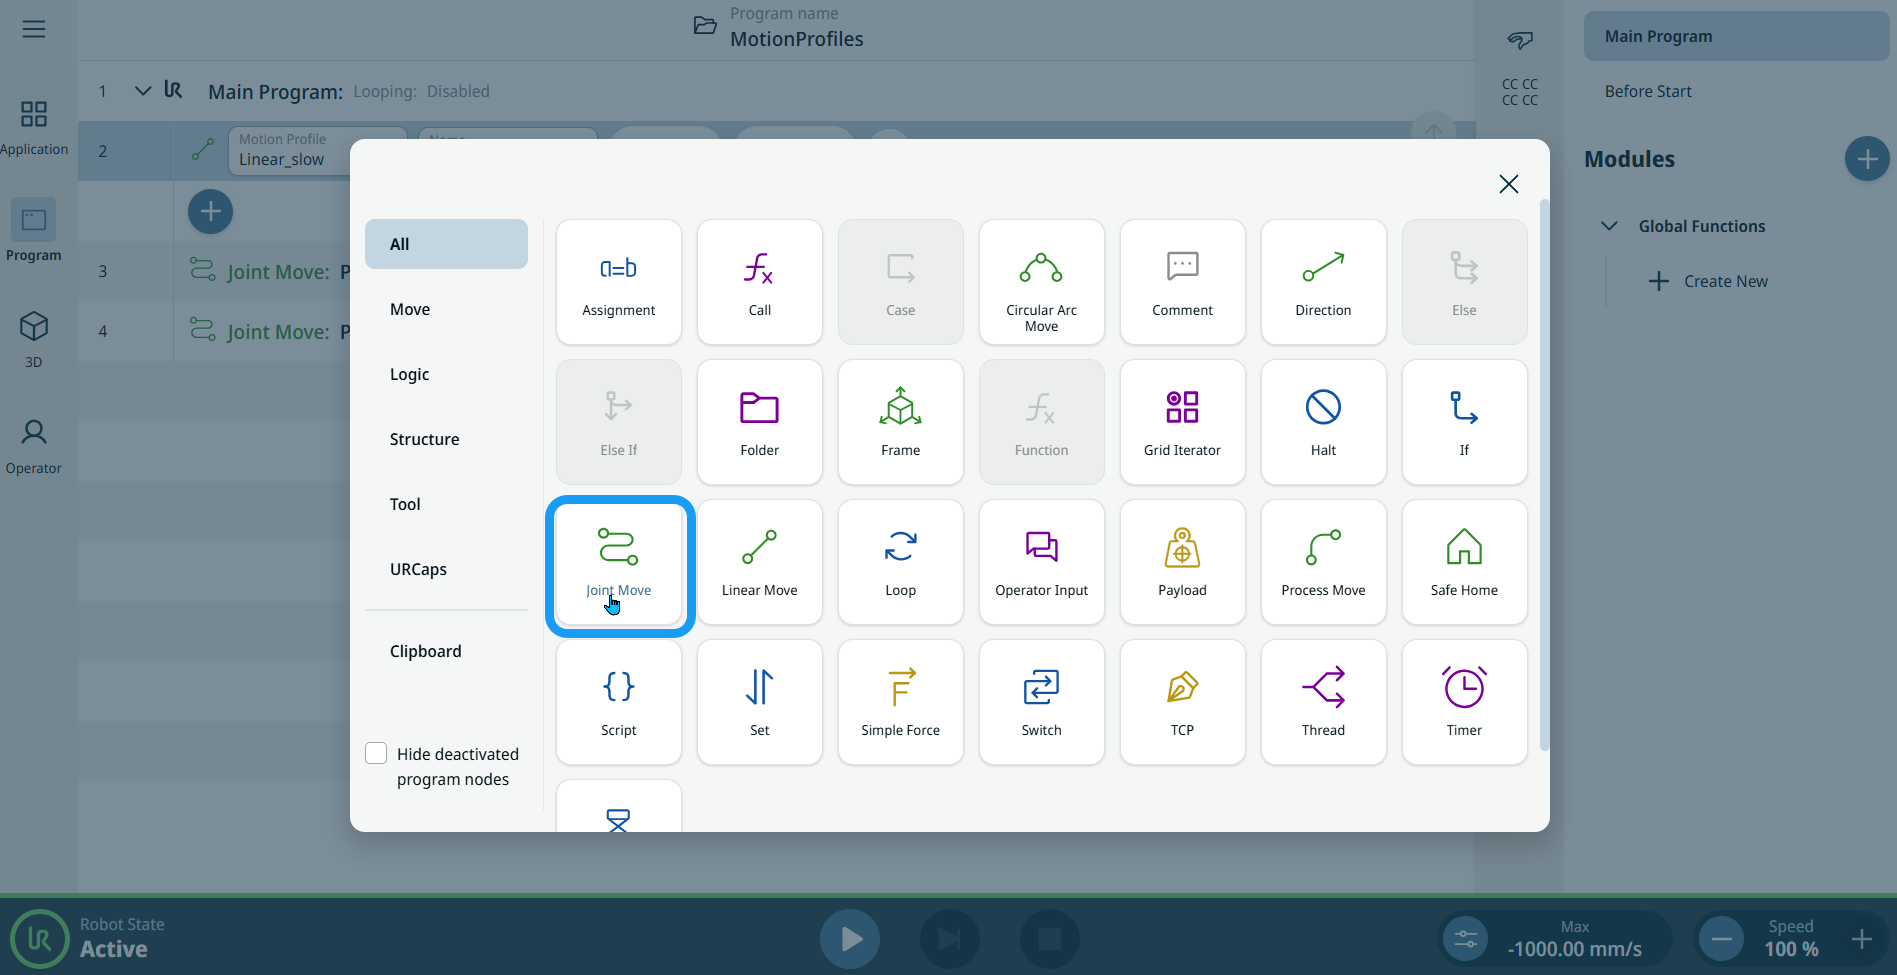
To access Joint Move command |
|
|
|
|
| Etiquetas de perfil de movimiento en nodos de movimiento |
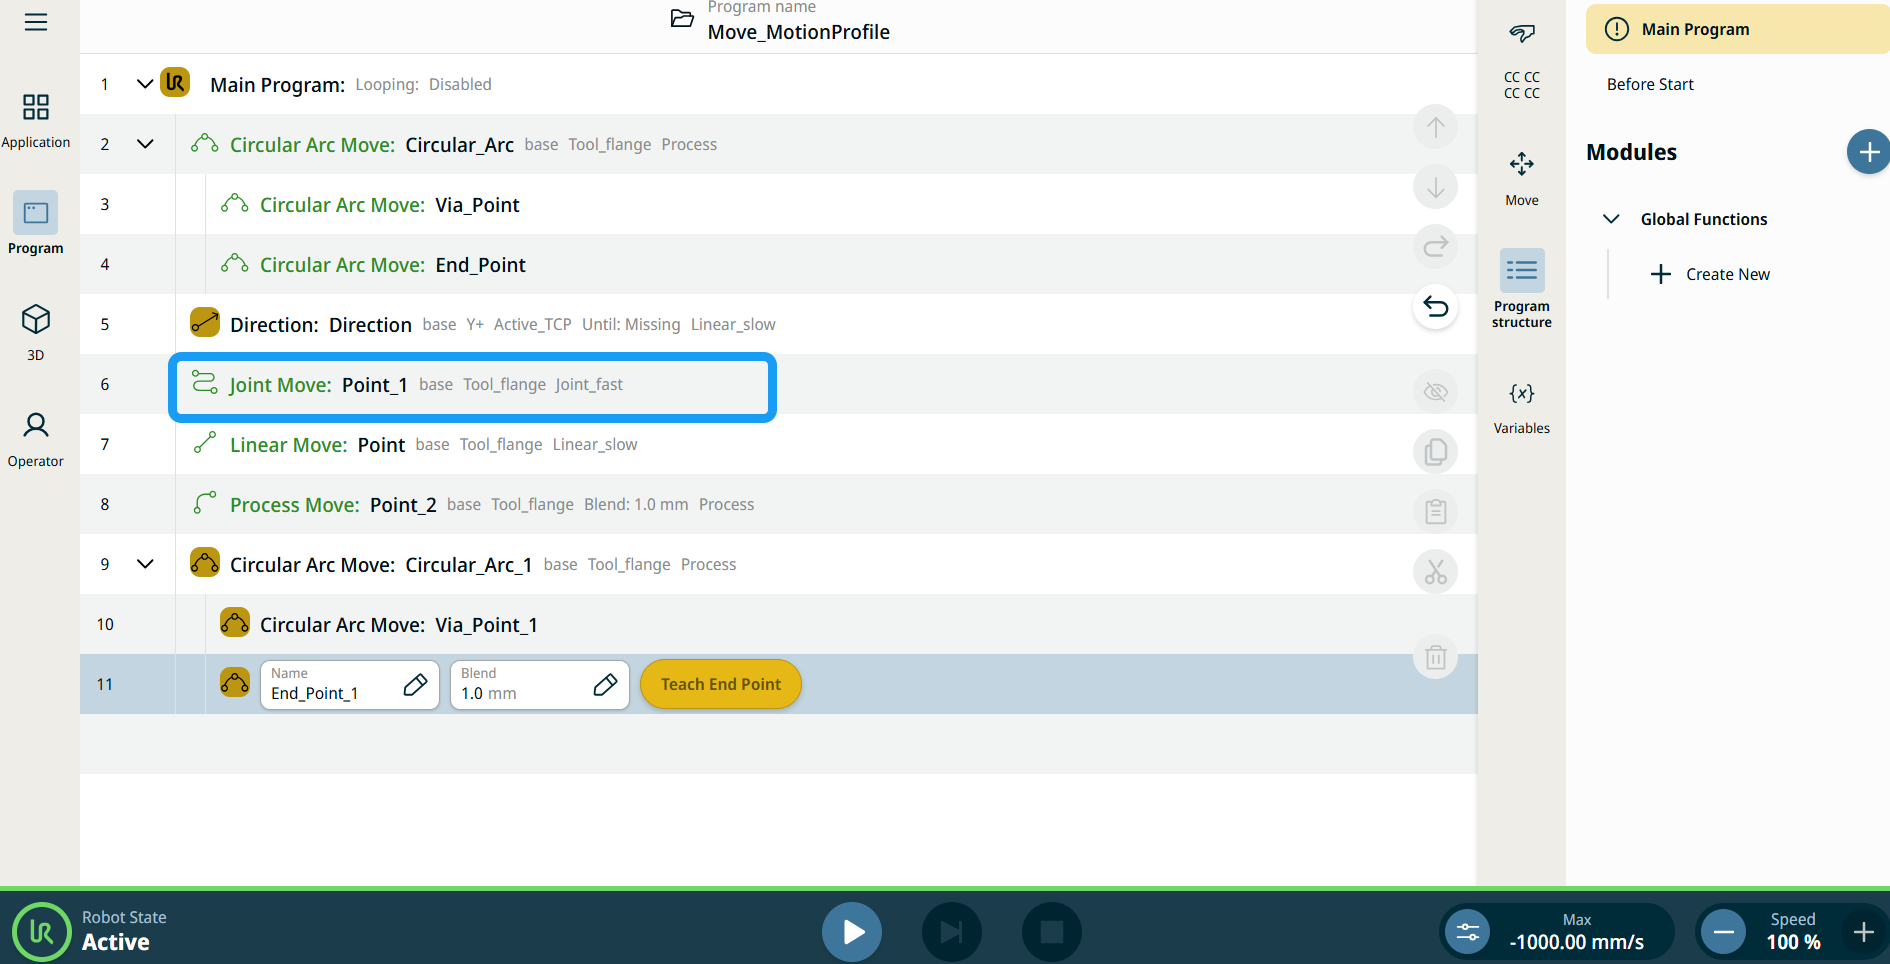
Todos los nodos de comando relacionados con movimiento en el árbol de programa muestran el Perfil de movimiento asociado a cada nodo. Esta función permite a los usuarios ver el perfil de movimiento seleccionado en un nodo Mover. Esta función se implementa en los siguientes nodos de comando: Los nodos de movimiento con perfil de movimiento personalizado mostrarán los valores de velocidad y aceleración en lugar del perfil de movimiento. |
|
|
|
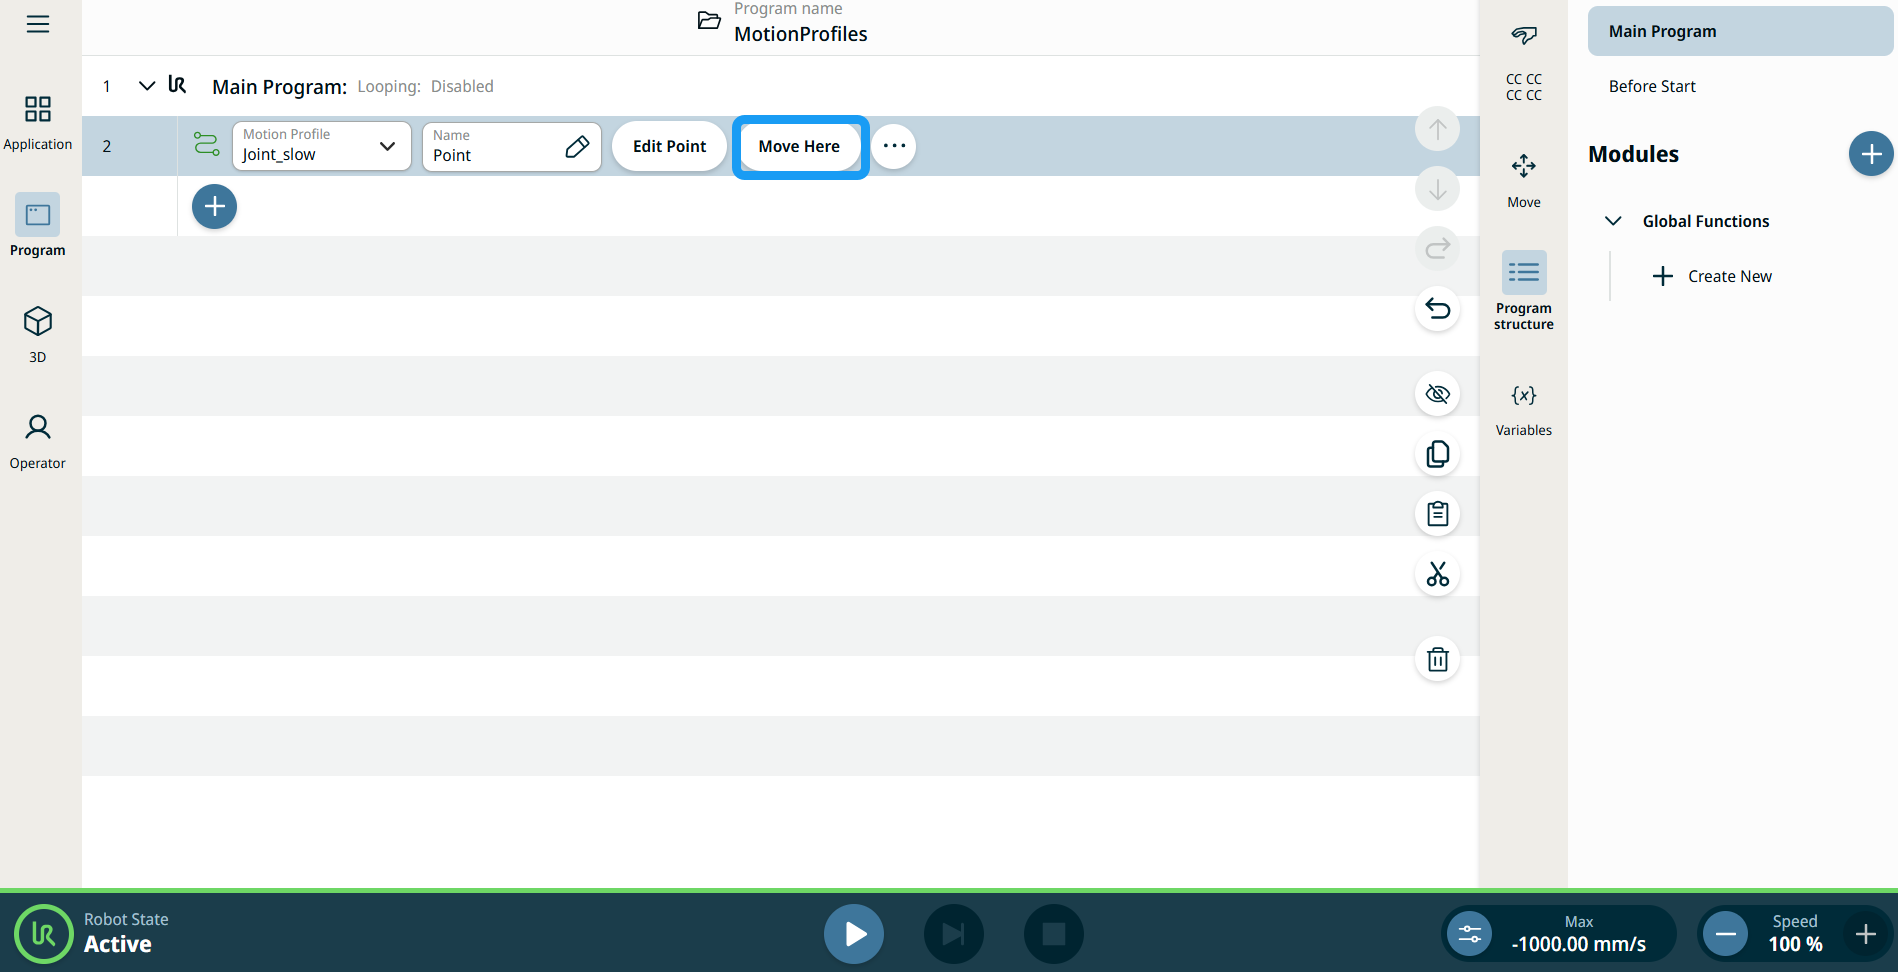
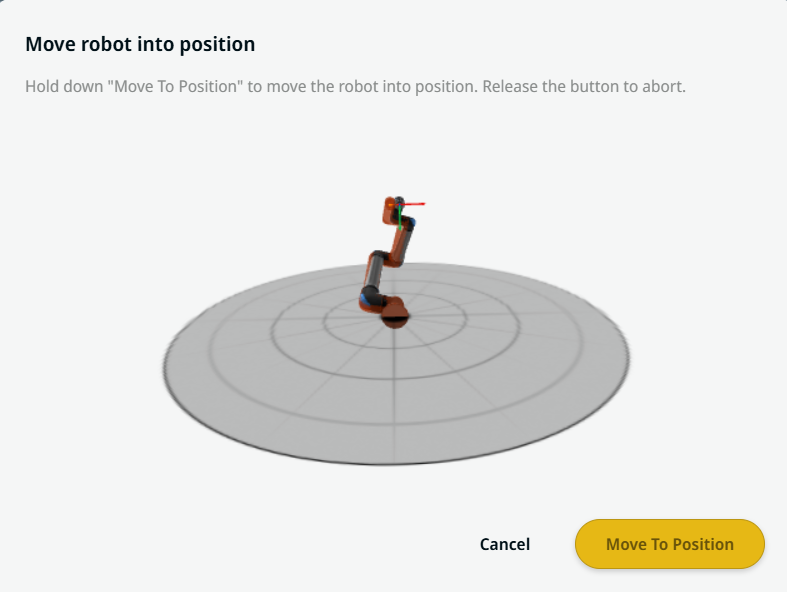
| Uso del botón Mover aquí |
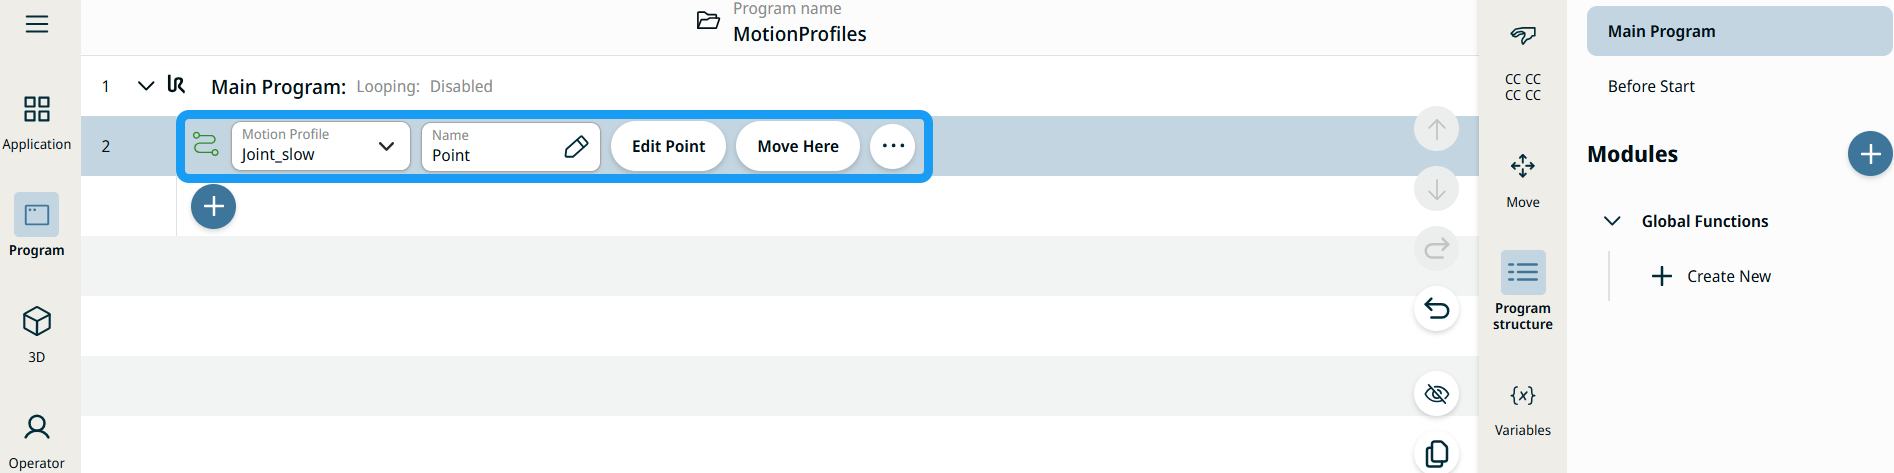
El botón Mover aquí se puede ver en los comandos Linear Move y Joint Move. Esta función le permite desplazarse a la posición de un punto de paso directamente desde el árbol de programa. Al pulsar el botón Mover aquí se abre el diálogo Poner robot en posición. El botón se puede ver cuando se ha enseñado el punto de paso y solo se habilita cuando el estado del robot está en modo Normal o Reducido.
|
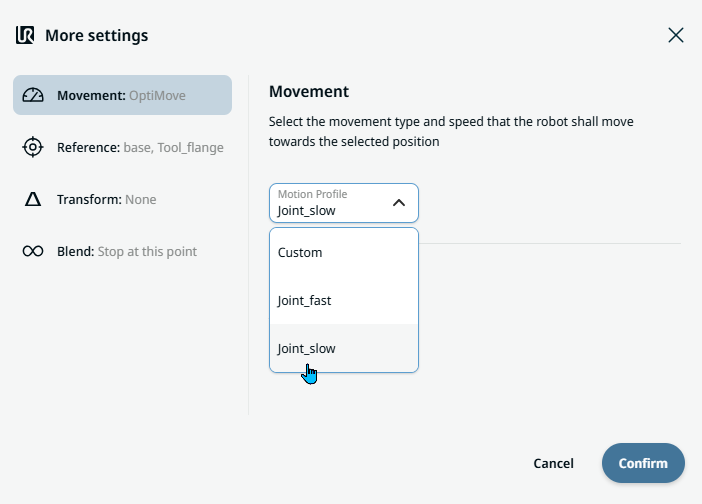
| Movement setting |
|
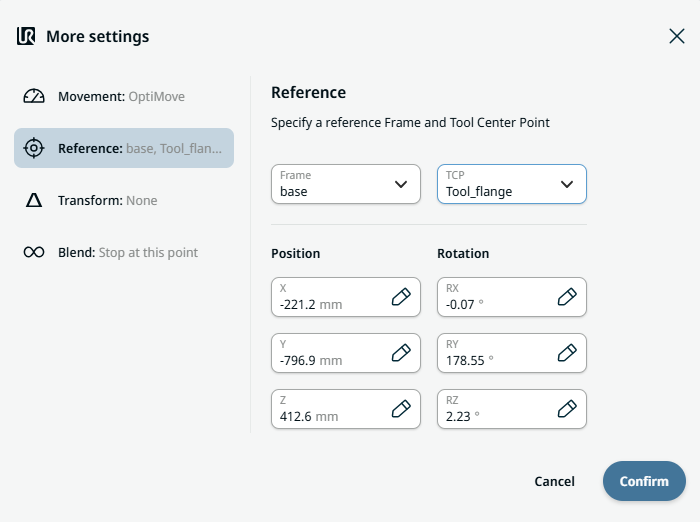
| Reference setting |
|
| Transform setting |
|
|
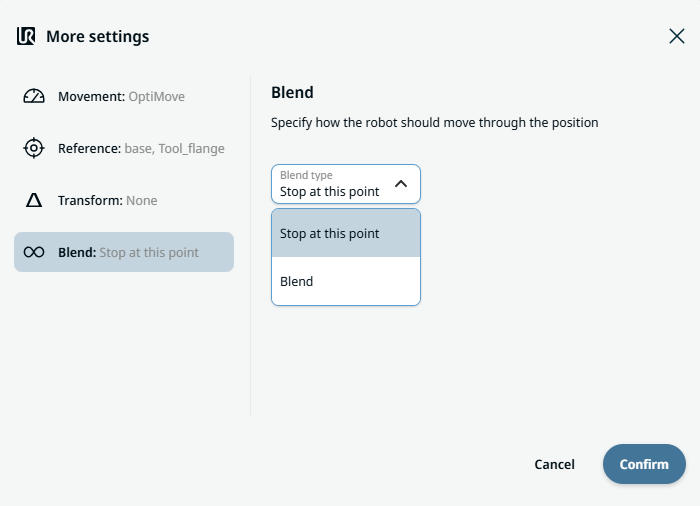
Blend setting |
|