Screwdriving

Description

The Screwdriving program node provides an easy way to add a screwdriving application for an attached screwdriver. Configuring the screwdriver and its connections to the robot is defined in the Installation Tab (see General).


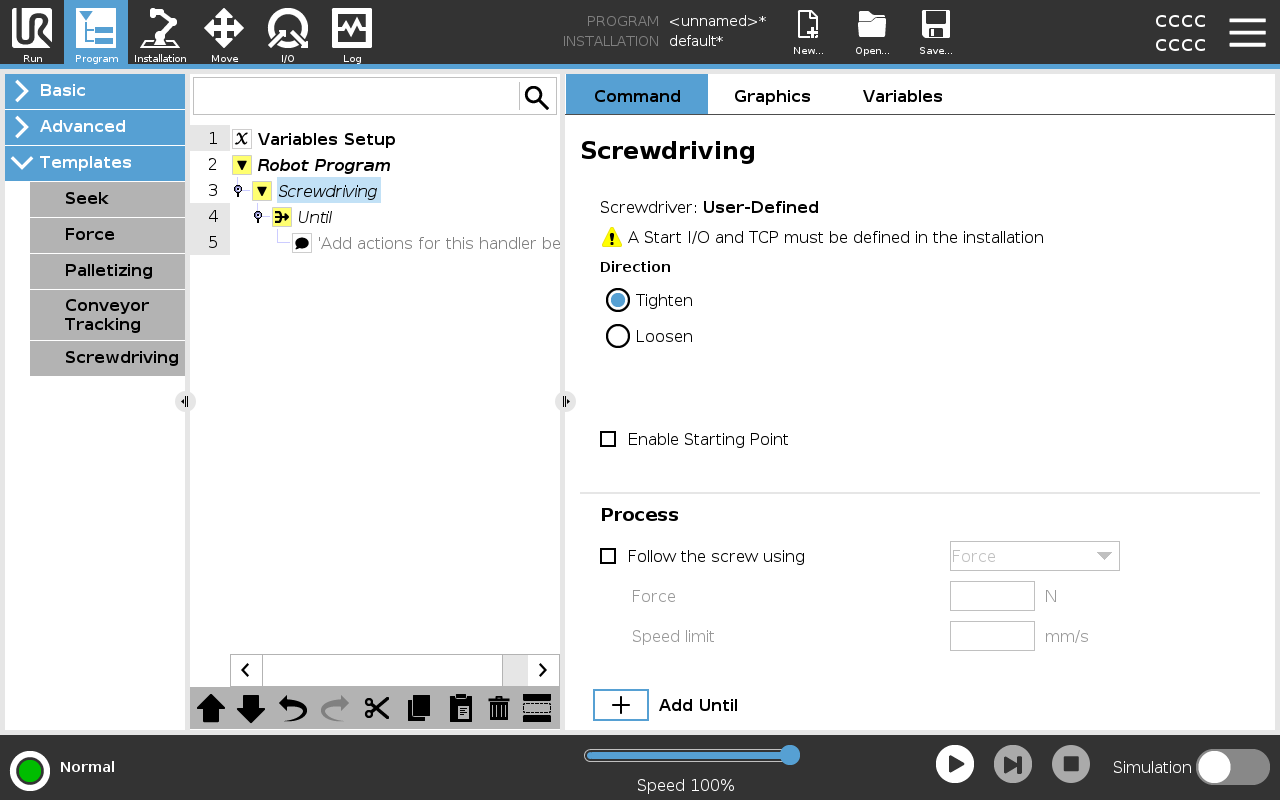
Adding a Screwdriving Node
  1. In the Header, tap Program.

  2. Under Templates, tap Screwdriving.

  3. Select Tighten to follow the screw in a tightening direction (in), or select Loosen to follow the screw in a loosening direction (out). This selection only impacts the motion of the robot to follow the screw and its measuring calculations.

  4. In the Program Selection field, you can select a screwdriver program, depending on the Program Selection signals in the Installation.

  5. Select Enable Starting Point, to add a MoveL to the Program Tree that is executed when the screwdriver is already running.
    Select Enable Machine Error Handler, to add a corrective measure, if required, to the Program Tree before the screwdriving actions begins.


Affect screwdriving action

Selecting Follow the Screw, under Process, to affect the screwdriving action in the following ways:

  • Force: Select Force to define how much force is exerted on a screw. Then select Speed Limit, so the robot moves at this speed as long as it does not come into contact with the screw.
    Place the screwdriver bit above the screw before starting a screwdriving program. Exerting any force on the screw can affect the screwdriving program performance.
  • Speed: Select a fixed Tool Speed and Accelerationfor the robot to follow the screw.

  • Expression: Similar to the If command (see If), select Expression to describe the condition under which the robot follows the screw.