Dismantling the OEM AC and DC Control Box
- Follow step 1 and 2 as described in Dismantling the Control Box
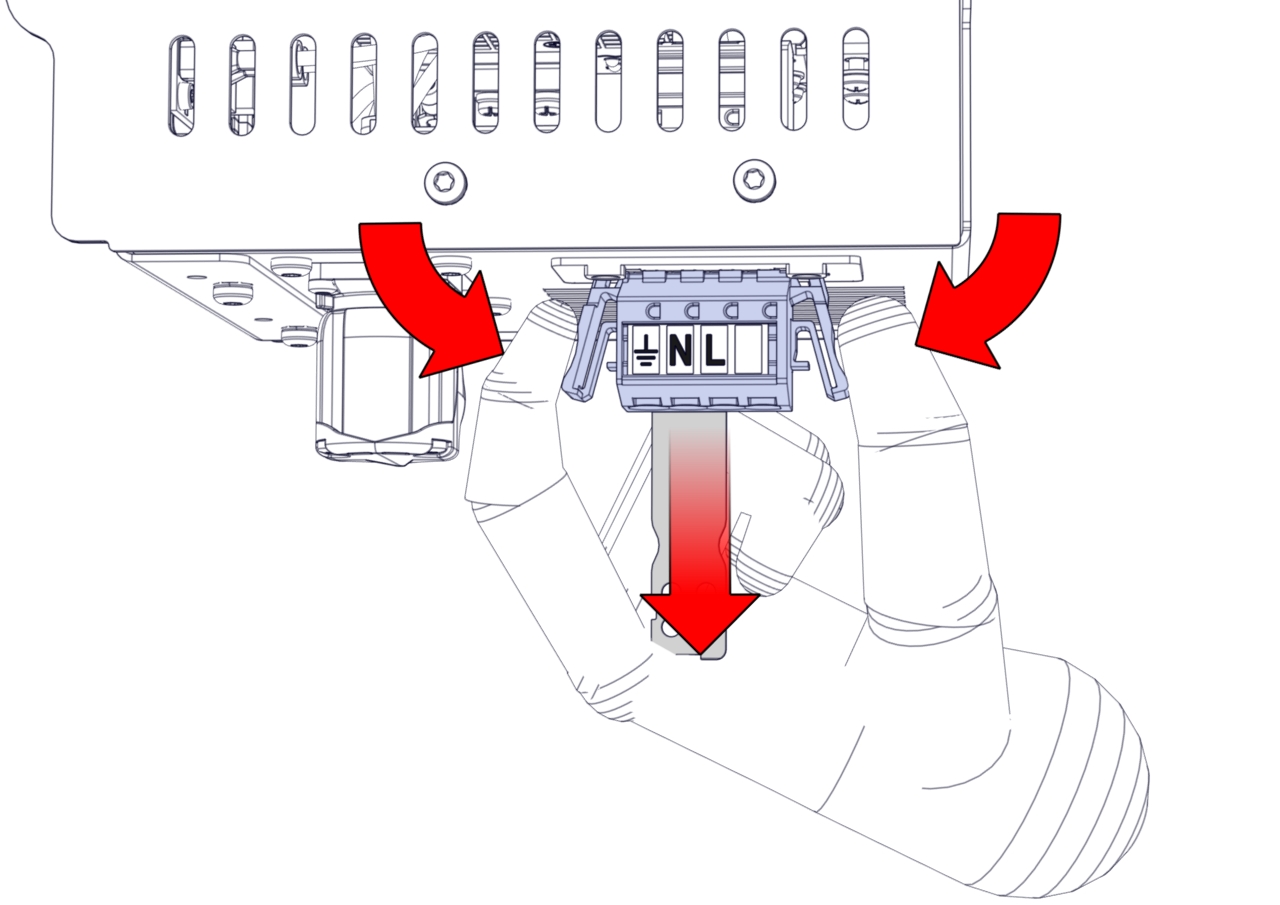
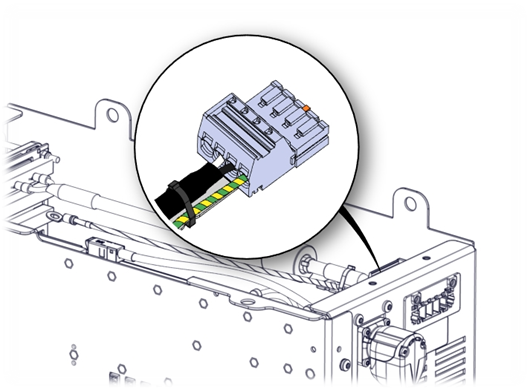
- Remove main power connection by pushing in on the two clips and pull backwards.
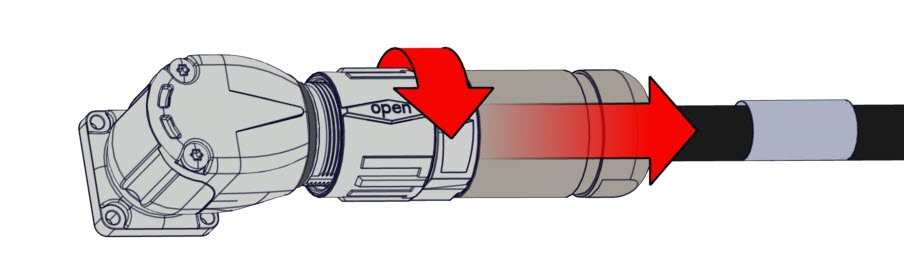
- Remove robot cable by unscrew the top part clock-vise then pull the plug out.
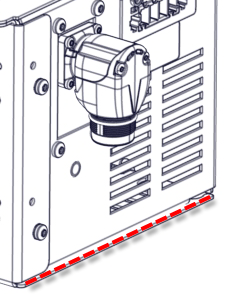
When pulling the robot arm cable connector, be careful not to scrape your hand/fingers on the frame edge.
- Remove the OEM Control Box from its installation and place it on a table or similar.
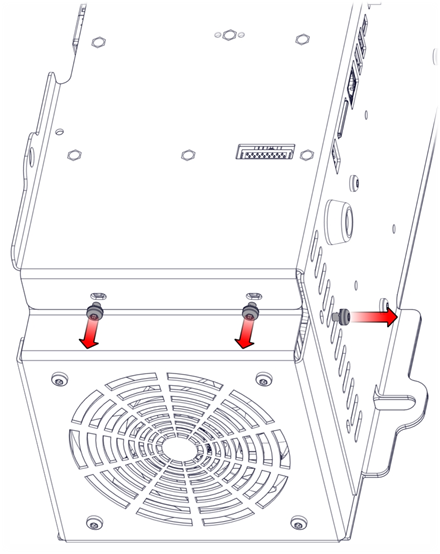
- Remove the 4 screws(T20) shown below, remember the washers as well.
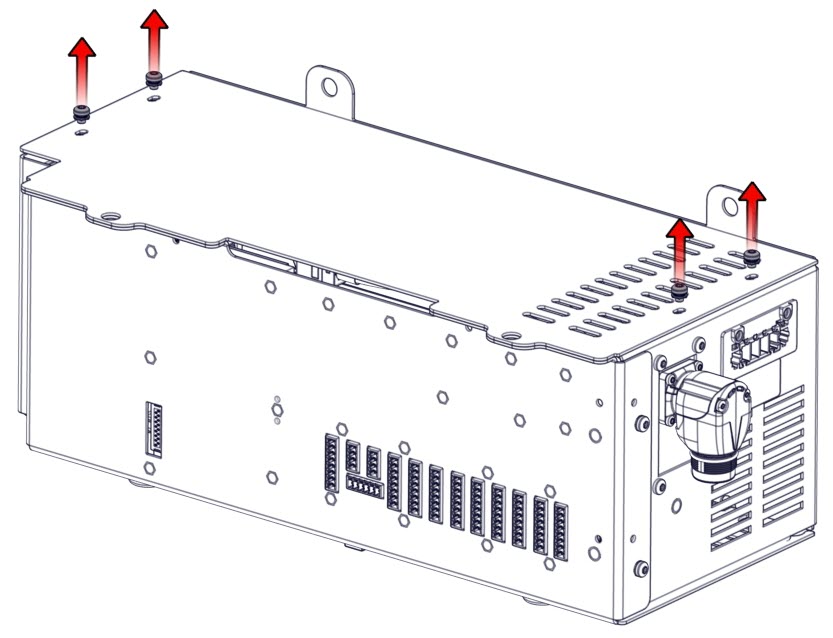
- Remove the top lid.
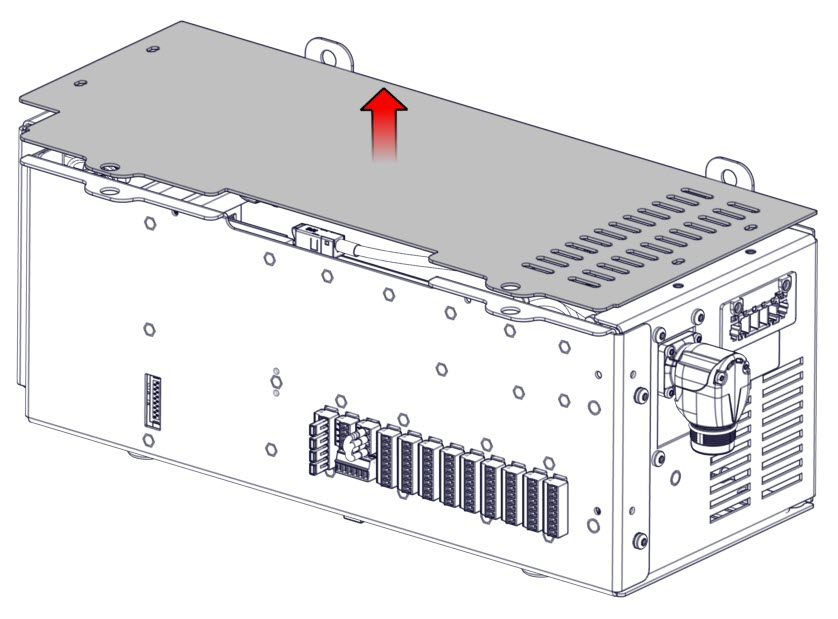
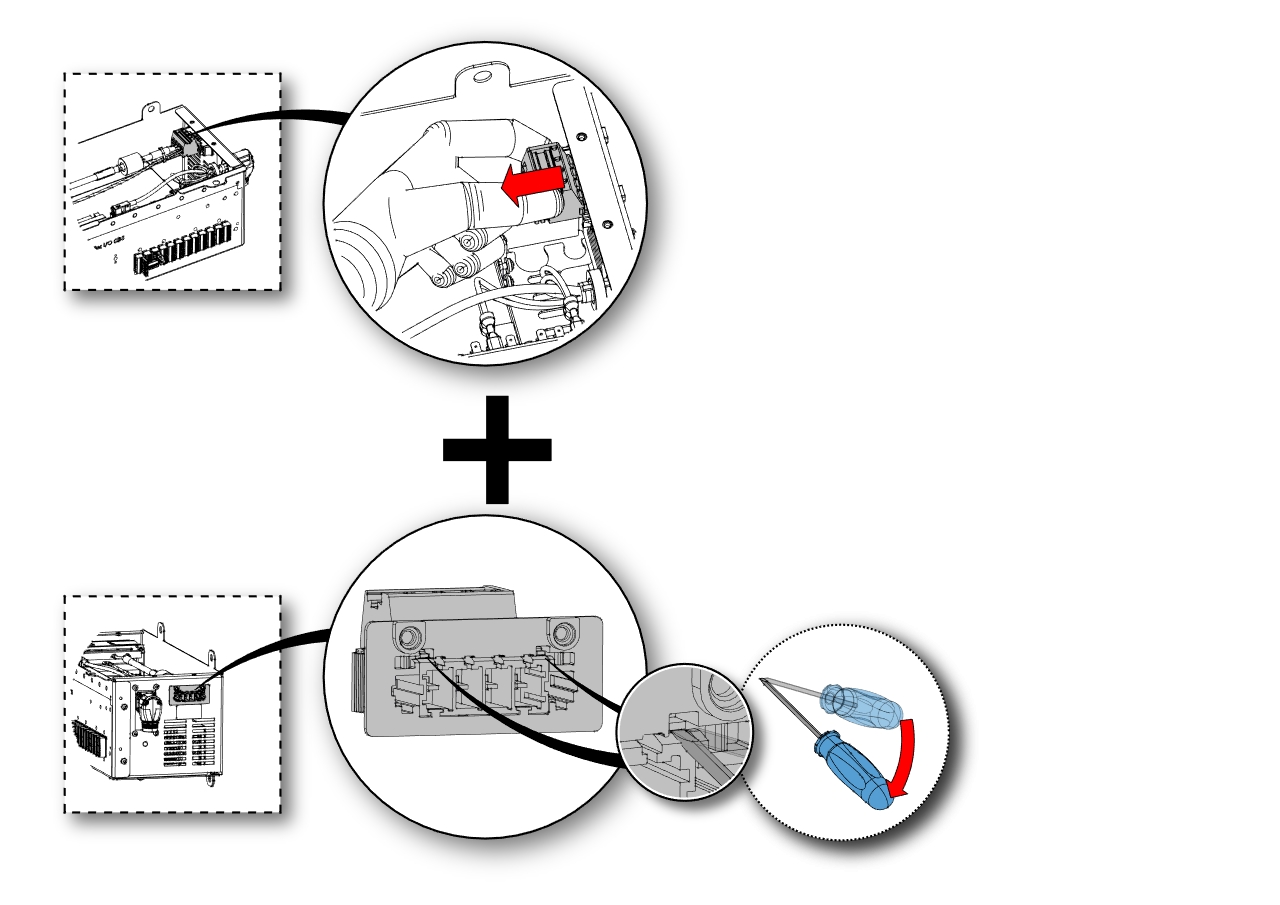
- Now the power plug on the inside needs to be disconnected from the frame, how to do this correctly is shown in Step 8.
- For removing the power plug, you will need a small 2mm flathead screwdriver. Pull in the power plug AND tip the two front locks upwards at the same time
- Remove all connections to the Control Board.
- Lay the Control Box on the “back”

- Remove the 6 screws(T20) shown below.
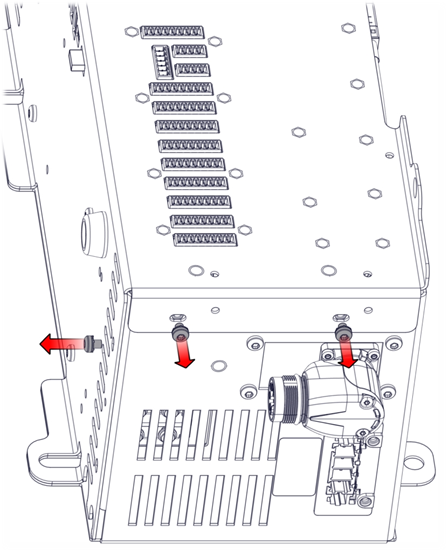
- Pull out the front part where the power supply and Control Board is attached.
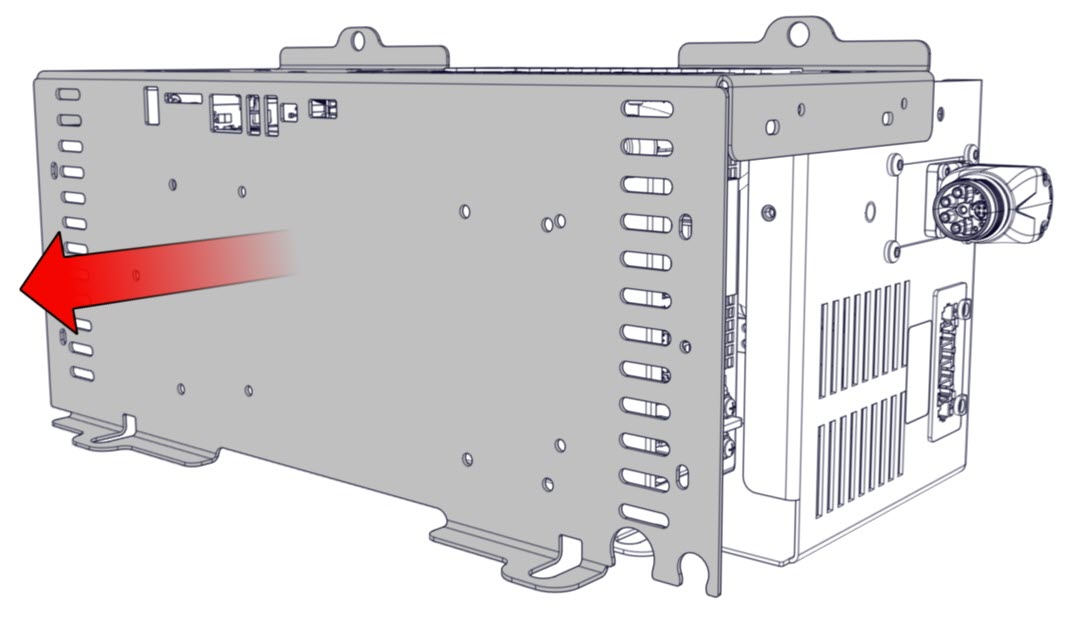
-
There are now two possibilities:
- Remove Power Supply and/or Control Board
- See step 7 and 8 in section Dismantling the Control Box
NOTE: Remember to cable tie the energy eater cable to the power cable when assembly the unit.
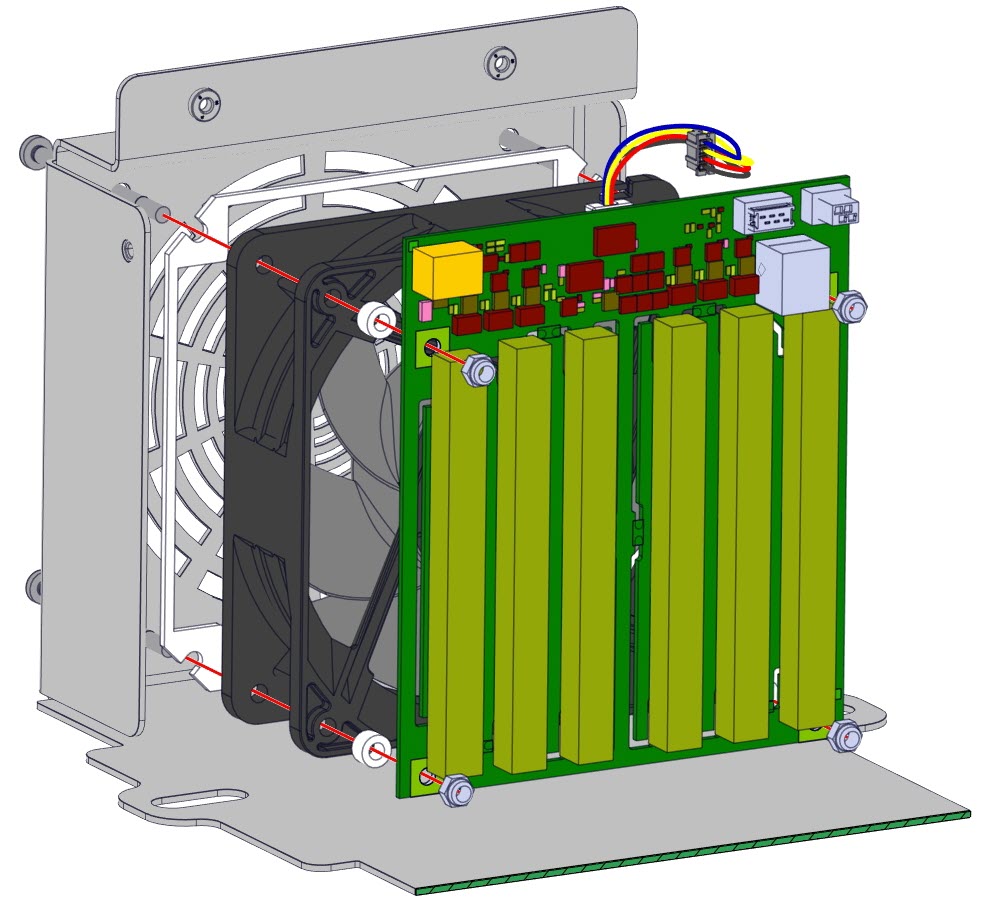
- Remove Energy Eater and/or Fan
See next step. -
Remove the 4 nuts(7mm) on the Energy eater side and pull the individually part off the screws(T20).