Configuring Waypoints

Description

Waypoints can be configured in different ways depending on the setup, application and position of the waypoint in the robot program.
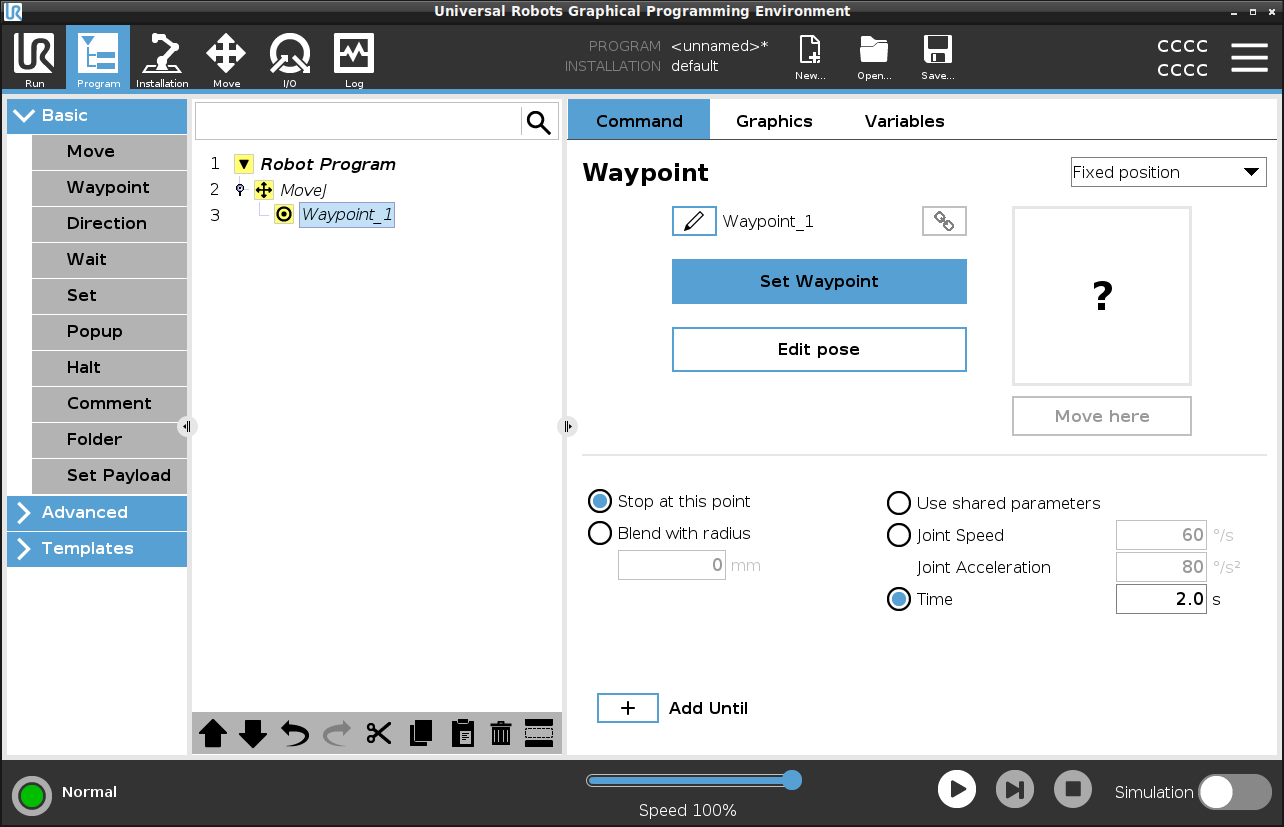
 

Naming Waypoints

Waypoints automatically get a unique name when you add them to the robot program.

The user can change the name of a waypoint.


To name a waypoint
  1. Make sure you are positioned on the Command tab on the right side of the screen
  2. Select the waypoint you wish to rename

  3. Tap the Rename button

  4. Type the new name

  5. Tap Submit to save the new name

Tip

In a large robot program, you can often have more than 50 waypoints, so create a naming rule that makes sense to you.


Linking Waypoints

By selecting the link icon, waypoints are linked and share position information.


Detail

Other waypoint information such as blend radius, tool/joint speed and tool/joint acceleration is configured for individual waypoints even though they may be linked.


Stop at this point

You configure the robot program to stop at this waypoint. The robot will decelerate moving towards this point and continue to the next waypoint.

Use Stop at this point
  1. Select the waypoint you wish to modify

  2. On the right side of the screen, select


Tip

This is useful to make the robot move to an exact position.


Use case

When you wish to move the robot away from a welding or machine tending application.


Blend with radius

You can add a blend radius for blending the robot arm's movement between waypoints. See this link for an in-depth description of blending.


Use Blend with radius

When you add a blend to a waypoint, the transition between waypoints becomes more fluid and efficient. This will make the robot arm move more smoothly, but it is not applicable in every robot arm movement.

  1. Select the waypoint you wish to modify

  2. On the right side of the screen, select

  3. Add a number [mm] to define the blend radius

  4. Tap Submit to save the number


Tip

If you are using multiple waypoints to guide the transition between two points you can blend the waypoints in between to make the overall movement smoother and more efficient.
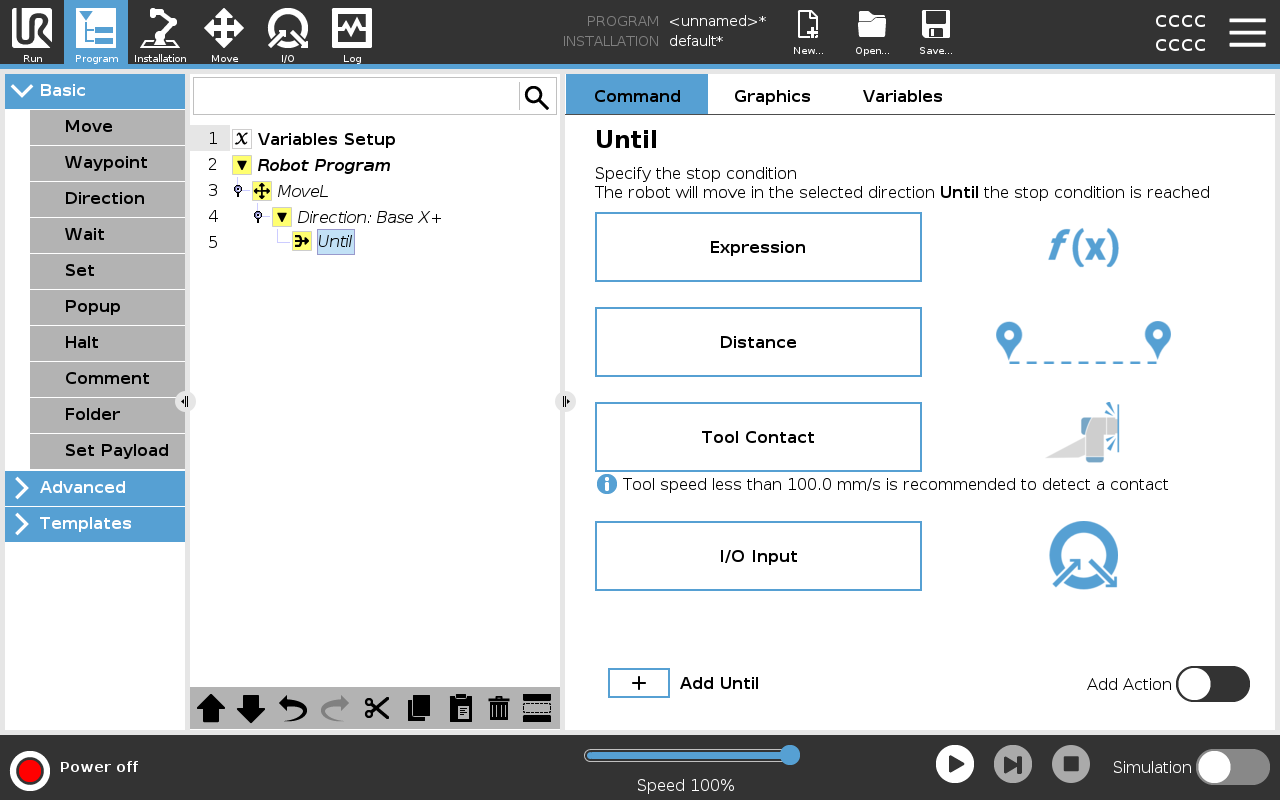
 

Use Shared Parameters

This is the default setting for the waypoint.

The settings are copied from the parent Move command.


Use case

This is used when the joint speed and joint acceleration is NOT changed in the parent Move command.


Joint Speed / Acceleration

You can modify the speed and acceleration of joints for each waypoint in a Move command.


Modify joint speed or acceleration
  1. Select the waypoint you wish to modify

  2. On the right side of the screen, set the joint speed or acceleration by selecting

  3. Add the value for speed

  4. Add the value for acceleration


Use case

If you create a palletizing program, then you can make the waypoint move more slowly as the program places the objects, and move faster when moving to pick up another object.


Time

You can change the amount of time that it takes to reach this waypoint.

The maximum is 21.600 seconds/6 hour.

Add time in seconds
  1. Select the waypoint you wish to modify

  2. On the right side of the screen, select

  3. Add a number in [s]

  4. Tap Submit to save the number

It now takes [s] to move the robot arm to this waypoint.


Add Until

Add Until will give you a number of different options for configuring your waypoint.


Steps

Please see the link Add Until for step by step instructions.