Add Until

Description

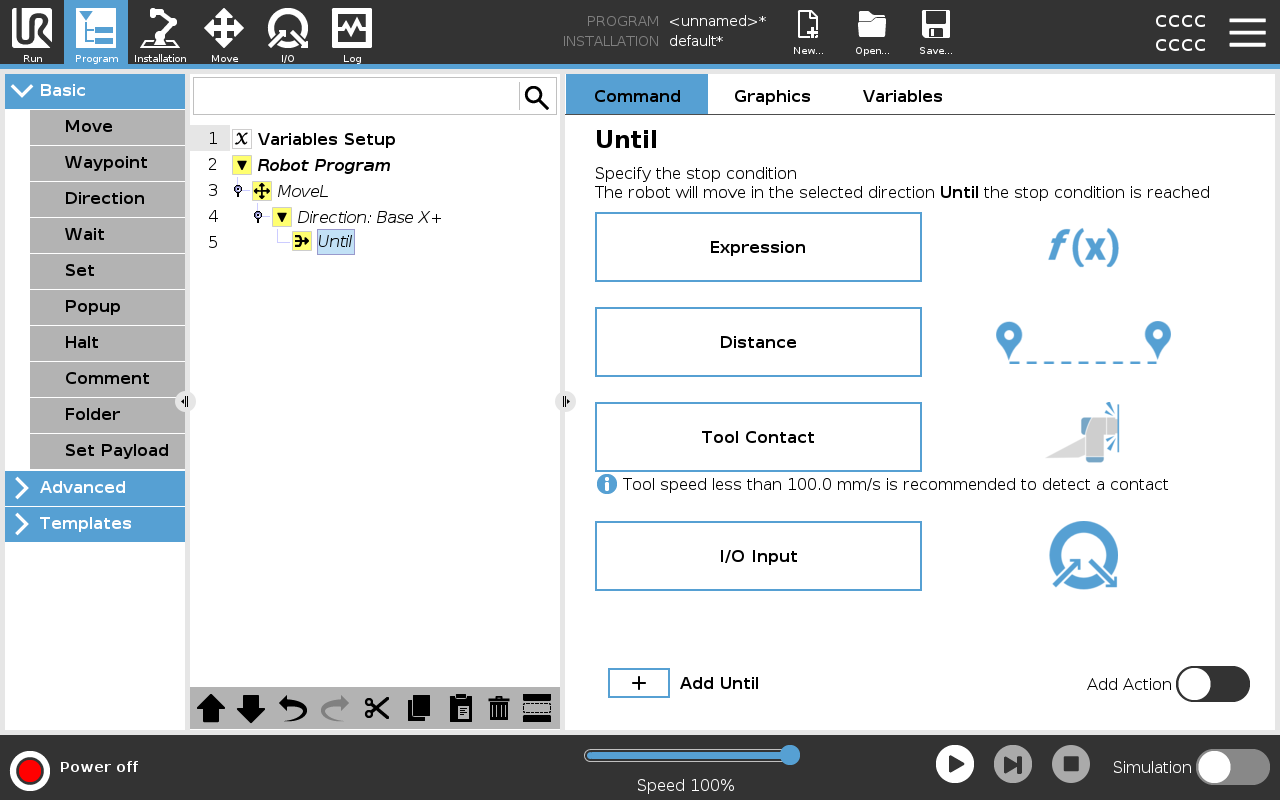
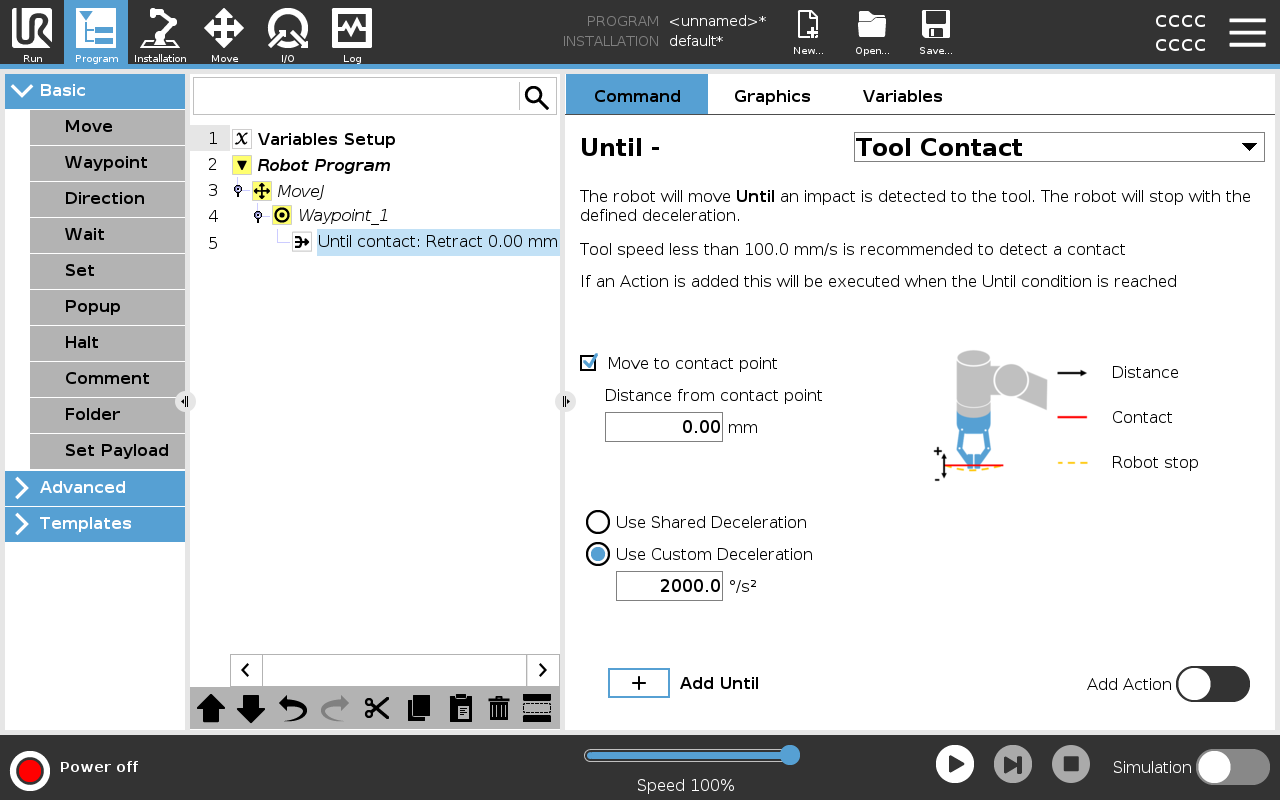
The program node Until defines stop criteria for a motion.

You can add Until nodes from Direction and Waypoint commands.

You can only add a direction node to a MoveL and MoveP.

The robot moves along a path and stops when contact is detected.


You can add multiple stop criteria to a single movement. The motion stops when the first Until condition is met.

You can add multiple Add Until one after the other, because there can be multiple conditions that must be met, before an action is done or executed.

  • Distance

  • Tool Contact:  (see Direction)

  • Expression

  • I/O Input:

  • Add Action


Expression

This node uses a custom program expression to stop the robot's motion. You can also use an expression to specify a stop condition.

Stop conditions can also be specified using variables and script functions.

Add an Until expression to a robot program
  1. When you have added the Until command, tap the

  2. Tap the yellow expression field

  3. Add the expression with the keyboard

  4. Tap Submit to save the expression

  5. Choose if you want to use the shared deceleration or a custom deceleration


Distance

This node stops a Direction move when the robot moves a certain distance. The velocity is ramped down so the robot stops exactly at the specific distance.

You can also use a specific distance as a stop condition.


Example

You can use the distance function to move the tool a specific distance before a full stop such as moving the tool away from a work piece.


Add an Until distance to a robot program
  1. When you have added the Until command, tap the

  2. Add the distance in mm

  3. Select to stop after it has moved the distance or blend with a radius. Click here to read more about blending.

Tool Contact

This node allows the robot to stop motion when contact with the tool is established.

You can use this node to stop a movement when the robot tool detects a contact.

You can also define the deceleration of the stop and the retraction of the tool.


Example

You can use the Until Tool Contact Node for applications like Stacking/Destacking, where Until Tool Contact determines the height of stacked objects.


Add a Until tool contact to a robot program
  1. When you have added the Until command, tap the

The default speed of motion is too high for contact detection. A faster speed of motion triggers a robot stop, before the Tool Contact condition can take effect. To avoid triggering a robot stop, lower the speed of motion. For example: 100m/s.
Until Tool Contact might not work if the mounted tool vibrates. For example: a vaccuum gripper with an embedded pump can introduce fast vibrations.


Detail

Use the Retract to Contact setting for the robot to return to the initial point of contact. You can set an additional reverse movement to make the robot move free of, or toward, contact. This is useful if you have a gripper that needs free space to move, or if a clamping action is needed.


I/O Input

This node uses an I/O input to stop a signal controlled motion.

You can also use an I/O input to specify a stop condition.

add a No Action to a robot program
  1. When you have added the Until command, tap the

  2. Select the analogue or digital input

  3. Add additional configuration


Add Action

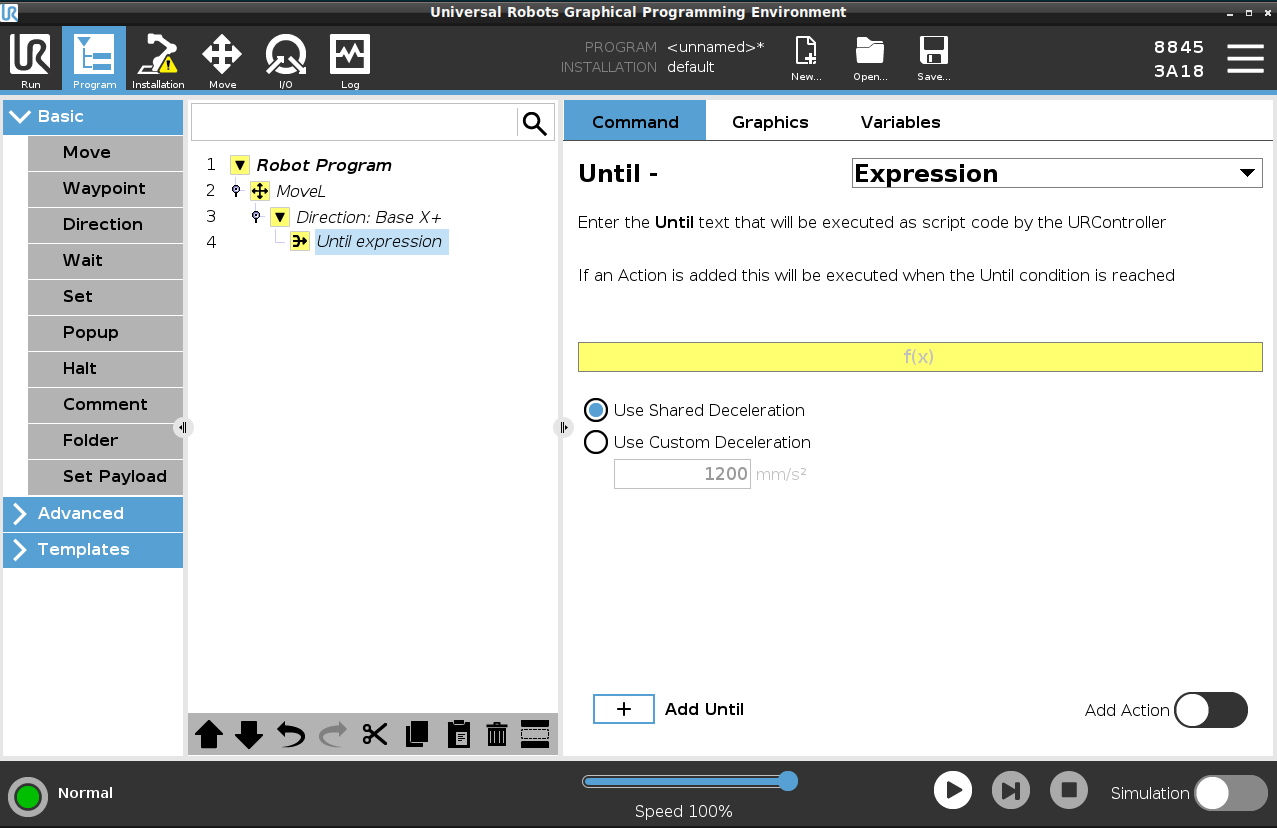
This node allows you to add a program node if a specific Until condition is met. You can also add an additional action to be executed right after an Until command.

Example

Until Tool Contact can engage the gripping action of a gripper tool. If no Action is defined, then program execution continues to the next program node in the Program Tree.


Add a No Action after an Until command
  1. Tap the

  2. Select a node from the Node List to be added immediately after the Until command

  3. Configure the node you just added