Set

Description

The Set command is one of the most often used commands. The Set command can turn external devices on and off. The Set command can also increase or decrease current/voltage to external devices.

You can always test your setup by using the test button in the right lower corner of the screen.

See the following sections about using Set:

The robot uses different Set commands.

See the Set command types below.
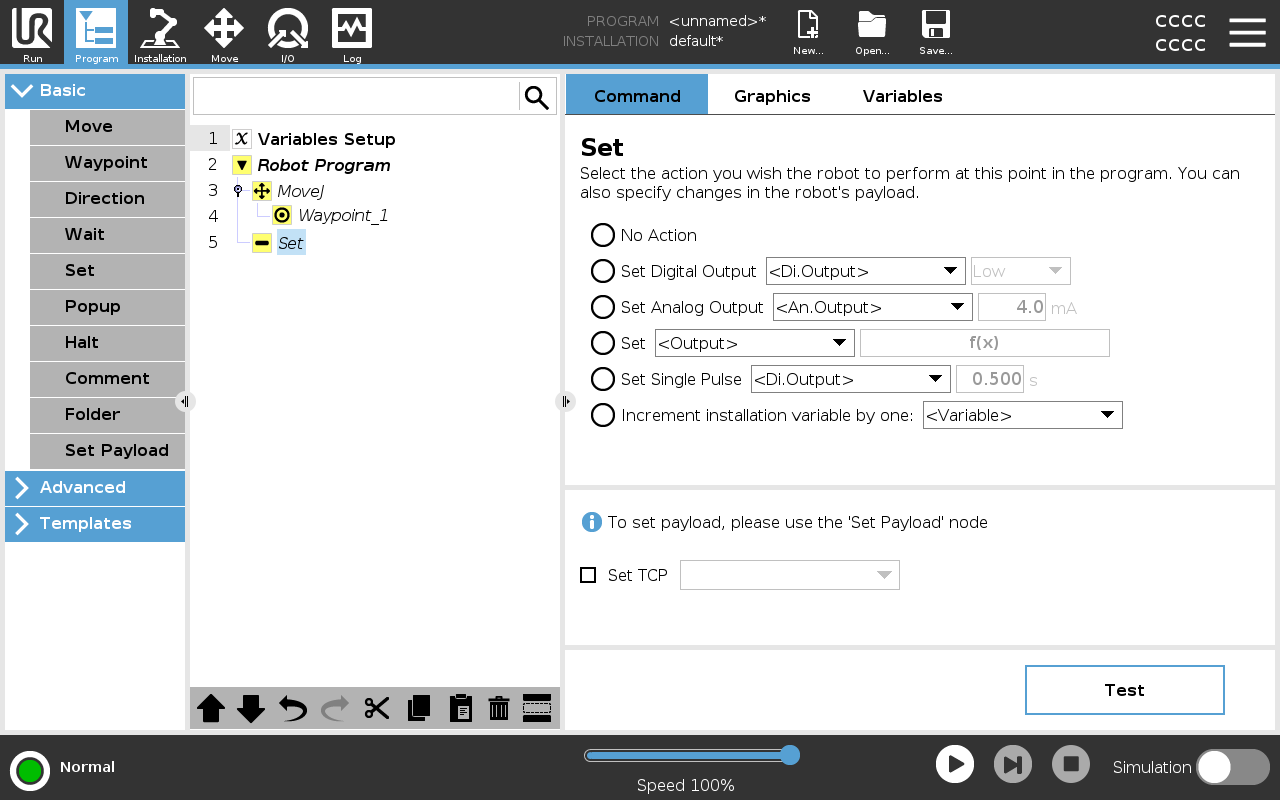
 

No Action

This is used in combination with setting the active TCP.


To add a No Action to a robot program

  1. In your Robot Program, select the place or node where you wish to add a Set command.

  2. Under Basic, tap Set.

  3. Select No Action


Set digital output

The digital output should be planned as a start/stop or on/off action.


  1. In your Robot Program, select the place or node where you wish to add a Set command.

  2. Under Basic, tap Set.

  3. Select Set Digital Output

  4. Select your pre-named digital output (See I/O Setup)

  5. Set to High/Low

Example: Set digital output

Use this Set command, if you want a conveyor to start or stop moving.


Set analog output

The analogue output should be planned as a variable increase/decrease in current/voltage.


  1. In your Robot Program, select the place or node where you wish to add a Set command.

  2. Under Basic, tap Set.

  3. Select Analog Output

  4. Select your pre-named analogue output (See I/O Setup)

  5. Input desired value (current or voltage depending on configuration in I/O Tab

Example: Set analog output

Use this command, if you wish to increase the speed of a conveyor or dim the light in a lamp or diode.


Set (variable)

The output can also be modified by an expression.


  1. In your Robot Program, select the place or node where you wish to add a Set command.

  2. Under Basic, tap Set.

  3. Select Set

  4. Choose the pre-named output

  5. Add the expression in the input field.


Example: Set (variable)

You can set an output to list the output torque of a robot joint.


Set single pulse

The Set command can be used to deliver a steady pulse of a specific duration. The output will remain High during the pulse, and return to Low after the pulse has ended.


  1. In your Robot Program, select the place or node where you wish to add a Set command.

  2. Under Basic, tap Set.

  3. Select Set Single Pulse

  4. Select your pre-named digital output

  5. Add your duration for the pulse in (s)

Example: Set single pulse

In order to ensure valid communication with older machinery, you can set a pulse to a high command for a duration, so that you ensure that the older machinery has time to register the command.


Increment installation variable by one

This is used to increase the number of a counter variable.


  1. In your Robot Program, select the place or node where you wish to add a Set command.

  2. Under Basic, tap Set.

  3. Select Increment installation variable by one

  4. Select your variable from the dropdown menu.

Example

If you need to know how many items that the robot has handled, you can add a counter and this Set command to increase the counter.


Set TCP


  1. In your Robot Program, select the place or node where you wish to add a Set command.

  2. Under Basic, tap Set

    1. You can set the active TCP with any command variation from the above.

  3. Tap Set TCP

  4. Select TCP from dropdown menu

Example: Set TCP

If you have a double gripper, you can use the Set command to change the active TCP to the other gripper.