Joint Move
| Descrizione |
The Joint Move is a move command node that supports Motion Profiles. The command creates a movement from point A to point B that is optimal for the robot. Il movimento può non essere una linea retta tra A e B, ma deve essere ottimale per la posizione iniziale e finale dei giunti. Joint Move makes movements that are calculated in the robot arm joint space. I giunti sono controllati in modo da terminare i propri movimenti contemporaneamente. Questo tipo di movimento si traduce in un percorso curvo che verrà seguito dall’utensile.
|
|
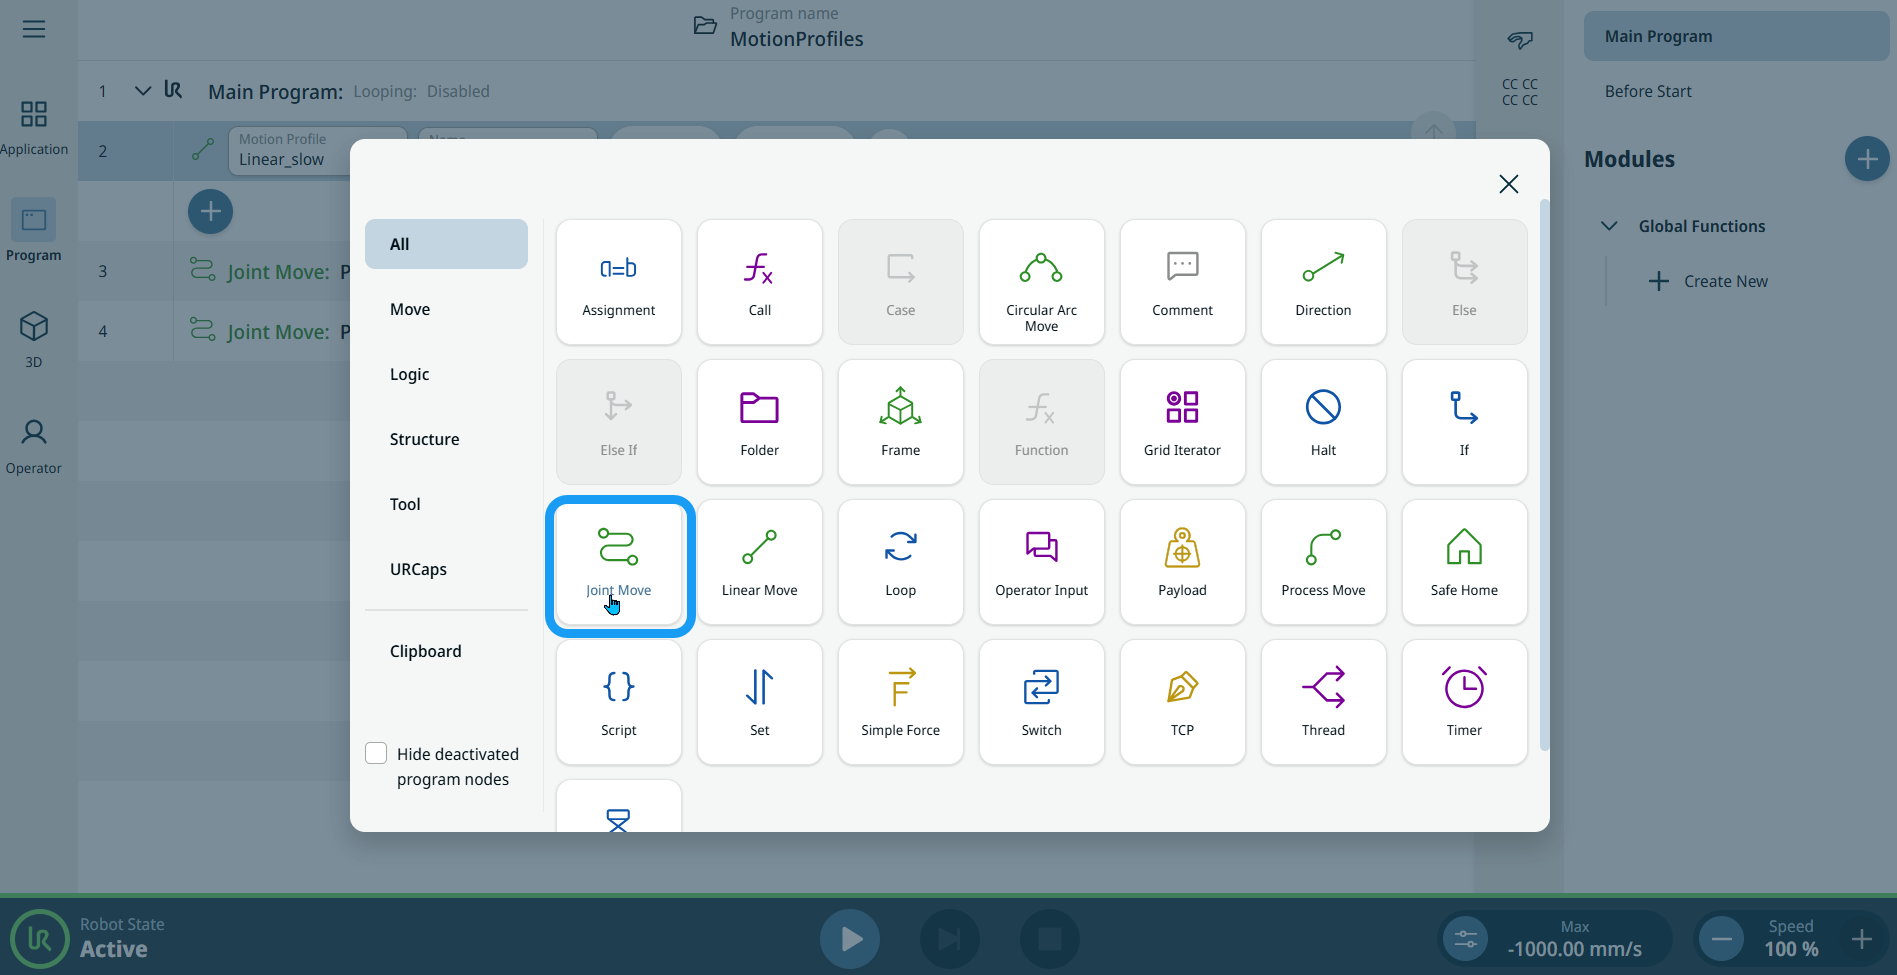
To access Joint Move command |
|
|
|
|
| Etichette di profilo movimento sui nodi Muovi |
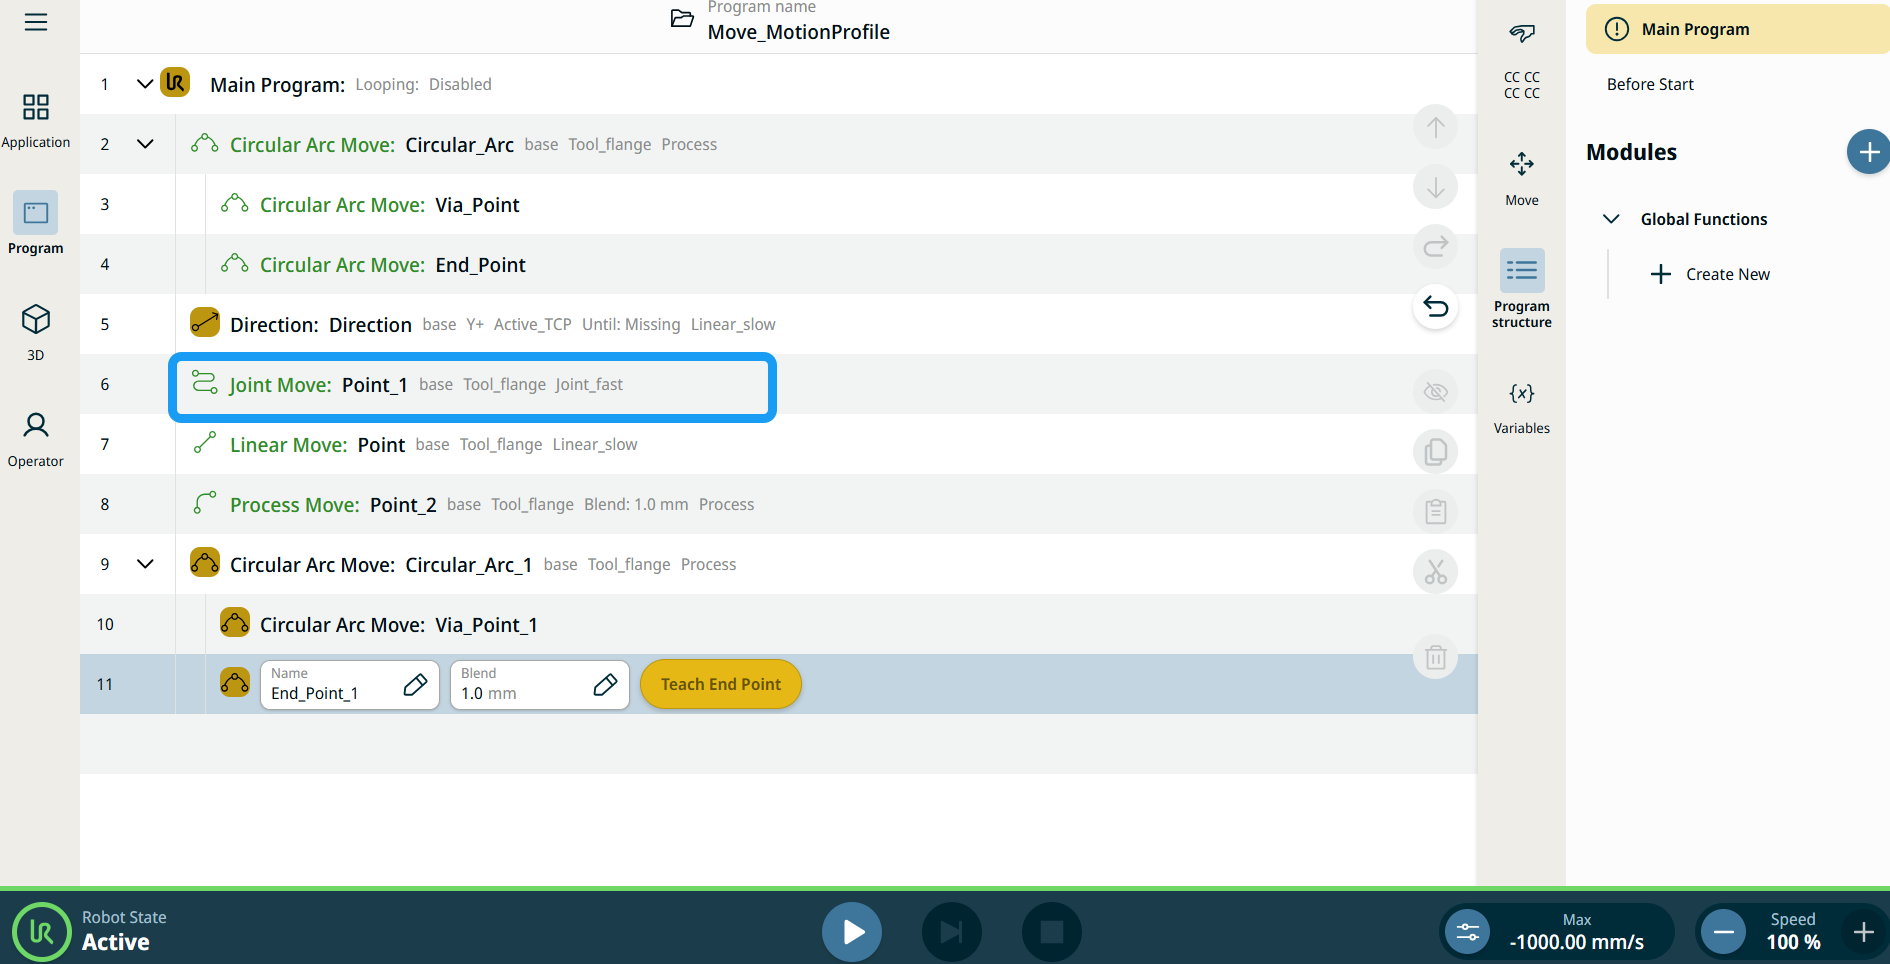
Tutti i nodi di comando relativi al movimento nell'albero del programma visualizzano il profilo di movimento associato a ciascun nodo. Questa funzione consente agli utenti di visualizzare il profilo di movimento selezionato su un nodo Muovi. Questa funzione è implementata nei seguenti nodi di comando: I nodi Muovi con profilo Movimento personalizzato visualizzeranno i valori relativi alla velocità e all'accelerazione anziché al profilo Movimento. |
|
|
|
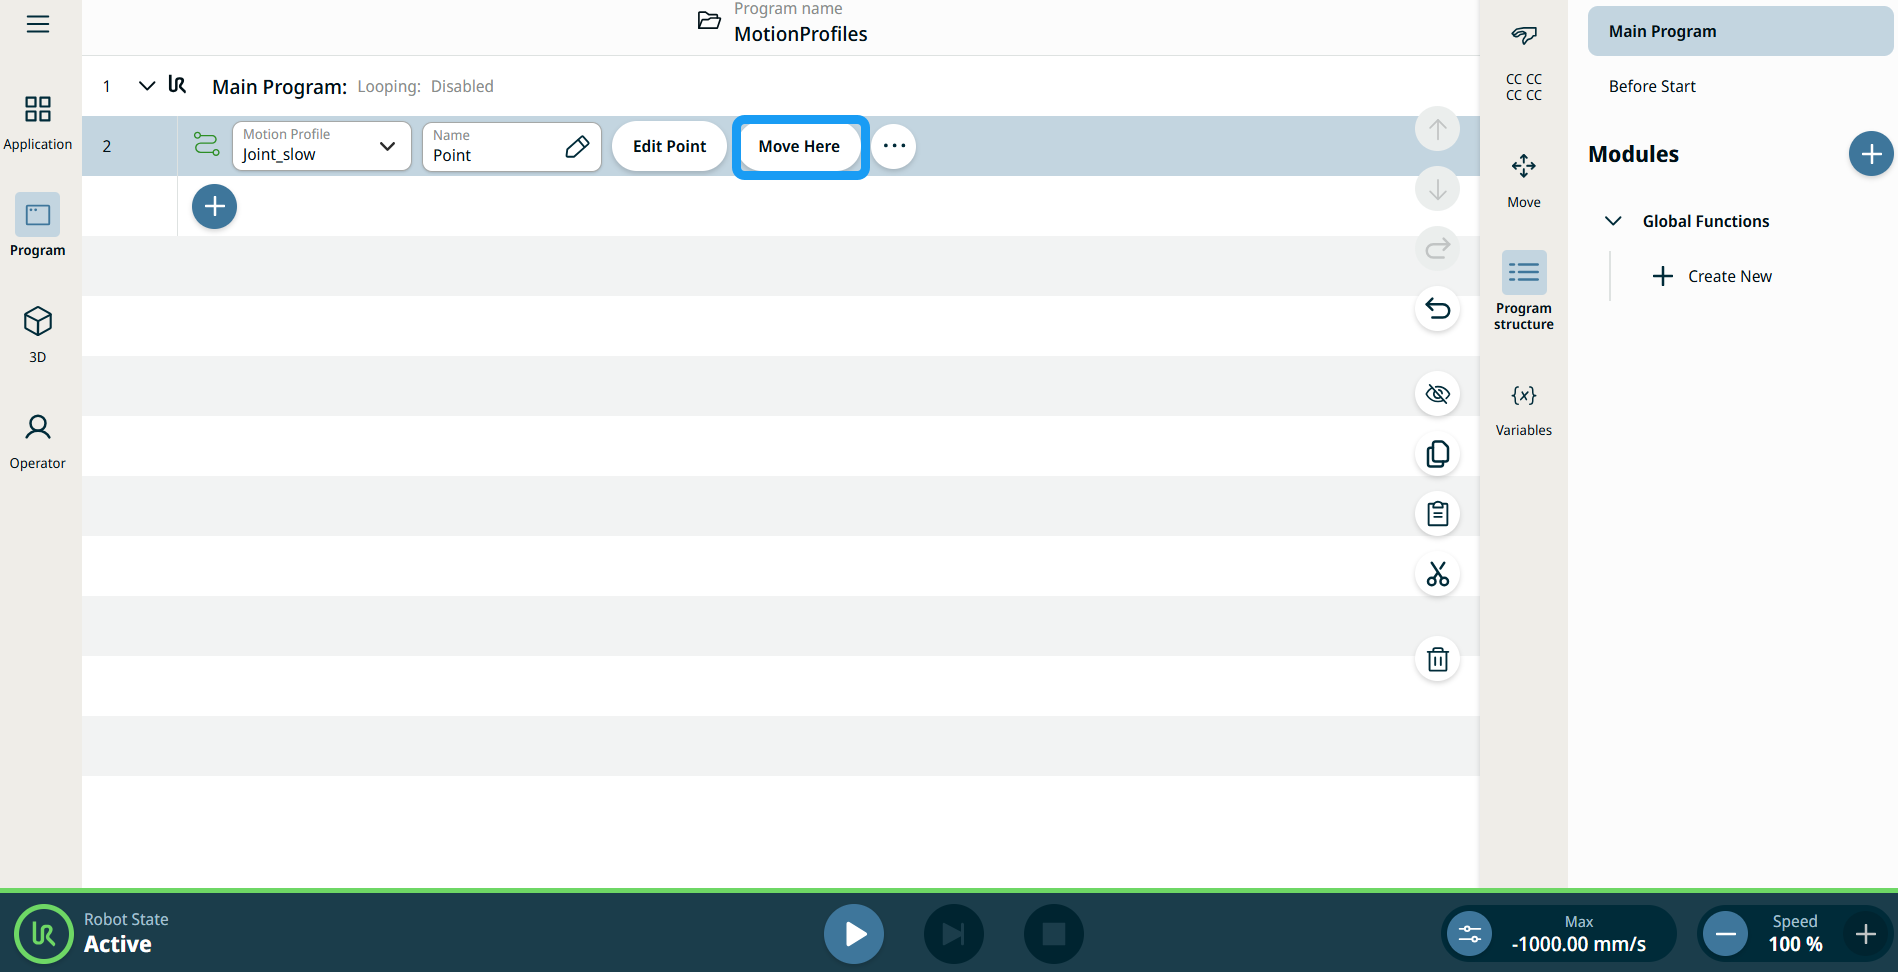
| Utilizzo del pulsante Sposta qui |
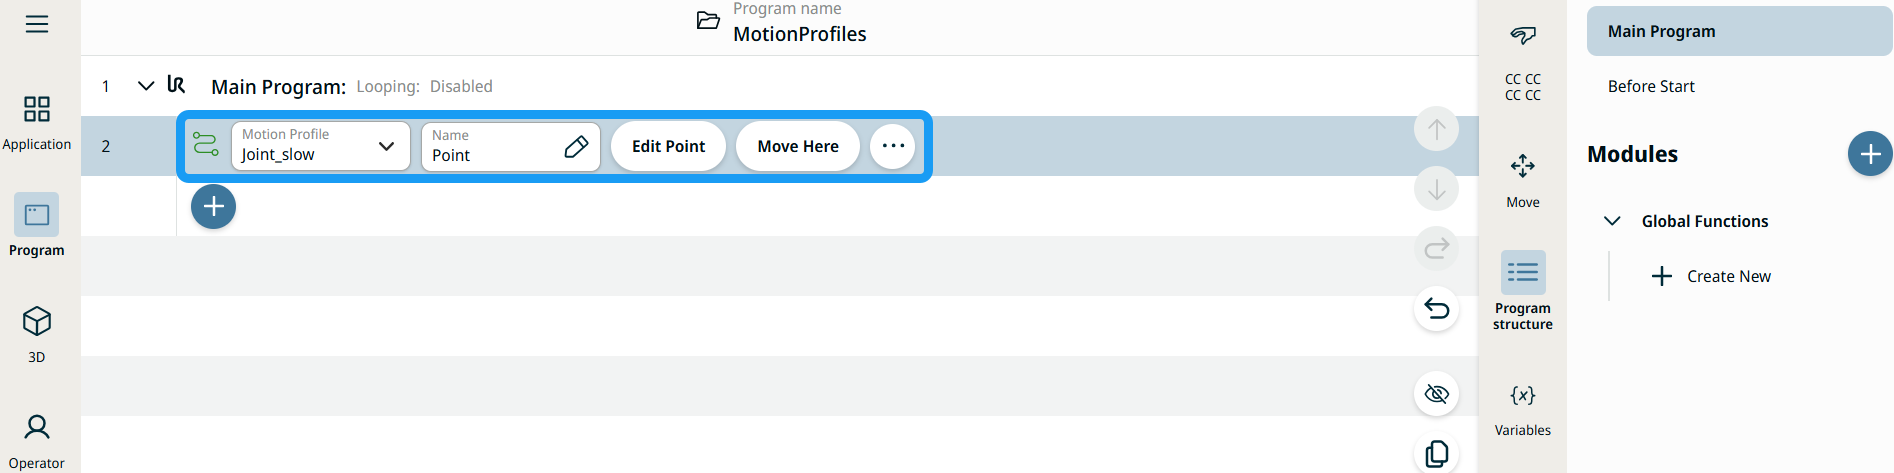
Il pulsante Sposta qui è visibile nei comandi Linear Move e Joint Move. Questa funzione consente di passare alla posizione di un punto percorso direttamente dall'albero del programma. La pressione del pulsante Sposta qui provoca l'apertura della finestra di dialogo Sposta robot in posizione. Il pulsante è visibile quando il punto percorso è stato impostato ed è abilitato solo quando lo stato del robot è in modalità Normale o Ridotta.
|
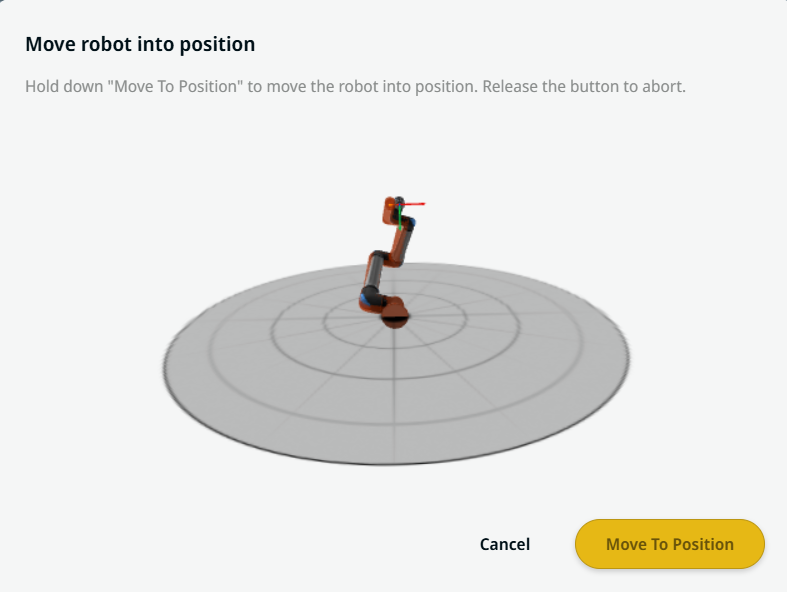
| Movement setting |
|
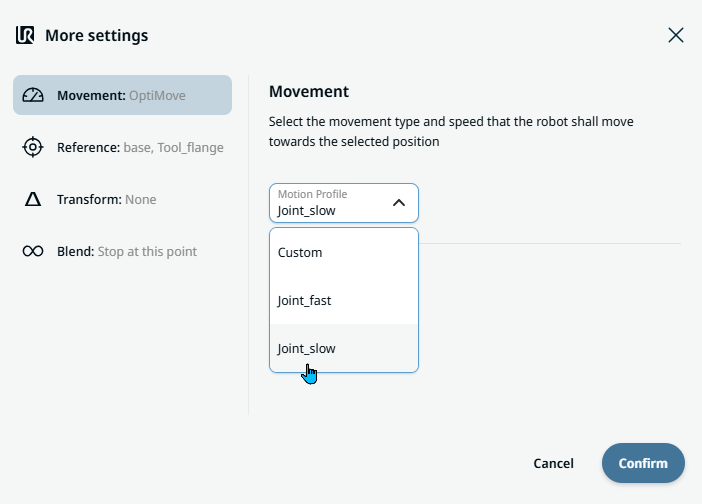
| Reference setting |
|
| Transform setting |
|
|
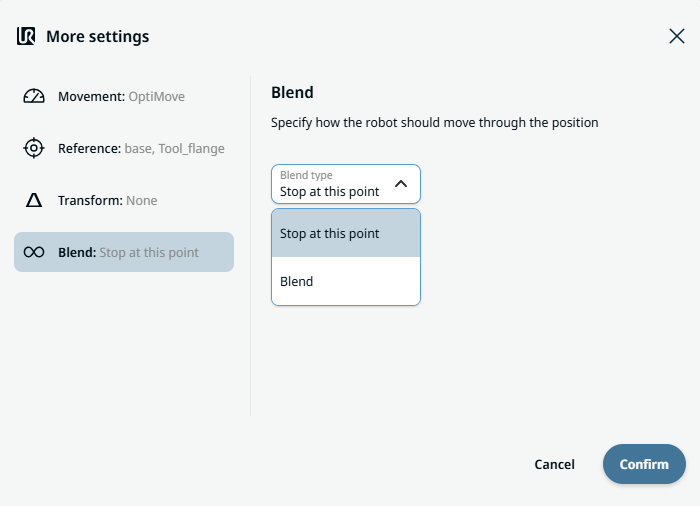
Blend setting |
|