Securing the Robot Arm

Description

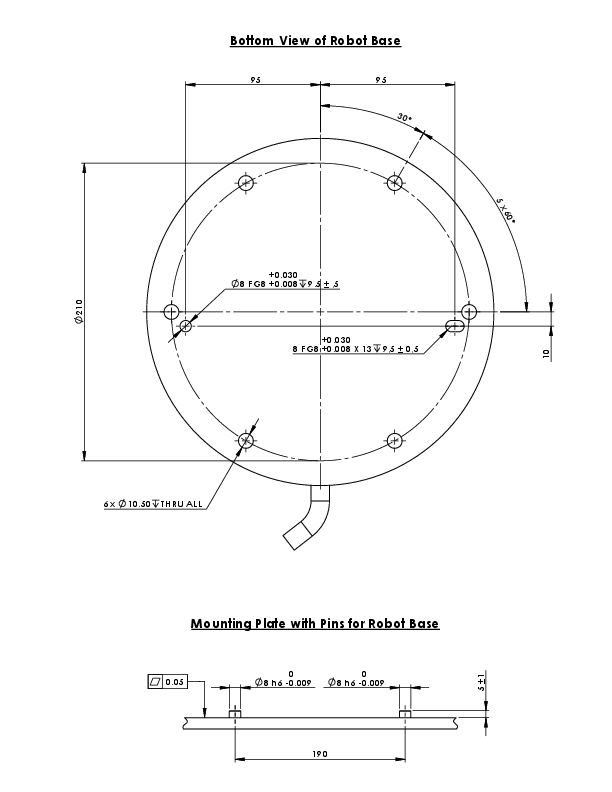
Dimensions and hole pattern for mounting the robot.


To power down the robot arm

Unexpected start-up and/or movement can lead to injury

  • Power down the robot arm to prevent unexpected start-up during mounting and dismounting.

  1. At the left side of the footer, tap the Robot State icon to turn off the robot arm.

    The icon color changes from green to white.

  2. Press the power button on the Teach Pendant to turn off the Control Box.

  3. If a Shutdown dialog box displays, tap Power Off.

At this point, you can continue to:

  • Unplug the mains cable / power cord from the wall socket.

  • Allow 30 seconds for the robot to discharge any stored energy.


To secure the robot arm
  1. Place the robot arm on the surface on which it is to be mounted.

    The surface must be even and clean.

  2. Tighten the six 8.8 strength, M10 bolts to a torque of 45 Nm.
    (Torque values have been updated SW 5.18. Earlier printed version will show different values)

  3. If accurate re-mounting of the robot is required, use the Ø8 mm. hole and Ø8x13 mm. slot with corresponding ISO 2338 Ø8 h6 positioning pins in the mounting plate.