General Guidance to Separate Joint from Counterpart
Before replacing ANY components inside the Control Box, it is important to completely shut it down first. Follow the first 3 steps in Complete Rebooting Sequence
Exercise caution when handling ESD sensitive parts. See Section 2: Handling ESD-Sensitive Parts
Disassemble:
- Before repairing the robot, make sure the necessary tools are available.
- Service tools with torque tools, ESD Wristband, etc.
- If you must disassemble the Robot Arm you will need:
new flat rings, wear rings, M3 and M4 tap tool("roll tap" or "forming tap") for threads, pre-coated screws, or Loctite.
Before continuing, read the complete guide in this manual.
- Move the robot to an appropriate position for disassembly.
- Shut down the Control Box and remove the main power.
- If necessary, dismount the entire Robot Arm from the work cell and place on a solid surface.
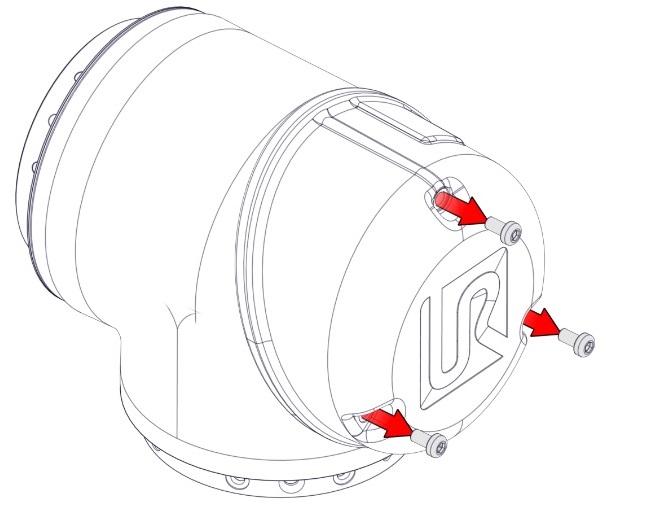
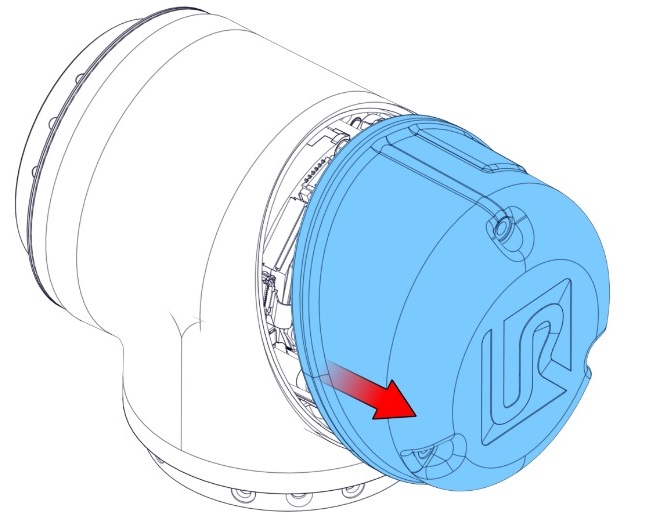
- Remove screws and the blue lid.
|
|
|
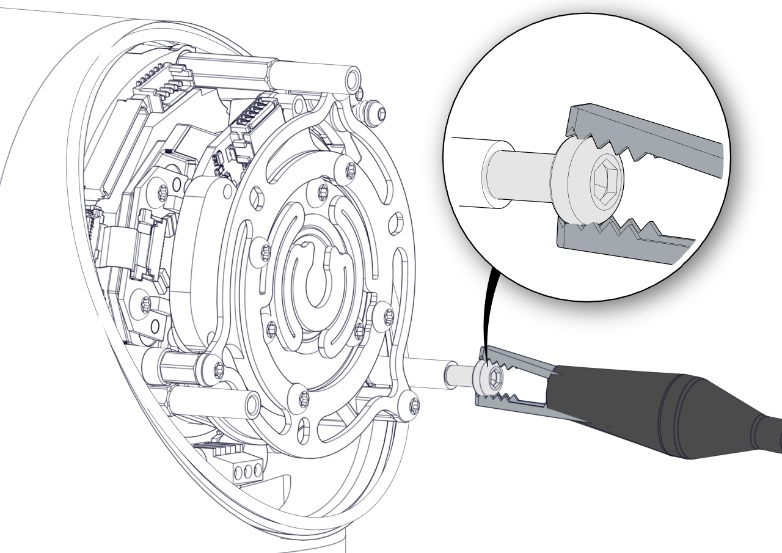
- Now reattach one of the screws, on one of the standoffs and mount the alligator clip on your ESD wristband, as shown below.
|
|
|

Some connectors have a lock that must be engaged before it is pulled out of the printed circuit board.
- Gently unplug the cable connectors without bending the printed circuit board.