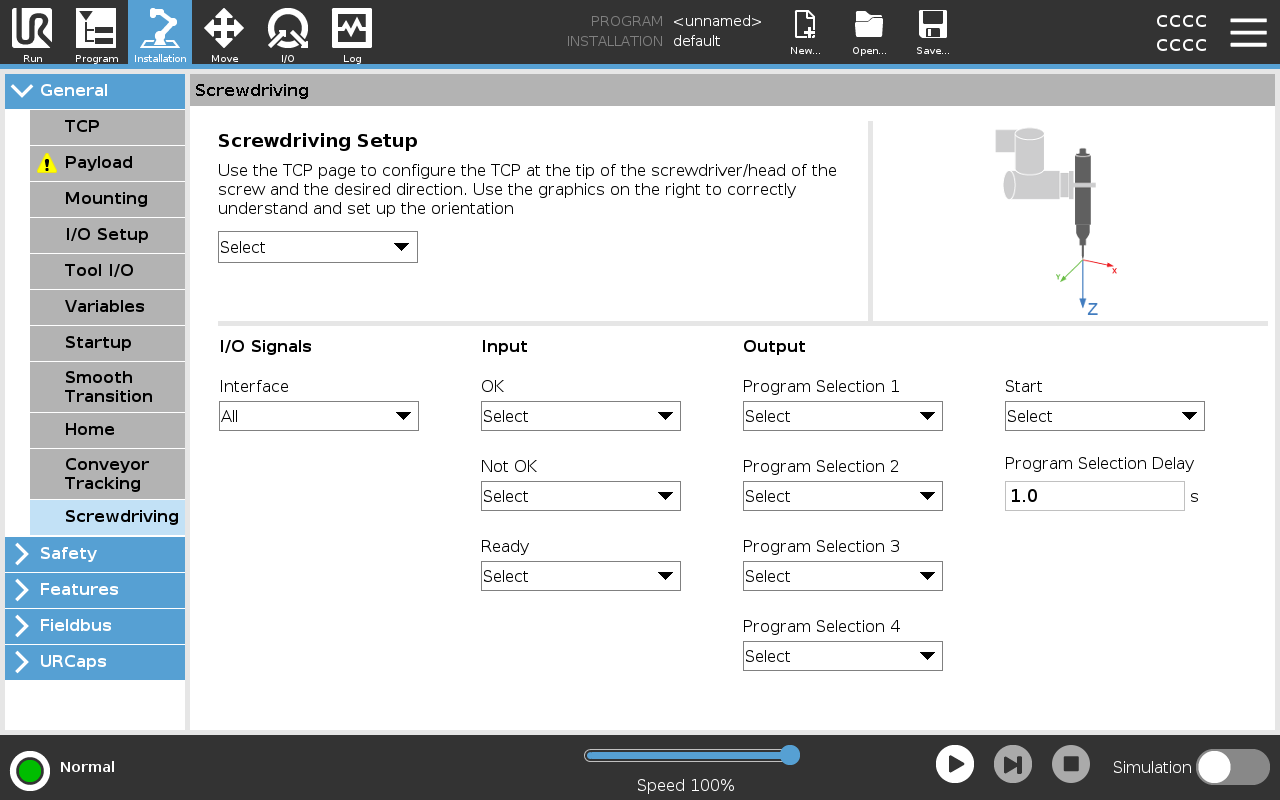
Screwdriving Setup

Description

The Screwdriving Setup provides options for configuring the robot to work with an industrial screwdriver or an industrial nutrunner. You can setup the screwdriver’s position with respect to the robot’s tool flange and electrical interface.


Configuring a Screwdriver

In any output Program Selection list under Output, you can select an integer output to switch Program Selection to a number field.

  1. In the Header, tap Installation.

  2. Under General, select Screwdriving, or create your own TCP for screwdriving by tapping TCP under General.

  3. Under Input and Output, configure the I/Os for your screwdriver. You can use the Interface list to filter the type of I/Os displayed under Input and Output.

  4. Under Start, select the I/O that starts the screwdriving action.


Configuring the Screwdriver Position
  1. Under Screwdriving Setup, use the drop-down menu to select a previously defined TCP (see TCP Configuration) where Position and Orientation are set up as follows:

    • Configure the Position to be the tip of the screwdriver tool where it contacts the screw.

    • Configure the Orientation so that the positive Z direction is aligned to the length of the screws to be tightened.

You can visualize the X, Y and Z coordinates of the selected TCP to confirm it matches the tool’s bit or socket.
The Screwdriving program node uses the positive Z direction of the selected TCP to follow the screw and calculate distances.


Configuring the Screwdriver Interface
  1. Use the Interface drop-down menu at the top of the screen to change the displayed content based on signal type.

  2. Under Input, configure the signals that the robot receives from the screwdriver:

    • OK: High when tightening ends successfully, if not selected this condition is not available in the Screwdriving program node

    • Not OK: High when tightening ends with errors, if not selected this condition is not available in the Screwdriving program node

    • Ready: High when the screwdriver is ready to be started, if not selected this condition is not checked

  3. Under Output configure the signals that the robot sends to the screwdriver:

    • Start: starts the tool tightening or loosening a screw depending only on wiring.

    • Program Selection: one integer, or up to four binary signals, can be selected to activate different tightening configurations stored in the screwdriver

    • Program Selection Delay: wait time to be used after changing the screwdriver’s program to make sure it is active


Typical Orientation values


Values (in Rotation Vector [rad] notation) are illustrated in the table below.

    Orientation
Screwdriving axis parallel to the negative Y direction of the robot’s tool flange1
  • RX: 1.5708 rad

  • RY: 0.0000 rad

  • RZ: 0.0000 rad

Screwdriving axis parallel to the positive Y direction of the robot’s tool flange2
  • RX: -1.5708 rad

  • RY: 0.0000 rad

  • RZ: 0.0000 rad

Screwdriving axis parallel to the positive X direction of the robot’s tool flange3

  • RX: 0.0000 rad

  • RY: 1.5708 rad

  • RZ: 0.0000 rad

Screwdriving axis parallel to the negative X direction of the robot’s tool flange4
  • RX: 0.0000 rad

  • RY: -1.5708 rad

  • RZ: 0.0000 rad

Screwdriving axis parallel to the positive Z direction of the robot’s tool flange5
  • RX: 0.0000 rad

  • RY: 0.0000 rad

  • RZ: 0.0000 rad

Screwdriving axis parallel to the negative Z direction of the robot’s tool flange6
  • RX: 3.1416 rad

  • RY: 0.0000 rad

  • RZ: 0.0000 rad