First Boot

Description

The first boot is the initial sequence of actions you can take with the robot after assembly.

  • This initial sequence requires you to:

  • Start the robot

  • Insert the serial number

  • Intialize the robot arm

  • Power down the robot

While the robot arm is powered on you can use Freedrive to move the robot.

The robot arm requires ample space to operate freely.

Failure to verify the payload and installation before starting up the robot arm can lead to injury to personnel and/or property damage.

  • Always verify the actual payload and installation are correct before starting up the robot arm.

Incorrect payload and installation settings prevent the robot arm and Control Box functioning correctly.

  • Always verify the payload and installation setting are correct.

Starting up the robot in lower temperatures can result in lower performance, or stops, due to temperature dependent oil and grease viscosity.
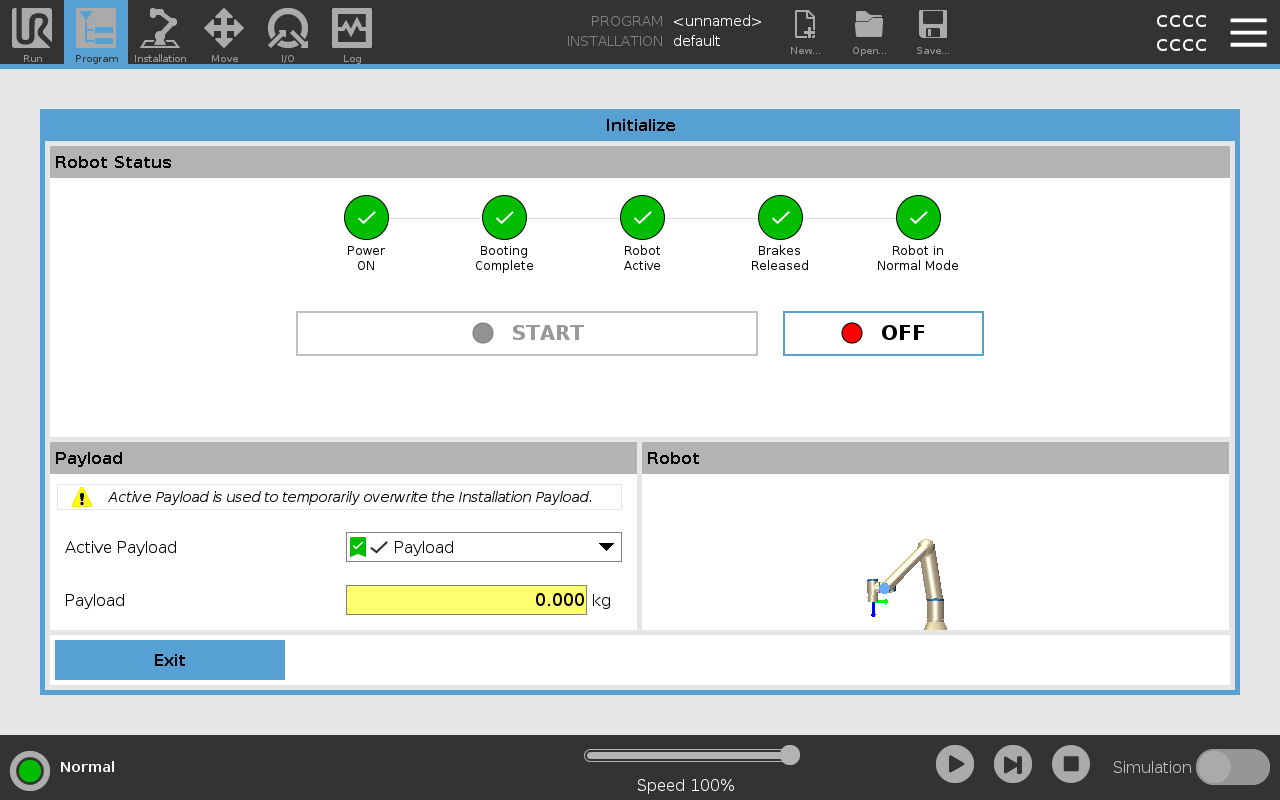
  • Starting up the robot in low temperatures can require a warmup phase.

Starting your robot

To start the robot

Start up disengages the braking system in the robot arm, allowing you to use freedrive.

  1. Tap the ON button with the green LED to start the initialization process. Then, the LED turns yellow to indicate the power is on and in Idle.

  2. Tap the START button to release the breaks.

  3. Tap the OFF button with the red LED to power off the robot arm.

  • When the PolyScope starts, tap the ON button once to power the robot arm. Then, the status changes to yellow to indicate the robot is on and idle.

  • When the robot arm state is Idle, tap the START button to start robot arm. At this point, sensor data is checked against the configured mounting of the robot arm.

    If a mismatch is found (with a tolerance of 30), the button is disabled and an error message is displayed below it.

  • If the mounting is verified, tap Start to release all joint brakes and the robot arm is ready for normal operation.

Robot arm start up is accompanied by sound and slight movements as joint brakes are released.


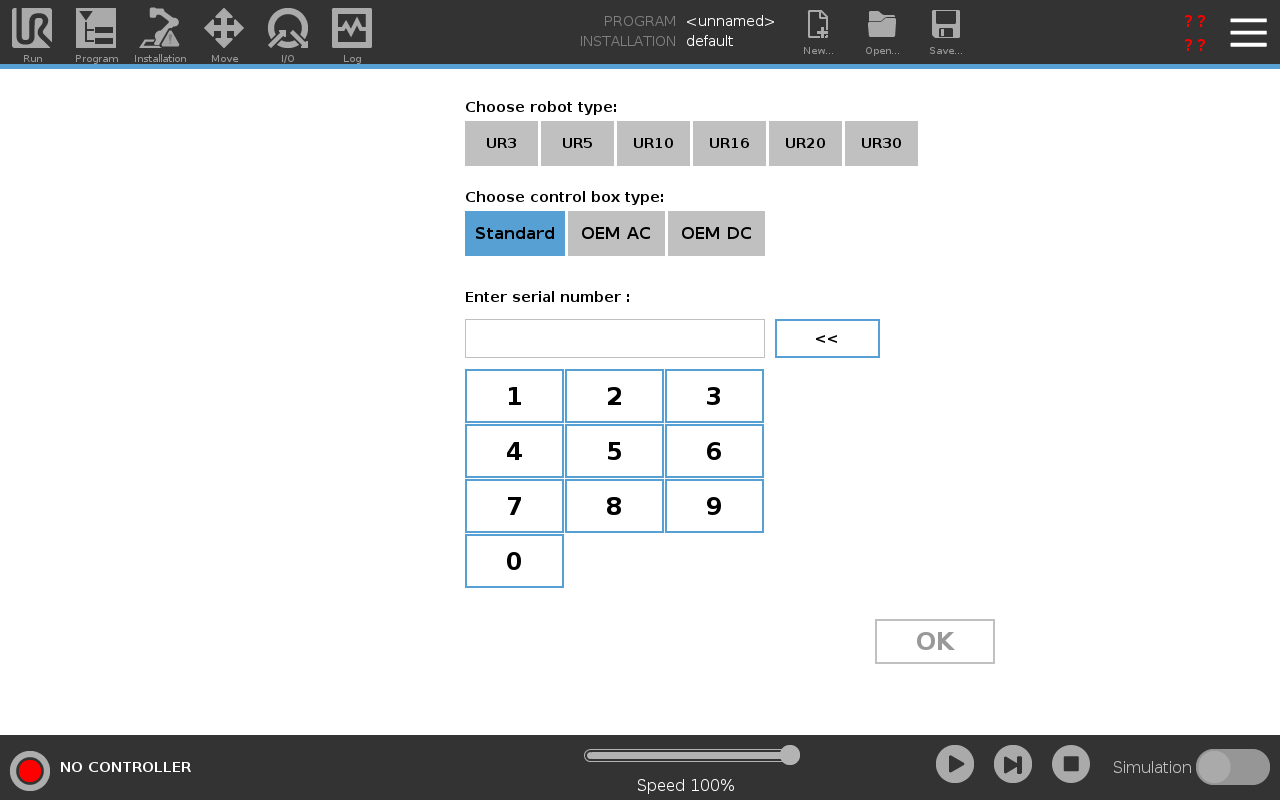
Inserting the Serial Number

To insert the serial number

When you install your robot for the first time, you need to configure serial number on the control box to match the robot arm.

This procedure is also required when you re-install the software on the control box, such as when receiving a software update.


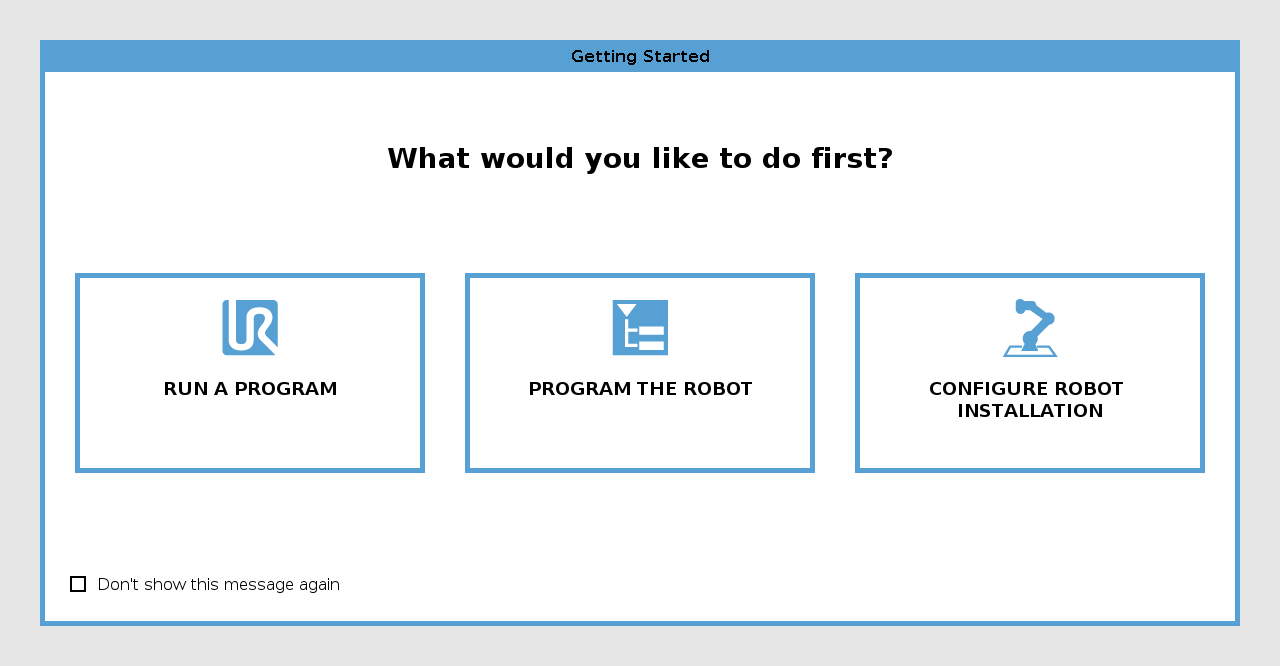
When you boot the robot for the first time, please follow these steps:

  1. Select the correct robot arm size.

  2. Select the correct control box.

  3. Add the serial number as it is written on the robot arm.

  4. End with the OK button.


Initializing the Robot Arm

To initialize the robot

On your first start up a Cannot Proceed dialog box can appear.

Select Go to initialization screen to access the Initialize screen.


In the Footer, to the left, the Initialize button indicates the status of the robot arm using colors:

  • Red Power off. The robot arm is in a stopped state.

  • Yellow Idle. The robot arm is on, but not ready for normal operation.

  • Green Normal. The robot arm is on and ready for normal operation.


Turning the Control Box On/Off

To turn the Control Box on/off

The Control Box mainly contains the physical electrical Input/Output that connects the robot arm, the Teach Pendant and any peripherals. You must turn on the Control Box to be able to power on the robot arm.


  1. On your Teach Pendant, press the power button to turn on the control box.

  2. Wait as text from the underlying operating system, followed by buttons, appear on the screen.

  3. A Getting Started screen can appear, prompting you to begin programming the robot.


Powering Down the Robot

To power down the robot arm

Unexpected start-up and/or movement can lead to injury

  • Power down the robot arm to prevent unexpected start-up during mounting and dismounting.

  1. Press the power button on the Teach Pendant to turn off the robot.

  2. Unplug the mains cable / power cord from the wall socket.

  3. Allow 30 seconds for the robot to discharge any stored energy.