Replacement of Teach Pendant Cable
The teach pendant cable can be replaced with a teach pendant cable repair kit. Note: Read the disclaimer in the kit thoroughly before installing.
-
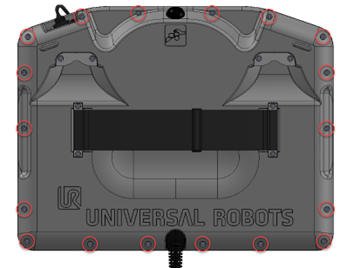
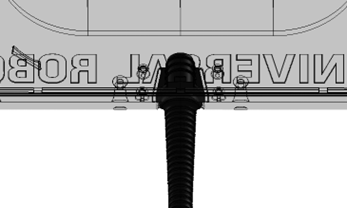
Turn the Teach Pendant around and place it carefully on something soft. Be careful not to damage the E-stop button.
-
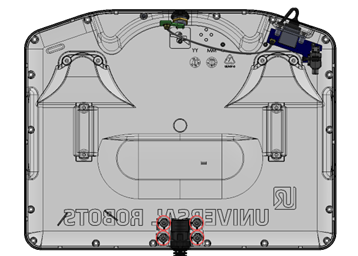
Remove the 18 bolts connecting the front frame to the back plate using a T8 Torx screwdriver.

-
Pull the front frame and back plate apart. This will in some cases require some force but note that there is a cable connecting the two parts, be careful that this cable or connectors does not get damaged.
-
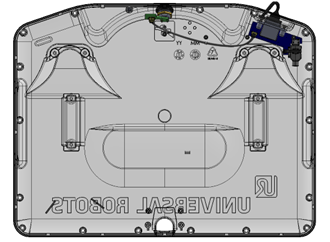
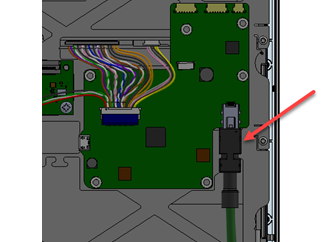
On the front frame, cut the cable tie and unplug the cable that are connecting the front frame and back plate.
-
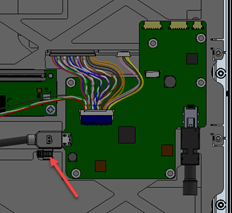
Unplug the Teach Pendant cable.

-
On the back plate remove the 4 bolts on the Teach Pendant cable bracket, using a T8 Torx screwdriver, and remove the bracket.
-
Teach Pendant cable can now be removed.
-
Find the new Teach Pendant cable from the kit. Pull it through the hole the back plate. Make sure that the rubber cable collar is mounted correctly in the hole.
-
Mount the Teach Pendant cable bracket again and mount the 4 bolts with 0.3 Nm using a T8 Torx screwdriver.
-
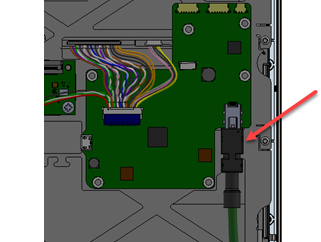
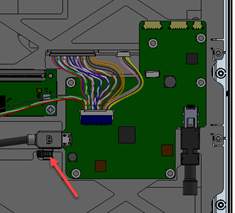
On the front frame connect the Teach Pendant cable on the PCB connector again.
-
Connect the cable between the front frame and back plate on the other PCB and mount the new cable tie from the kit.

-
Connect the front frame and back plate again.

-
Mount the 18 bolts connecting the front frame to the back plate with 0.3 Nm, using a T8 Torx screwdriver.