Replacing the Teach Pendant: Standard TP
This section describes how to remove and replace a Standard Teach Pendant. For information on how to replace a Standard Teach Pendant with a 3PE Teach Pendant, see Replacing the Teach Pendant: 3PE TP.
When the Teach Pendant is replaced, test the E-stop button function.
Replacing the Teach Pendant can result in the system reporting a fault on start-up.
- Always select the correct configuration for the type of Teach Pendant.
To remove:
-
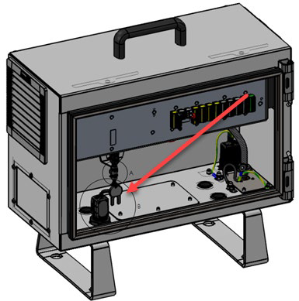
Power down the control box and disconnect the mains cable from the power source.
-
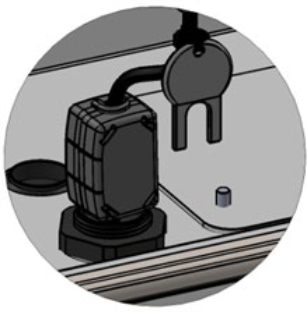
If mounted, remove the ferrite core with snap lock from the teach pendant cable by cutting the cable ties of key.
|
|
-
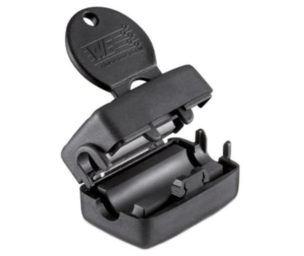
Insert the key into the ferrite core with snap lock to unlock it and remove it.
-
Remove and discard the two cable ties used for mounting the Teach Pendant cables.
-
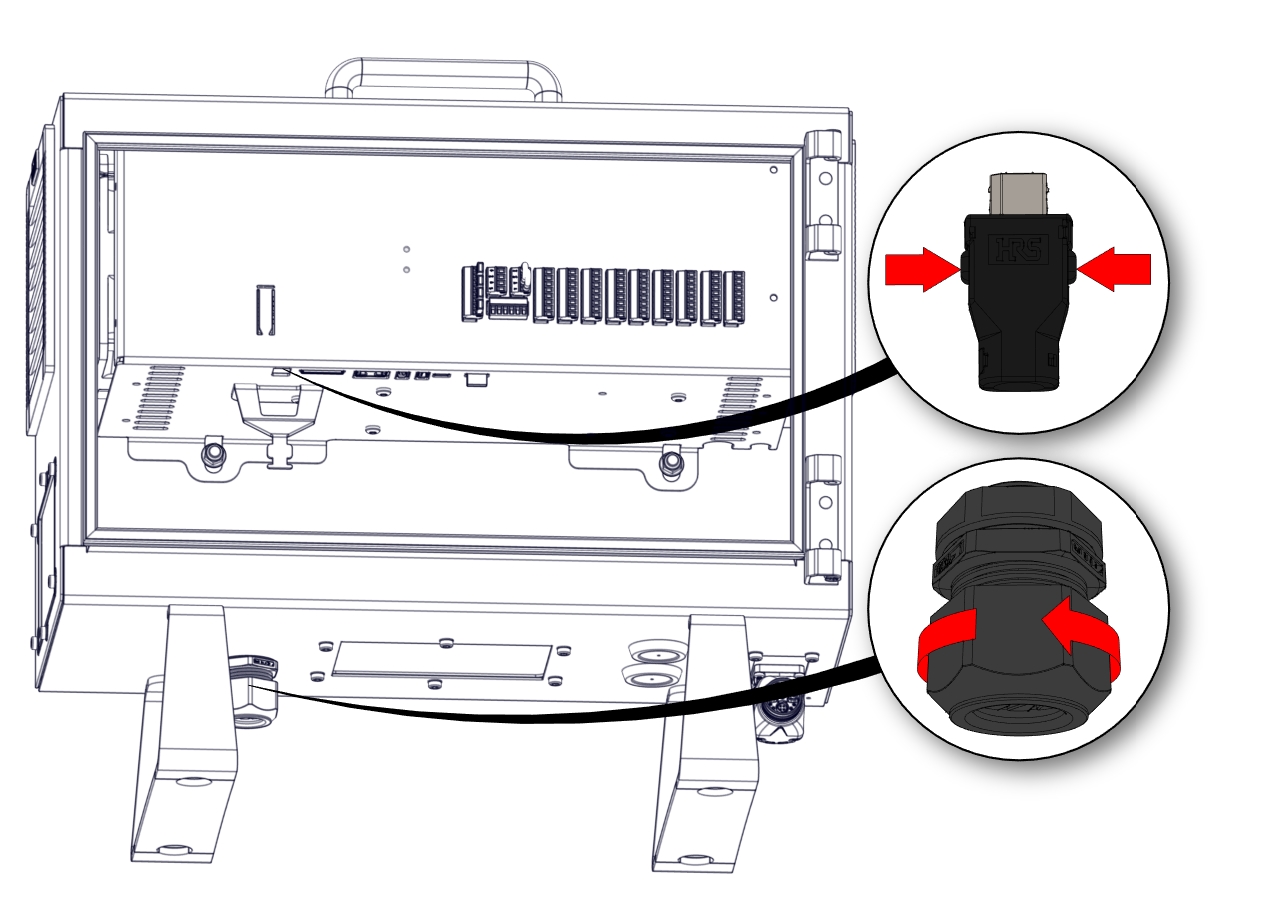
Press in the clips on both sides of the Teach Pendant plug, as illustrated below, and pull down to disconnect from the Teach Pendant port.
-
Fully open/loosen the plastic grommet at the bottom of the control box and remove the Teach Pendant plug and cable.
-
Gently remove the Teach Pendant cable and Teach Pendant.
To replace:
-
Place the Teach Pendant plug and cable in through the bottom of the Control Box and fully close/tighten the plastic grommet.
-
Push the Teach Pendant plug into the Teach Pendant port to connect.
-
Use two new cable ties to mount the Teach Pendant cables.

-
If mounted previously, mount the ferrite core with snap lock again. If the ferrite core was not mounted from production, a new one does not need to be mounted.
-
Connect the main power cable to the power source and power on the Control Box.