External Device Connection Ports
The bottom side of the OEM Control Box contains a bracket with ports for connecting external devices. The following illustration shows the bracket.
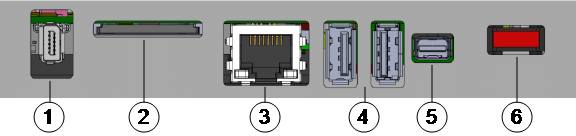
| 1 | Teach Pendant port | 2 | SD card slot |
| 3 | Ethernet port | 4 | USB ports |
| 5 | Mini Displayport | 6 | 10 A mini blade fuse |
The following table describes the ports.
| Port | Description |
|---|---|
| Teach Pendant | The port for connecting the Teach Pendant (Teach Pendant sold separately). |
| Ethernet | Connect external devices supporting MODBUS, Ethernet/IP, or PROFINET. |
| USB ports | Connect USB devices, for example a mouse, keyboard, a USB flash drive. |
| Mini Displayport |
Connect a monitor. The output video stream shows the same as the display on the Teach Pendant. Supported connection types:
|
| 10 A mini blade fuse | Connect a fuse. The fuse must be UL-marked and have a 10 A current rating. |
| SD card | The SD card is already in the SD card port. |
Connecting a Mouse, Keyboard, or Monitor
Use a USB port to connect a keyboard or a mouse.
Use the Mini Displayport to connect a monitor.
How to Connect a Teach Pendant
To connect a Teach Pendant
Excessive strain at the port on the OEM Control Box can cause damage to the Teach Pendant connector and affect the functionality of the Teach Pendant.
- Avoid pulling and/or exerting lateral forces on the Teach Pendant cable during installation.
- Avoid moving the Teach Pendant cable connector when it is connected to the Teach Pendant port.
- Power down the Control Box. Connect the Teach Pendant cable connector to the Teach Pendant port.
- The Teach Pendant powers on in a fault state and the Robot Arm brakes engage.
Press Re-Initialize to clear the fault state. - When the Teach Pendant restarts, on PolyScope, exit the start-up screen.
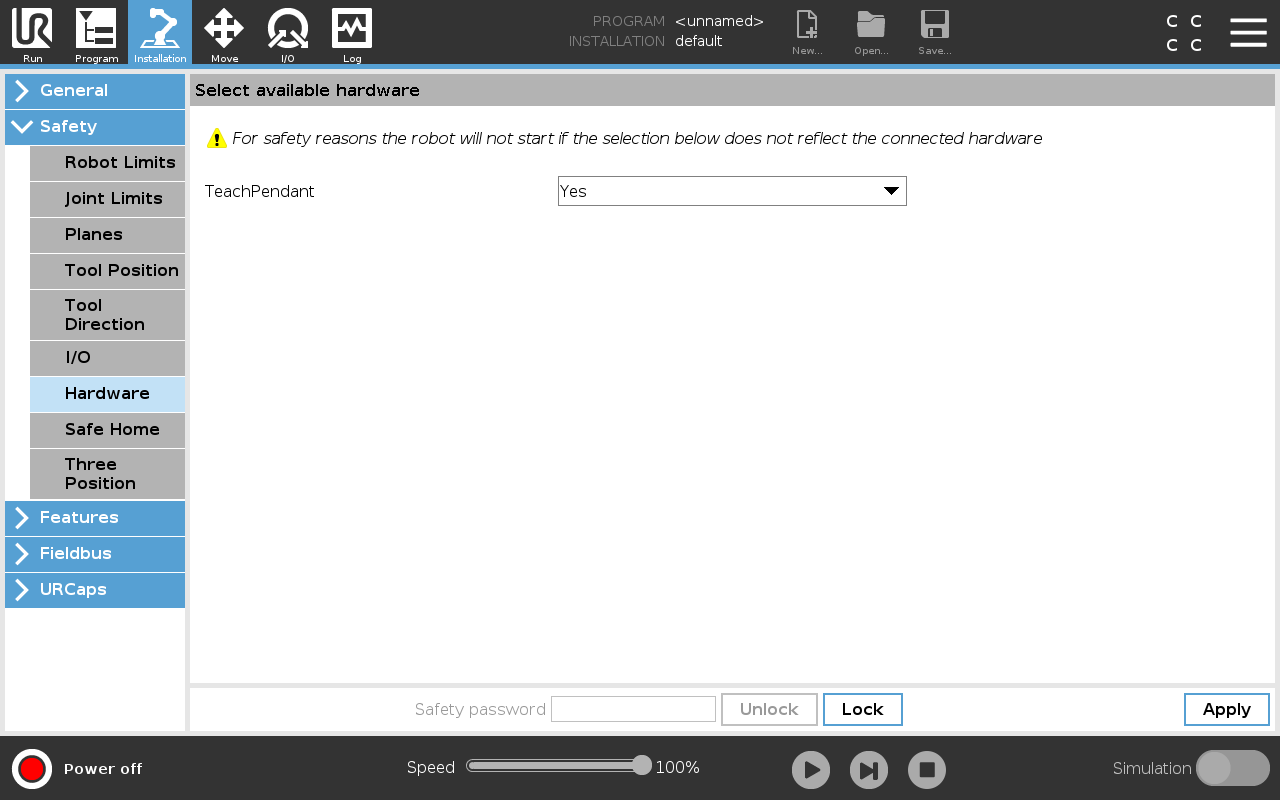
- On PolyScope, in the Header, tap Installation and select Safety.
- Under Safety, tap Hardware.
- In the Teach Pendant drop-down menu, select Yes.
If you are prompted to use a password, type the Safety Password and tap Unlock.
How to Use Remote Control and Local Control
To Enable Remote Control
- On PolyScope, in the Header, tap the Hamburger Menu.
- Select Settings, tap System and select Remote Control.
- On the Remote Control screen, select Enable to activate Remote Control.
To activate Local Control, in the Header, tap the Remote Control icon and select Local Control.