How to attach the Calibration Connector
The Calibration Connector attaches the two robot arms via the tool flanges.
To attach the Calibration Connector
-
Verify both robot arms are correctly attached to the Calibration Horse.
-
For each robot arm: On PolyScope, tap Move and select the Home button to return each robot arm to the Home position.
-
When the robots return to home position, attach the Calibration Connector to the designated Master robot.
-
Tap Proceed in the pop-up.
-
Tap Connect Robots.
-
Align the Slave robot's tool flange with the Calibration Connector.
-
Use the four screws and washers to attach the Slave robot's tool flange to the Calibration Connector.

As both robots move to bring the tool flanges close to each other, the Slave robot enters Freedrive.
The following illustrations show the Calibration Connector in use:
|
|
|
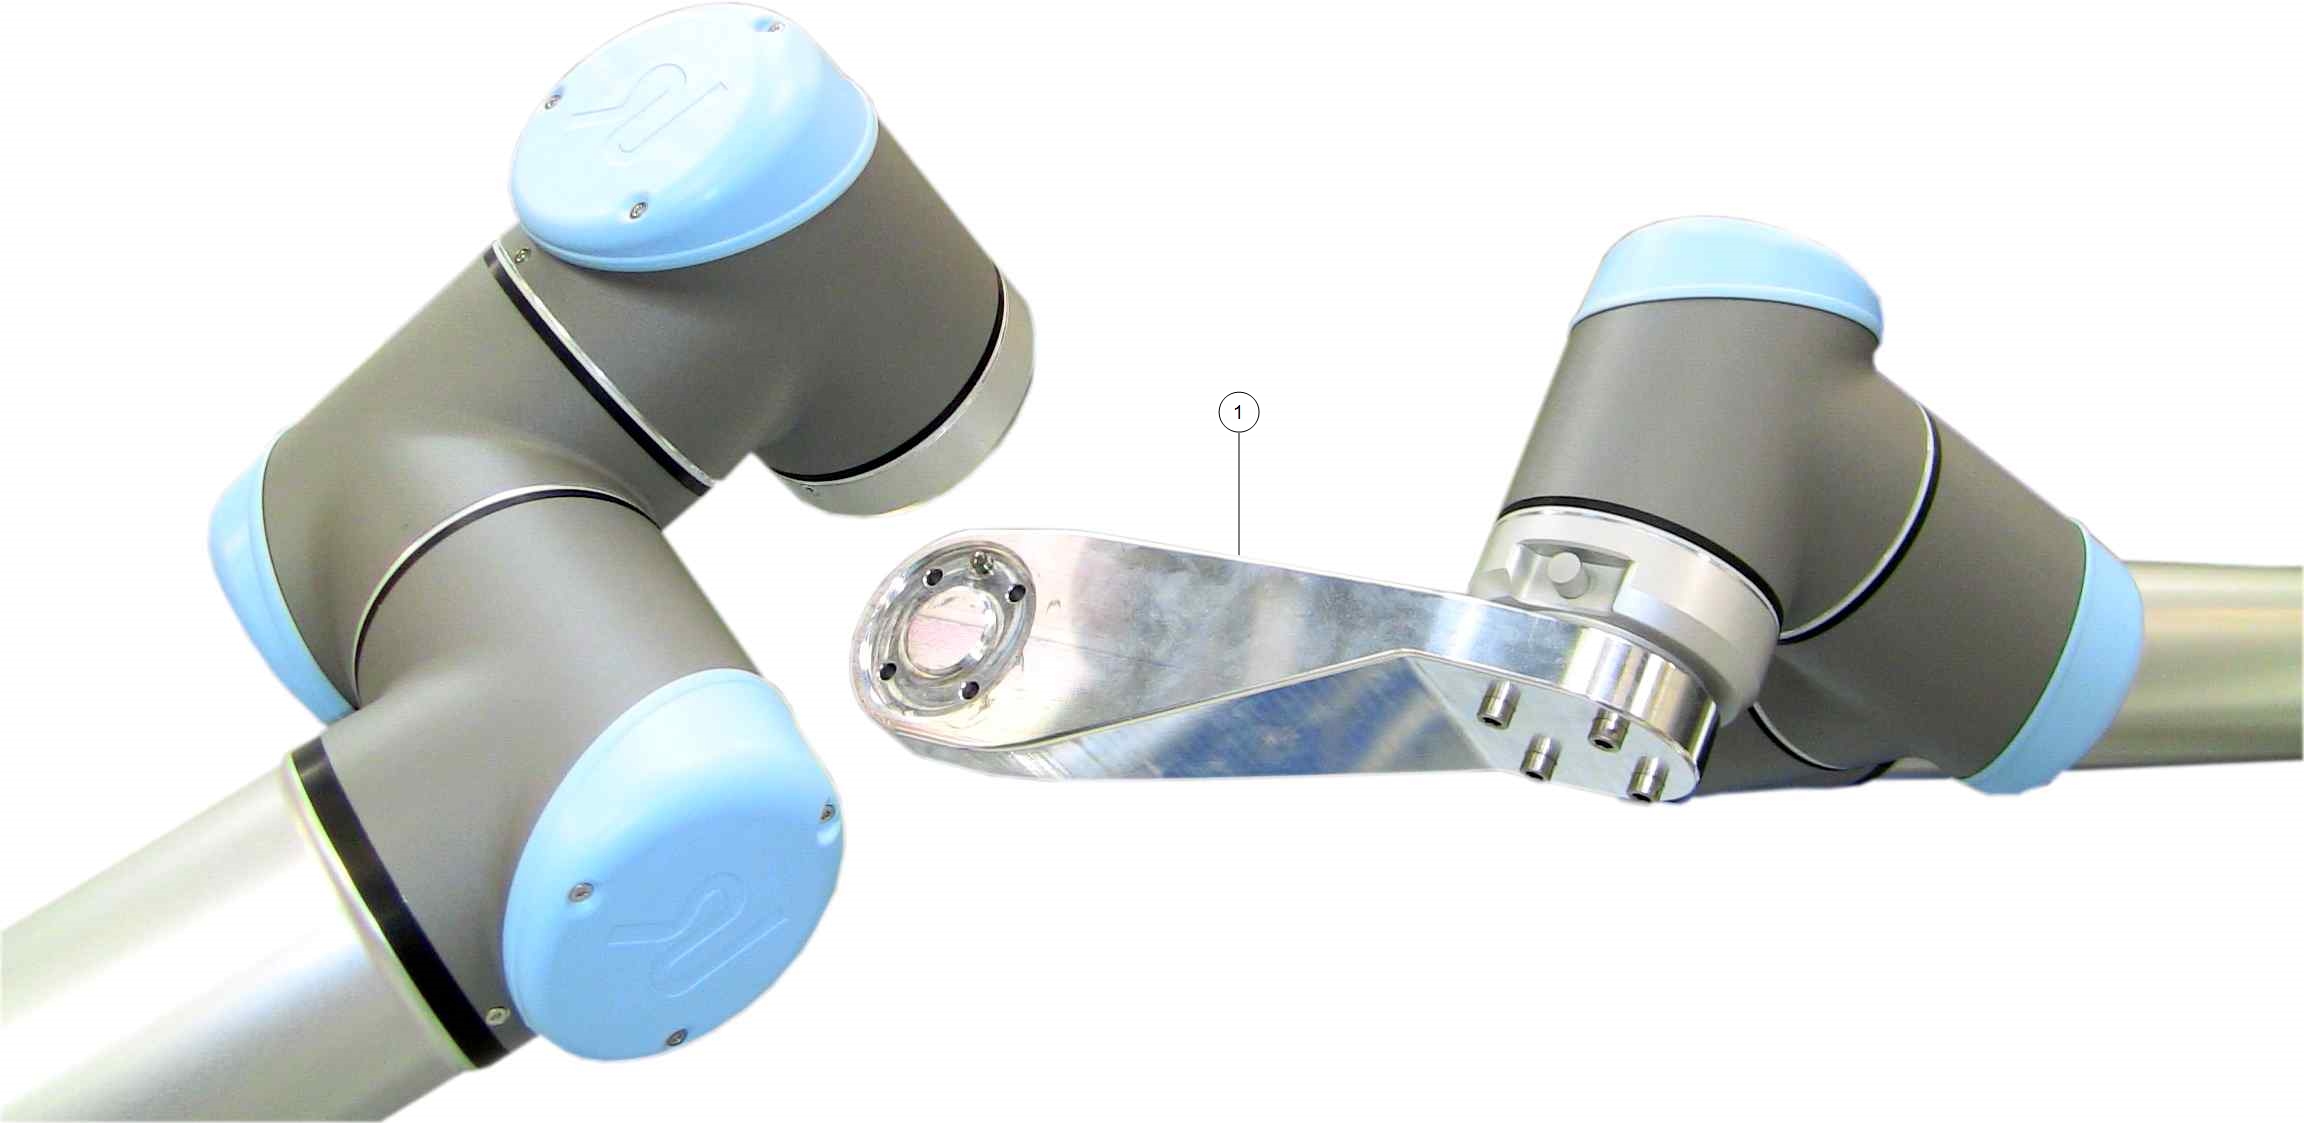
| 1 | Calibration Connector attached to the Master robot's tool flange (step 2). | 2 | Calibration Connector attached to the Master robot's tool flange and the Slave robot's tool flange (step 5). |