Camera Calibration
| Description |
The end effector and the camera must be calibrated for precise robot operation, allowing the system to accurately translate visual data into coordinated movements.
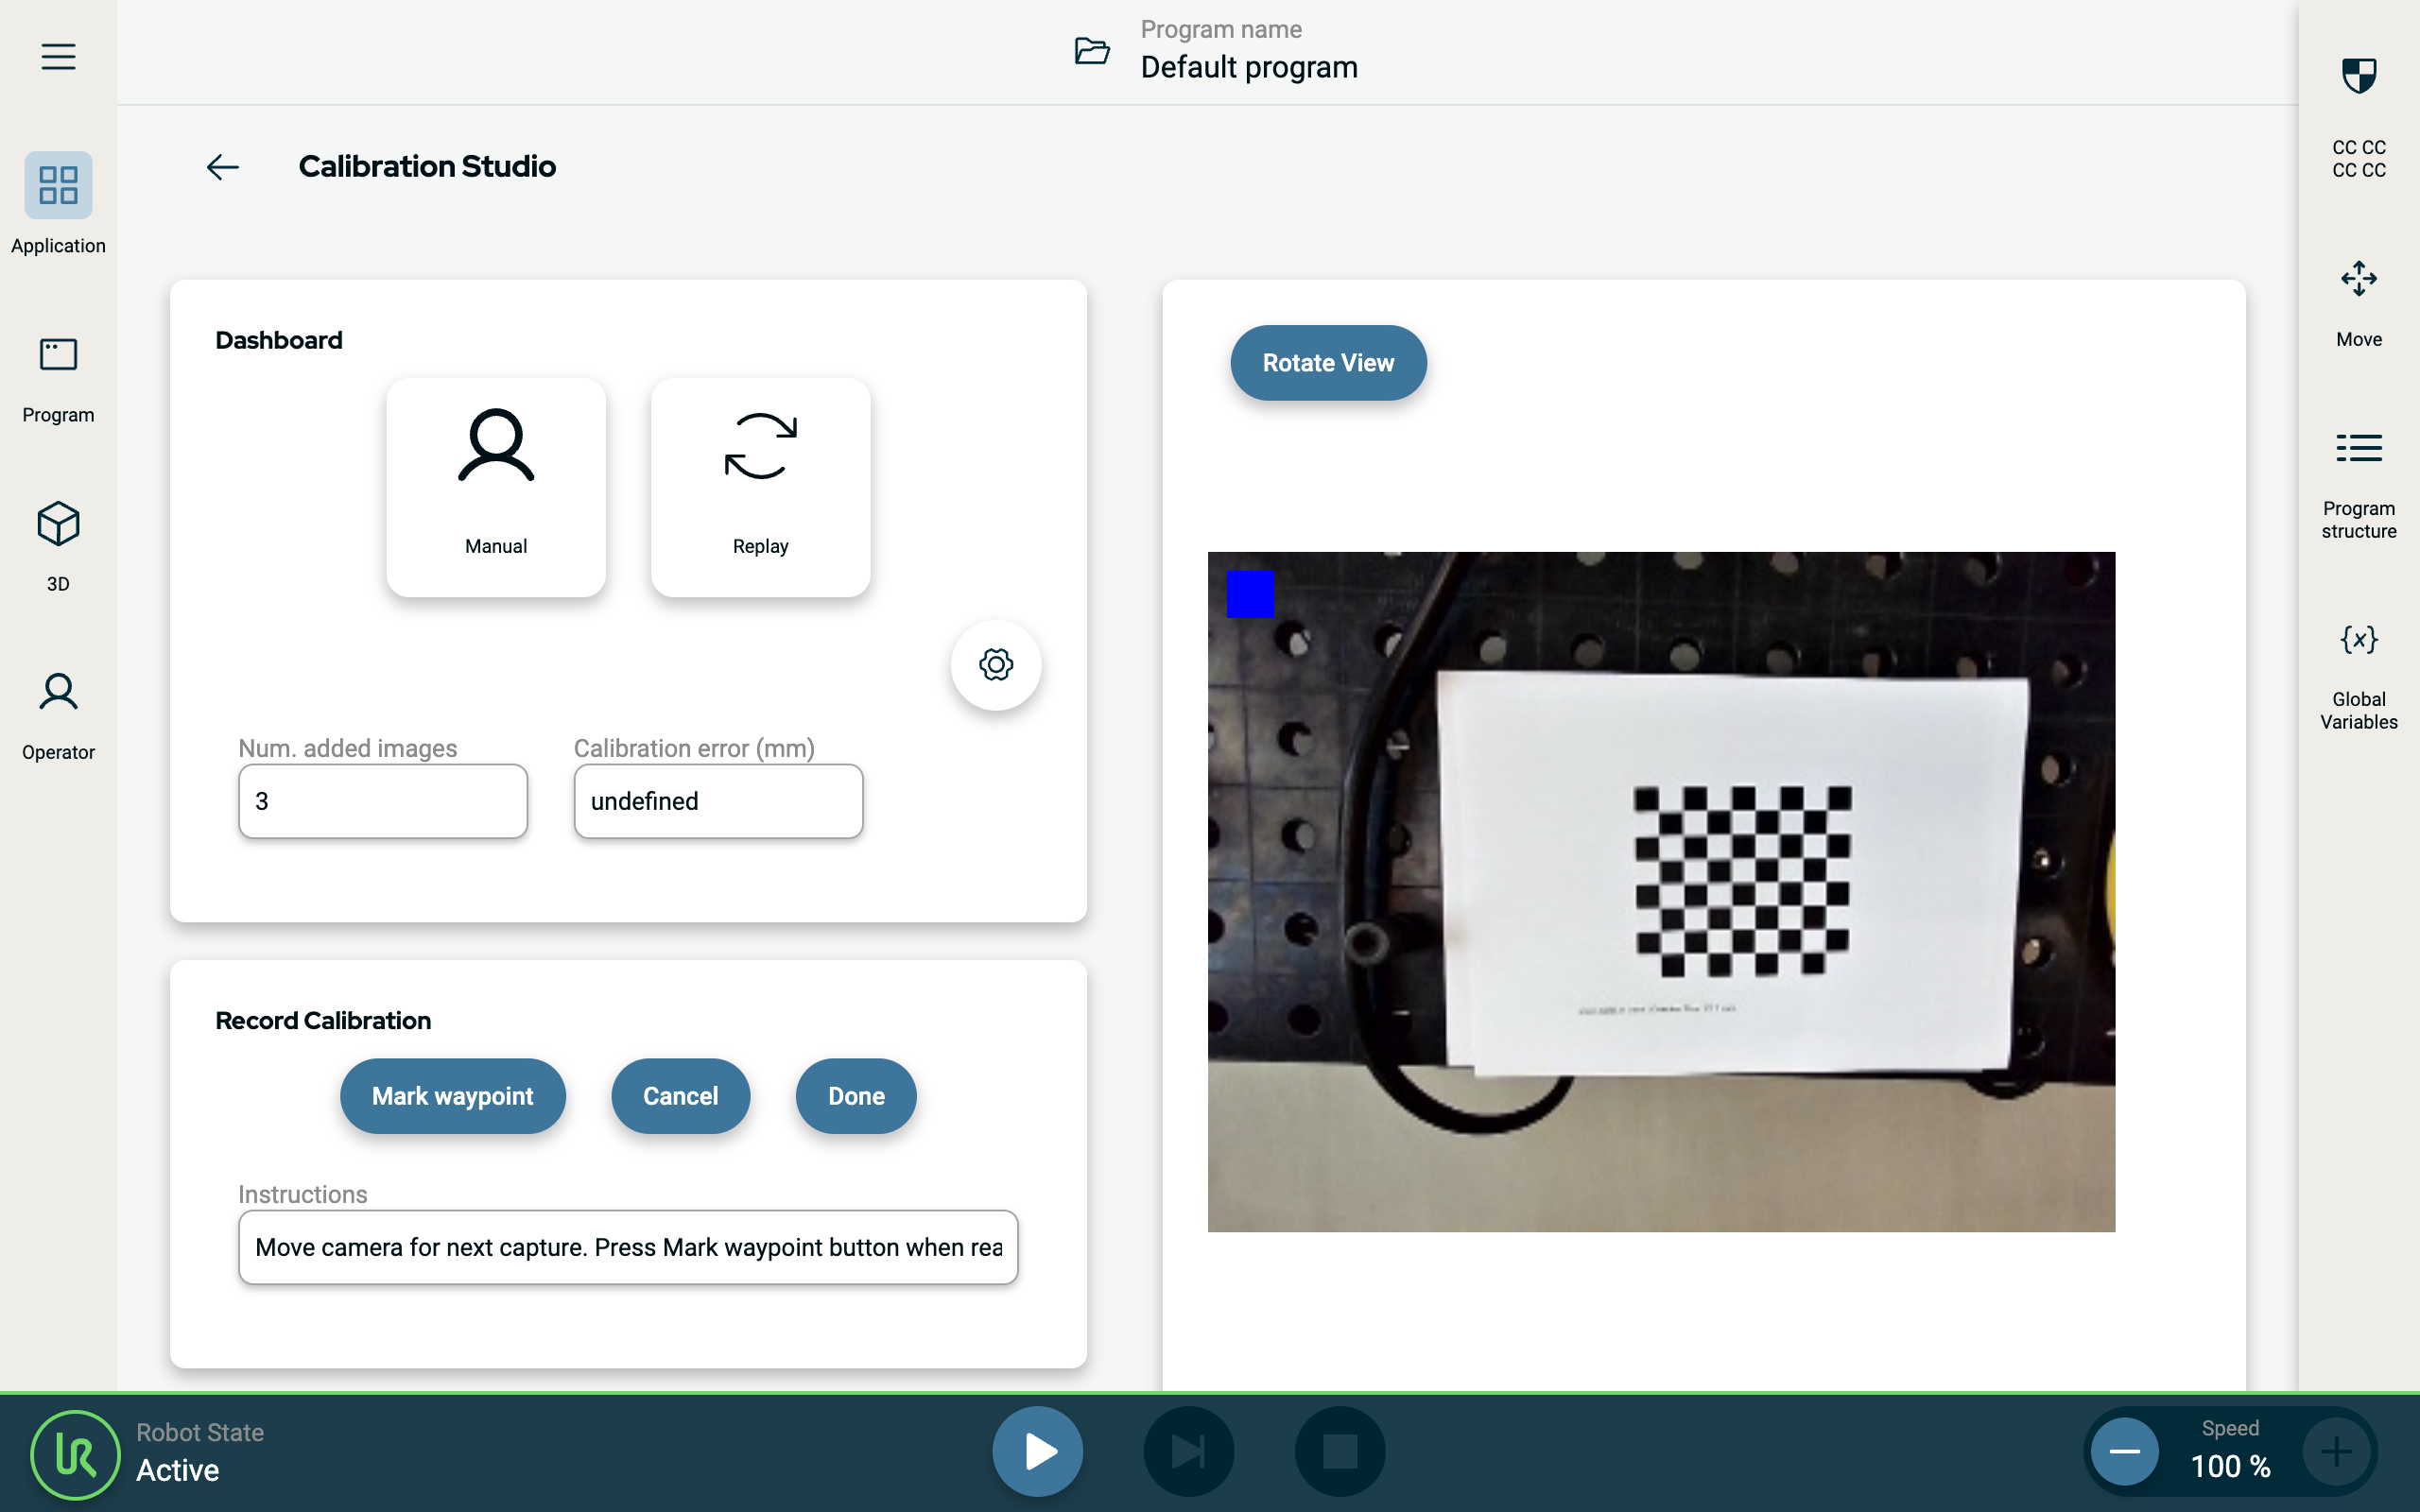
Calibration is performed by recording camera images and matching them with the robot poses. A special calibration board, with fixed positions, is used to recognize camera orientation.
The result of the calibration is the camera calibration file stored on the compute module ( ros/config/env.json).
|
| Repeating the calibration |
It is necessary to perform the calibration again after making any changes that affect the position of the camera on the robot. These might be any adjustments to the camera mount, replacement of the gripper or tightening of the bolts that hold the camera on the tool flange.
|
| Adjusting robot payload |
Ensure that you are using the correct Payload and Center of Gravity (CoG). Incorrect payload may result in Robot arm movement when pressing the Freedrive button.
You can use the Payload Estimation Wizard in PolyScope to assess the Payload and CoG.
|
| Preparing for calibration |
A calibration board is required to calibrate the camera. You can find and print a calibration board in the calib.io pattern generator. You can also adjust the grid and cell size in the Calibration Studio URCap. Make sure the printed board has the correct dimensions, as printer driver can introduce some scaling.
To set up your calibration board:
You can improve calibration accuracy by tapping Replay. The robot automatically moves through all manually recorded poses and re-takes images of the calibration board. Stand outside the robot reach, robot will move automatically.
|
| To calibrate the camera |
|
| Finishing calibration |
The calibration data is stored in: ros/config/env.json Translation x,y,z are recorded in meters and should match camera offset from the robot's tool flange.
|