Advanced Force
| Description |
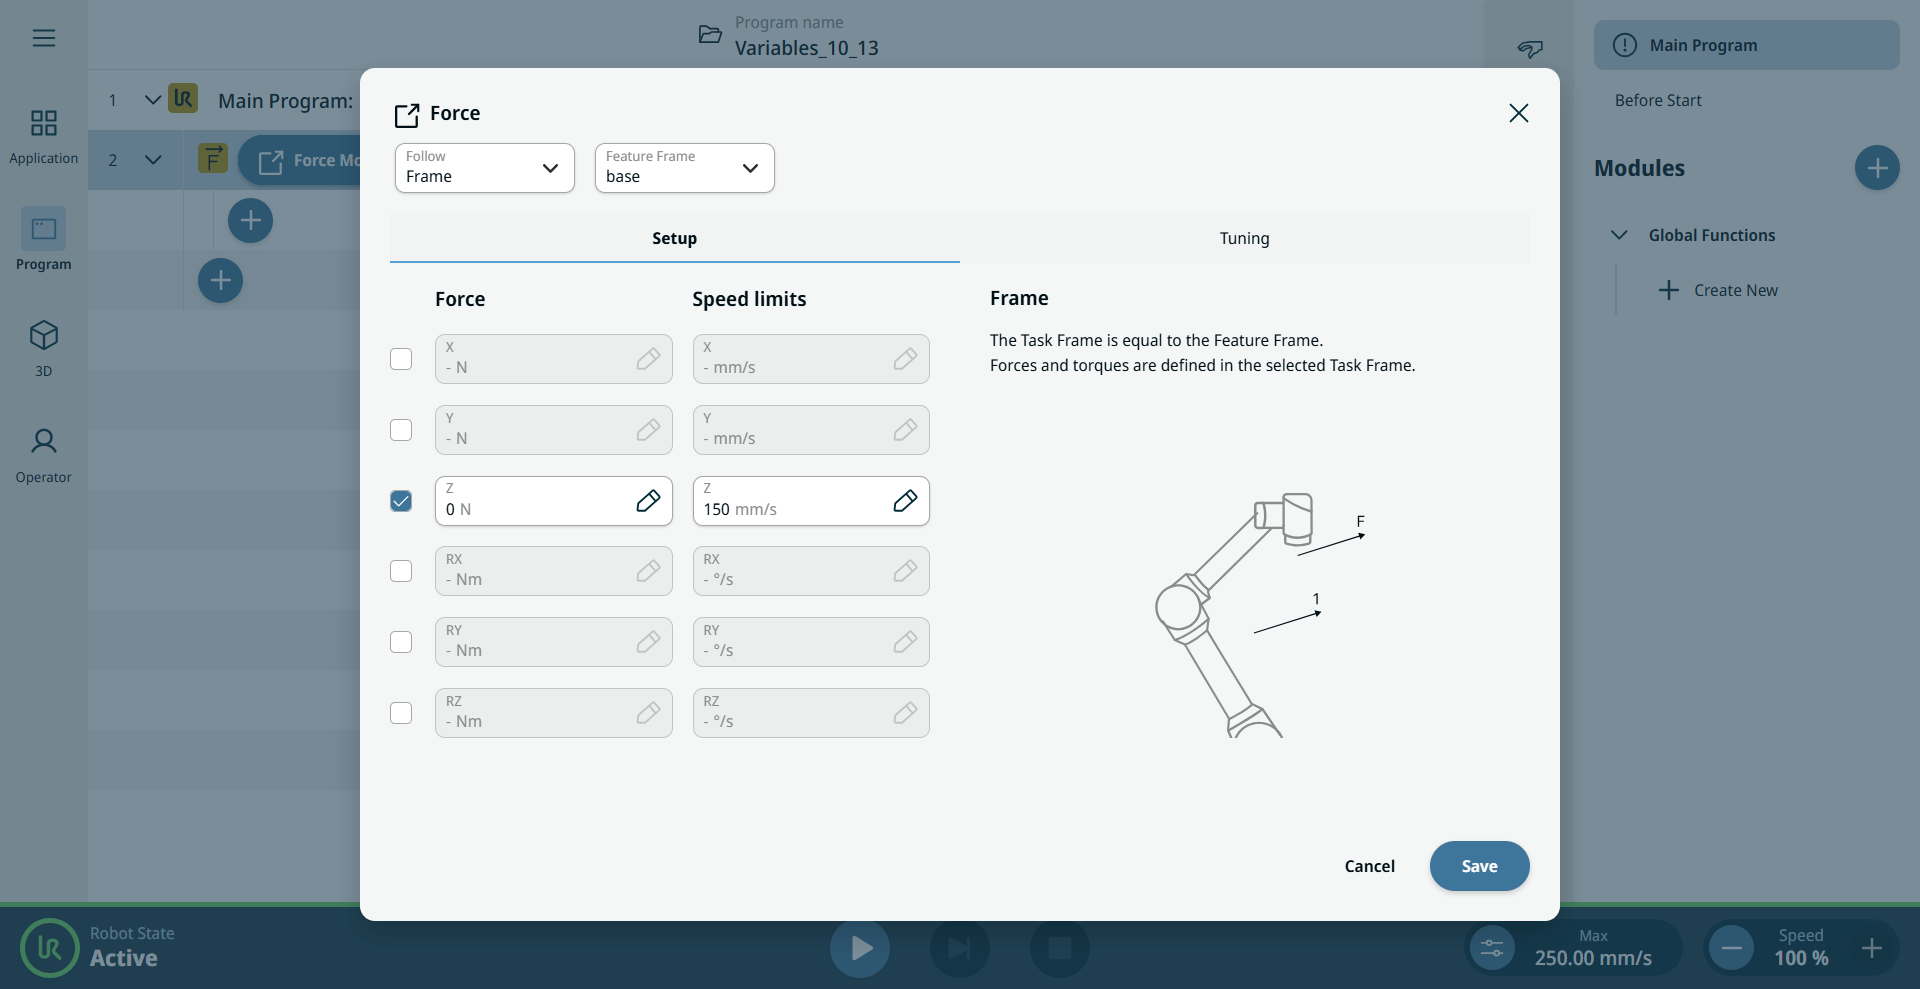
The Advanced Force command lets you set force and speed limits in the X, Y, Z, RX, RY, and RZ directions.
|
|
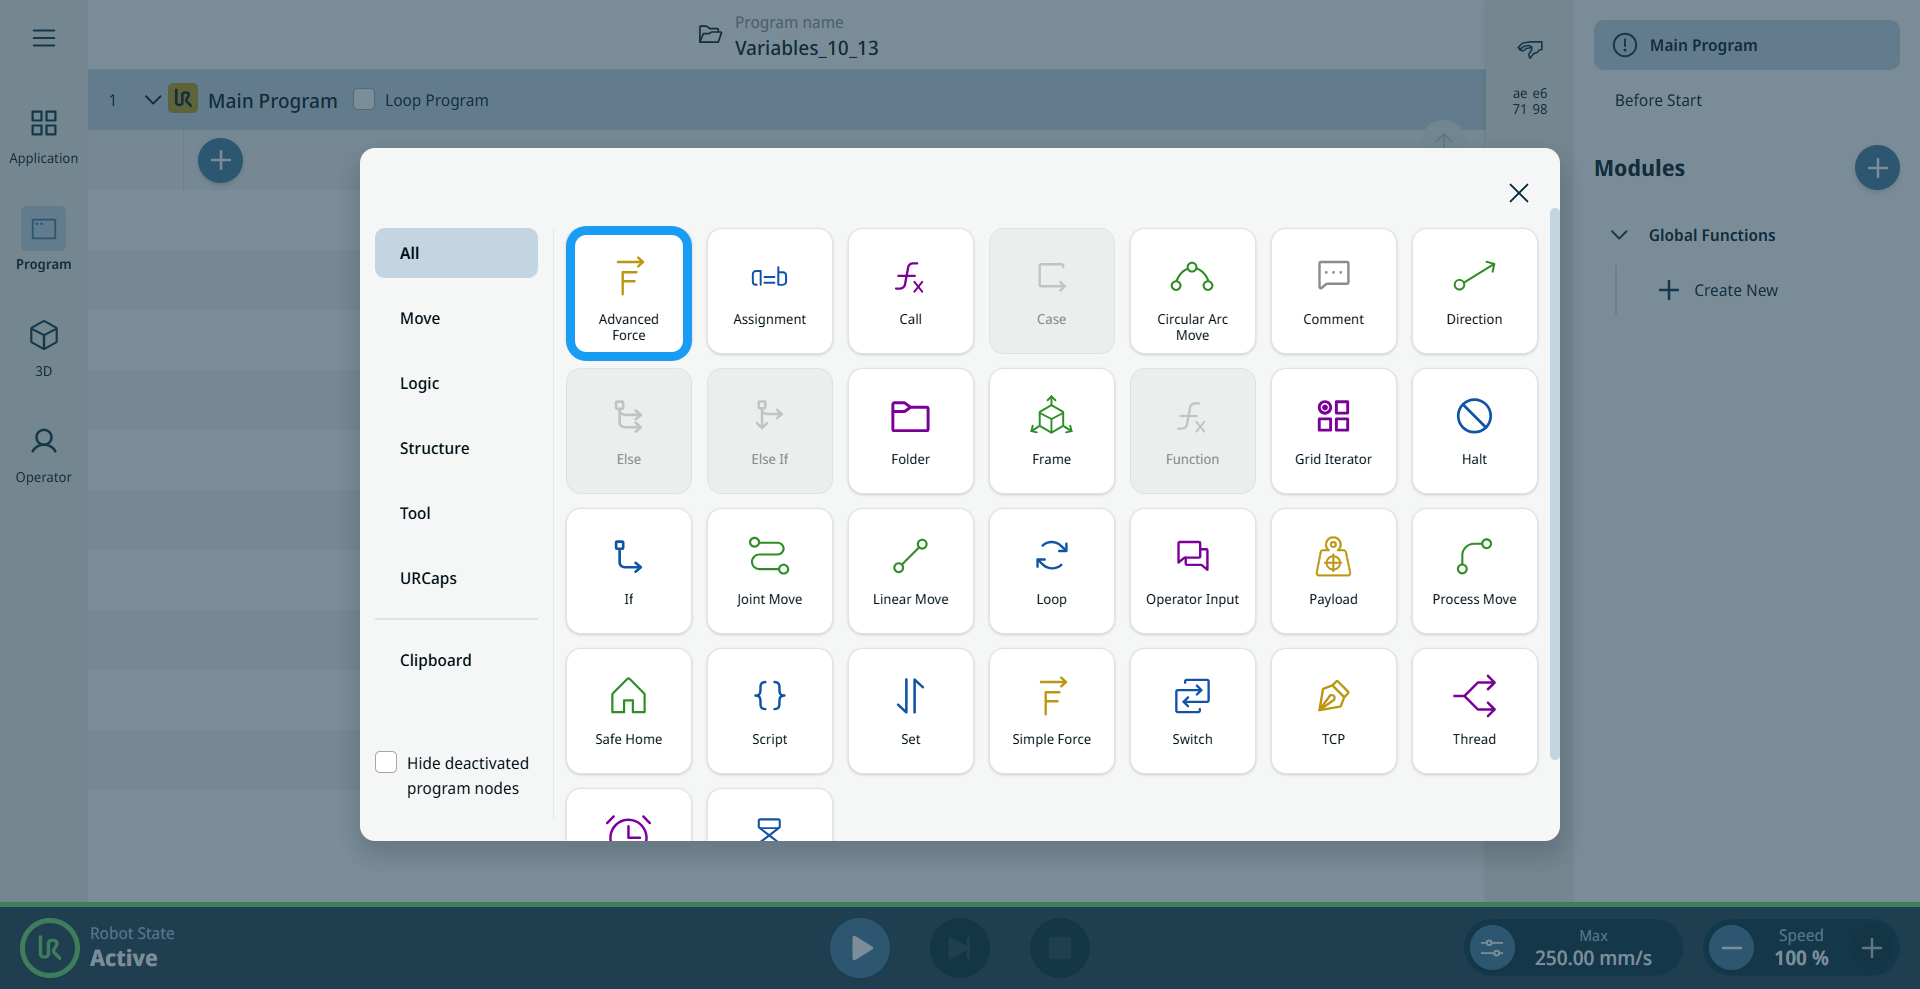
Access the Advanced Force command |
|
|
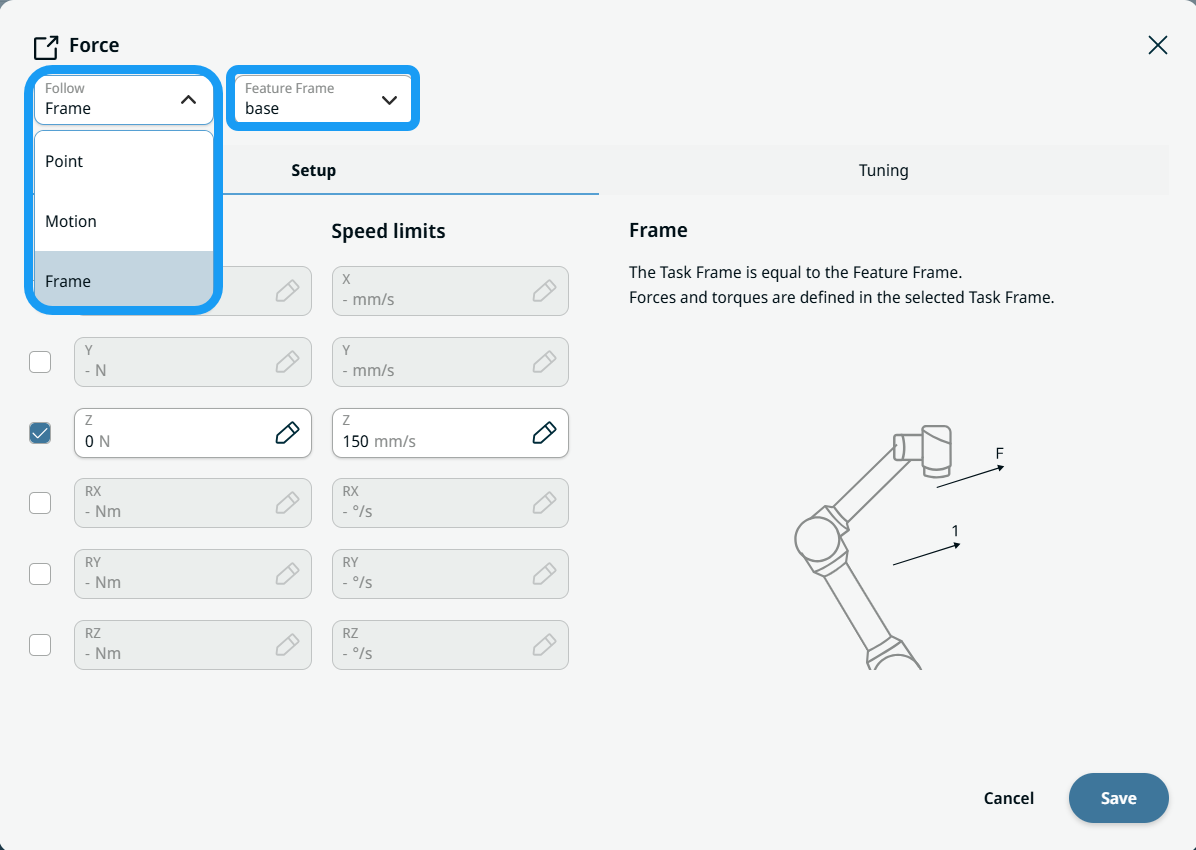
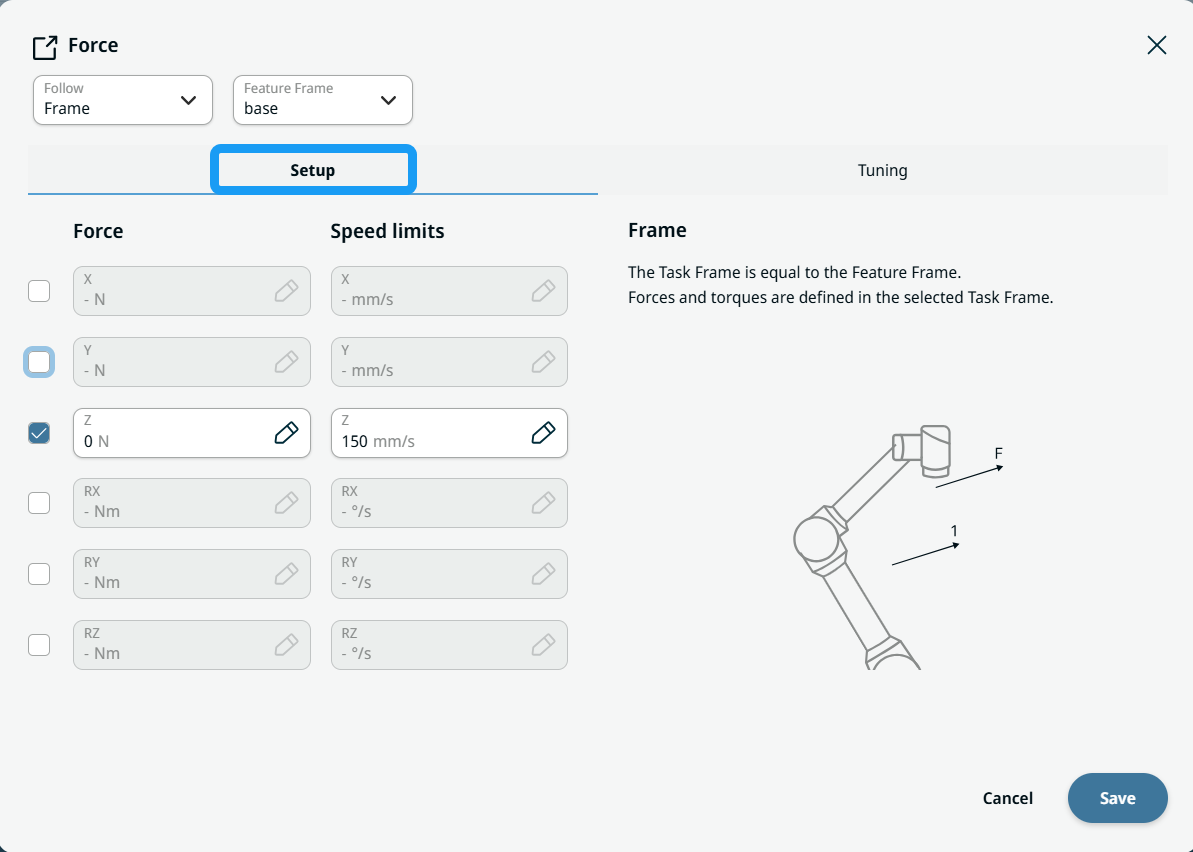
Follow and Feature Frame fields |
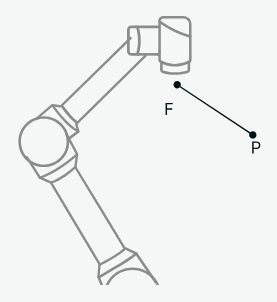
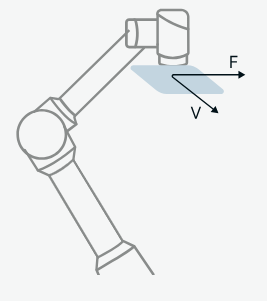
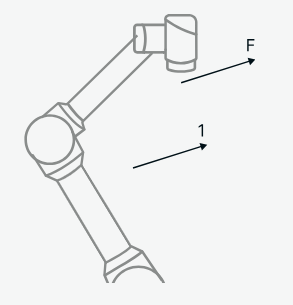
In the Follow field, you can select one of three modes: Point, Motion, or Frame.
|
|
|
In the Feature Frame field, you can select:
|
|
Setup panel |
|
|
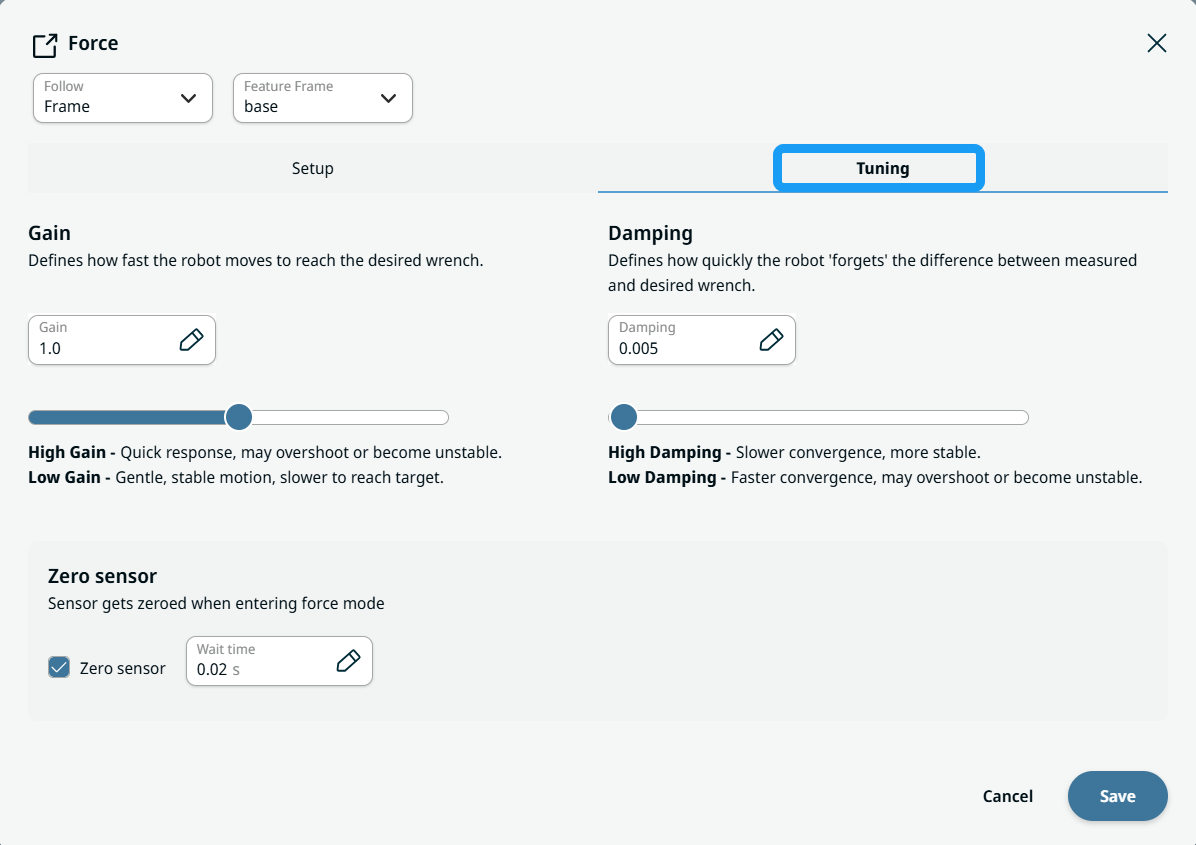
Tuning panel |
Tap Tuning, then use the Gain, Damping, and Zero sensor functions.
|